
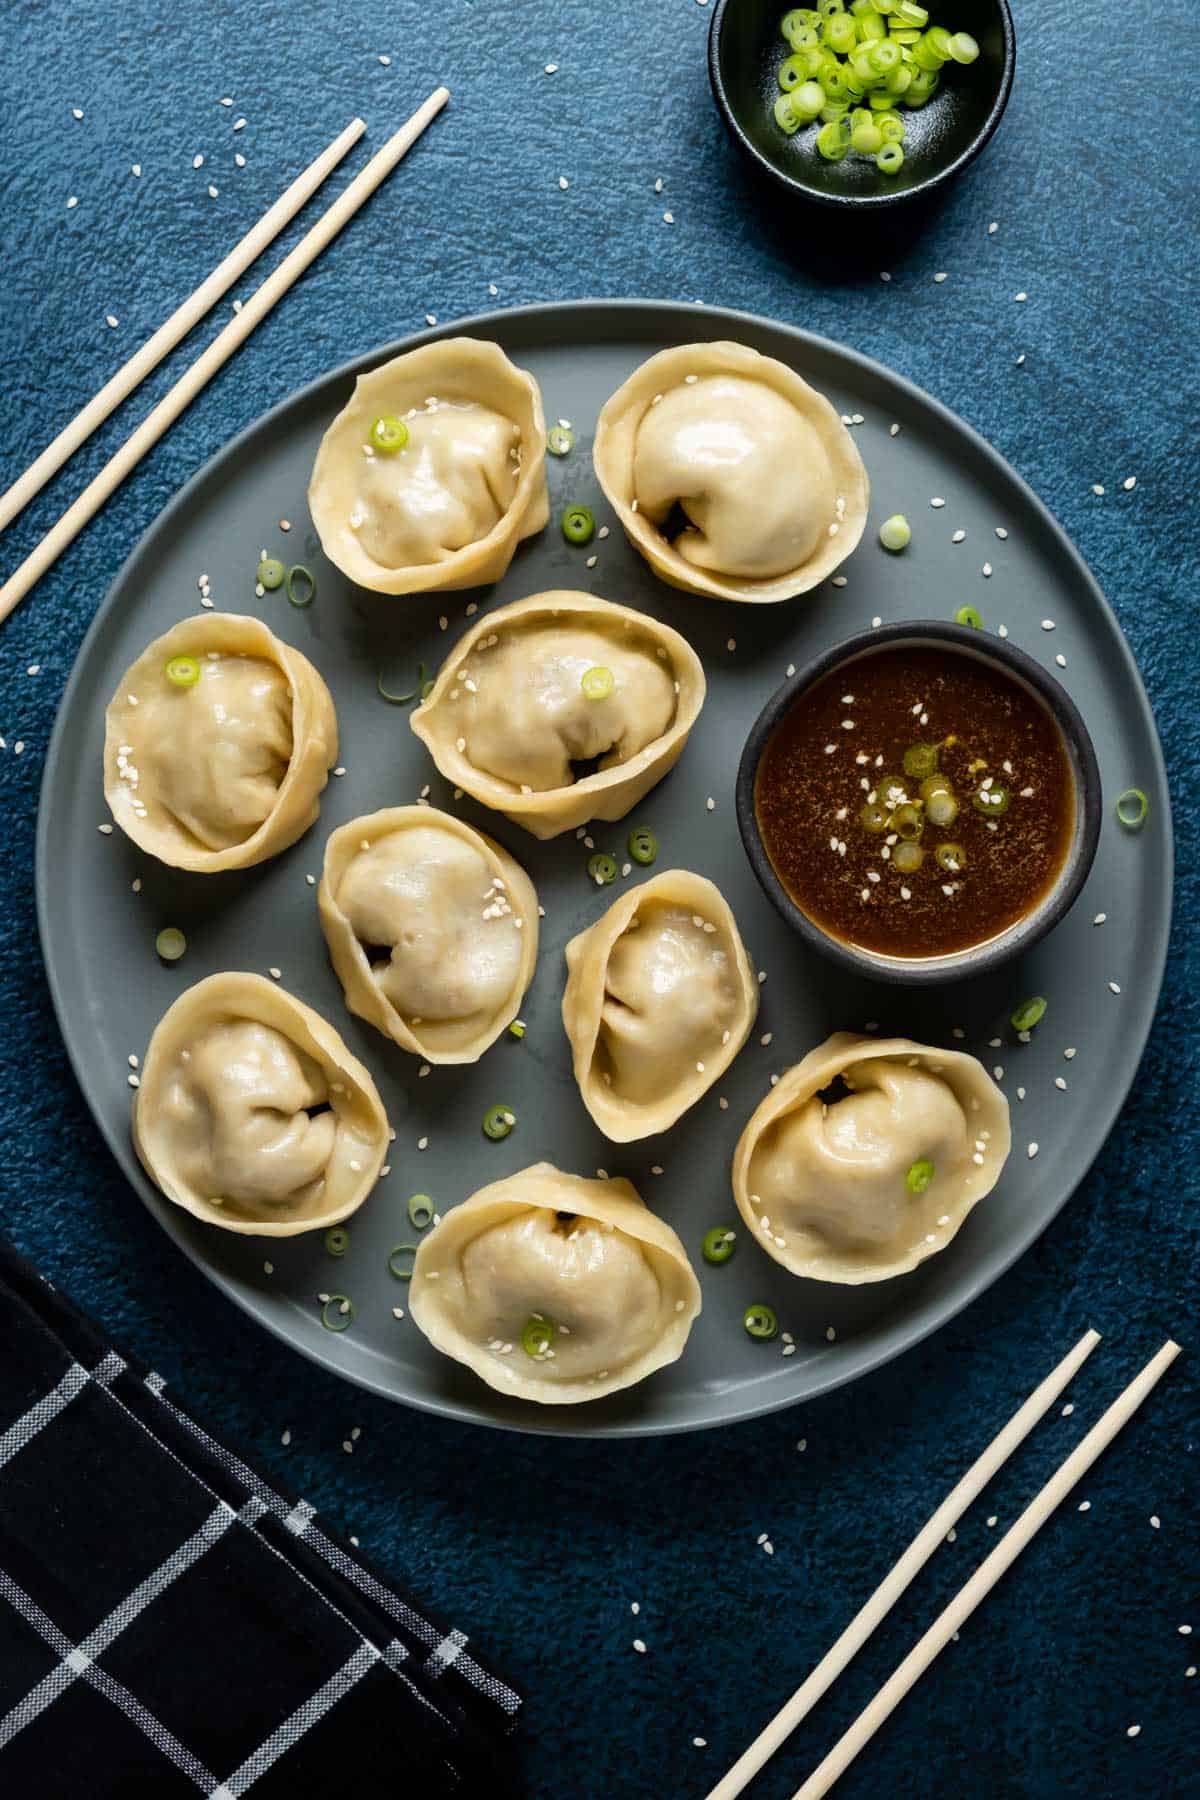
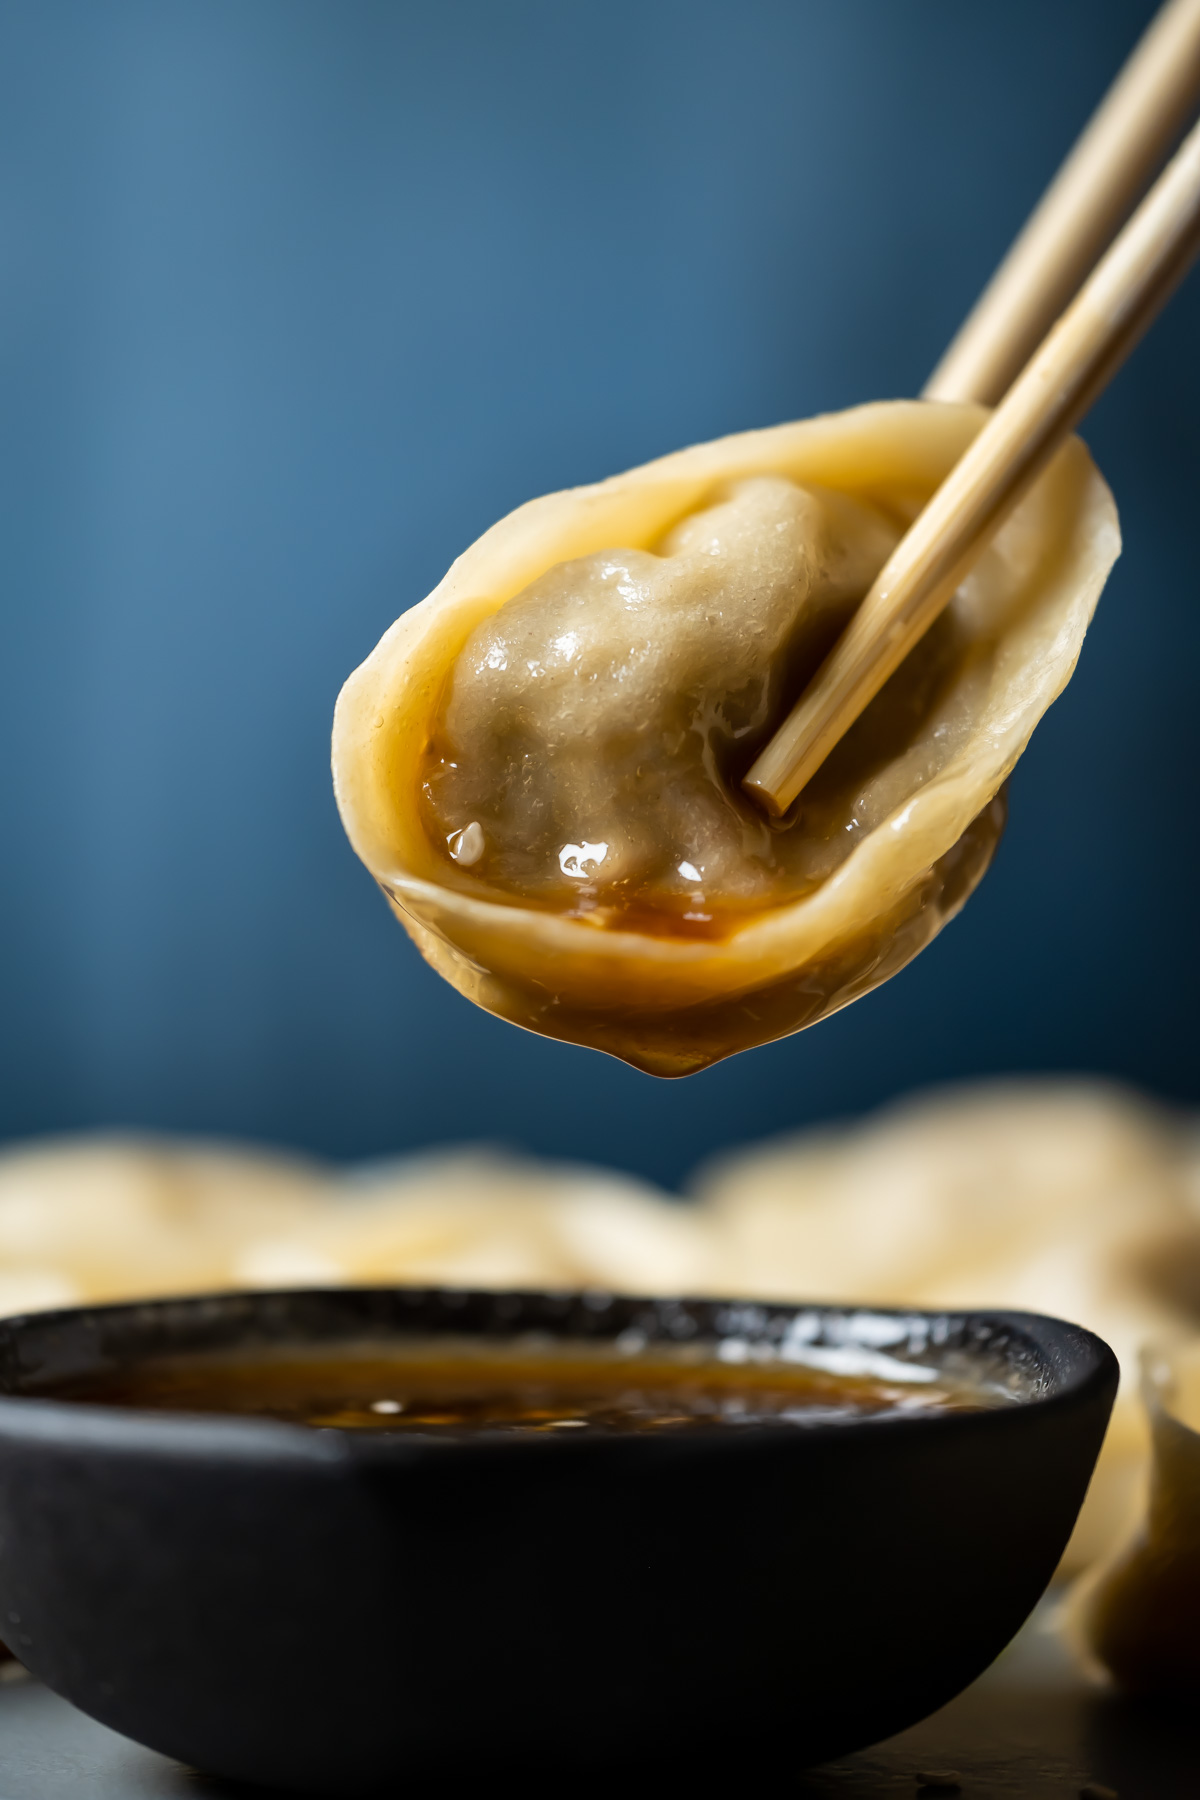
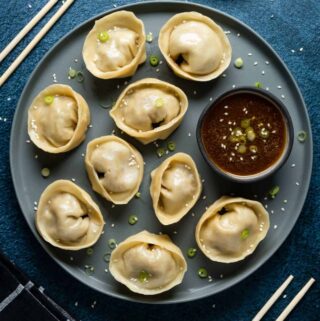
These vegan dumplings (also known as potstickers or gyoza) are made with homemade dumpling wrappers and stuffed with a tofu and mushroom filling. They are both fried and steamed to make the bottoms crispy and delicious. Serve with a fabulous homemade dipping sauce.
One of our favorite dishes to order in a restaurant is dumplings. There are very often vegan options so we are always excited to see them on the menu.
These vegan dumplings are made with homemade dumpling wrappers (also called wonton wrappers) and stuffed with a crazy delicious filling made from mushrooms, tofu, spring onions and cabbage. And the dipping sauce? Well, that takes it to the next level.
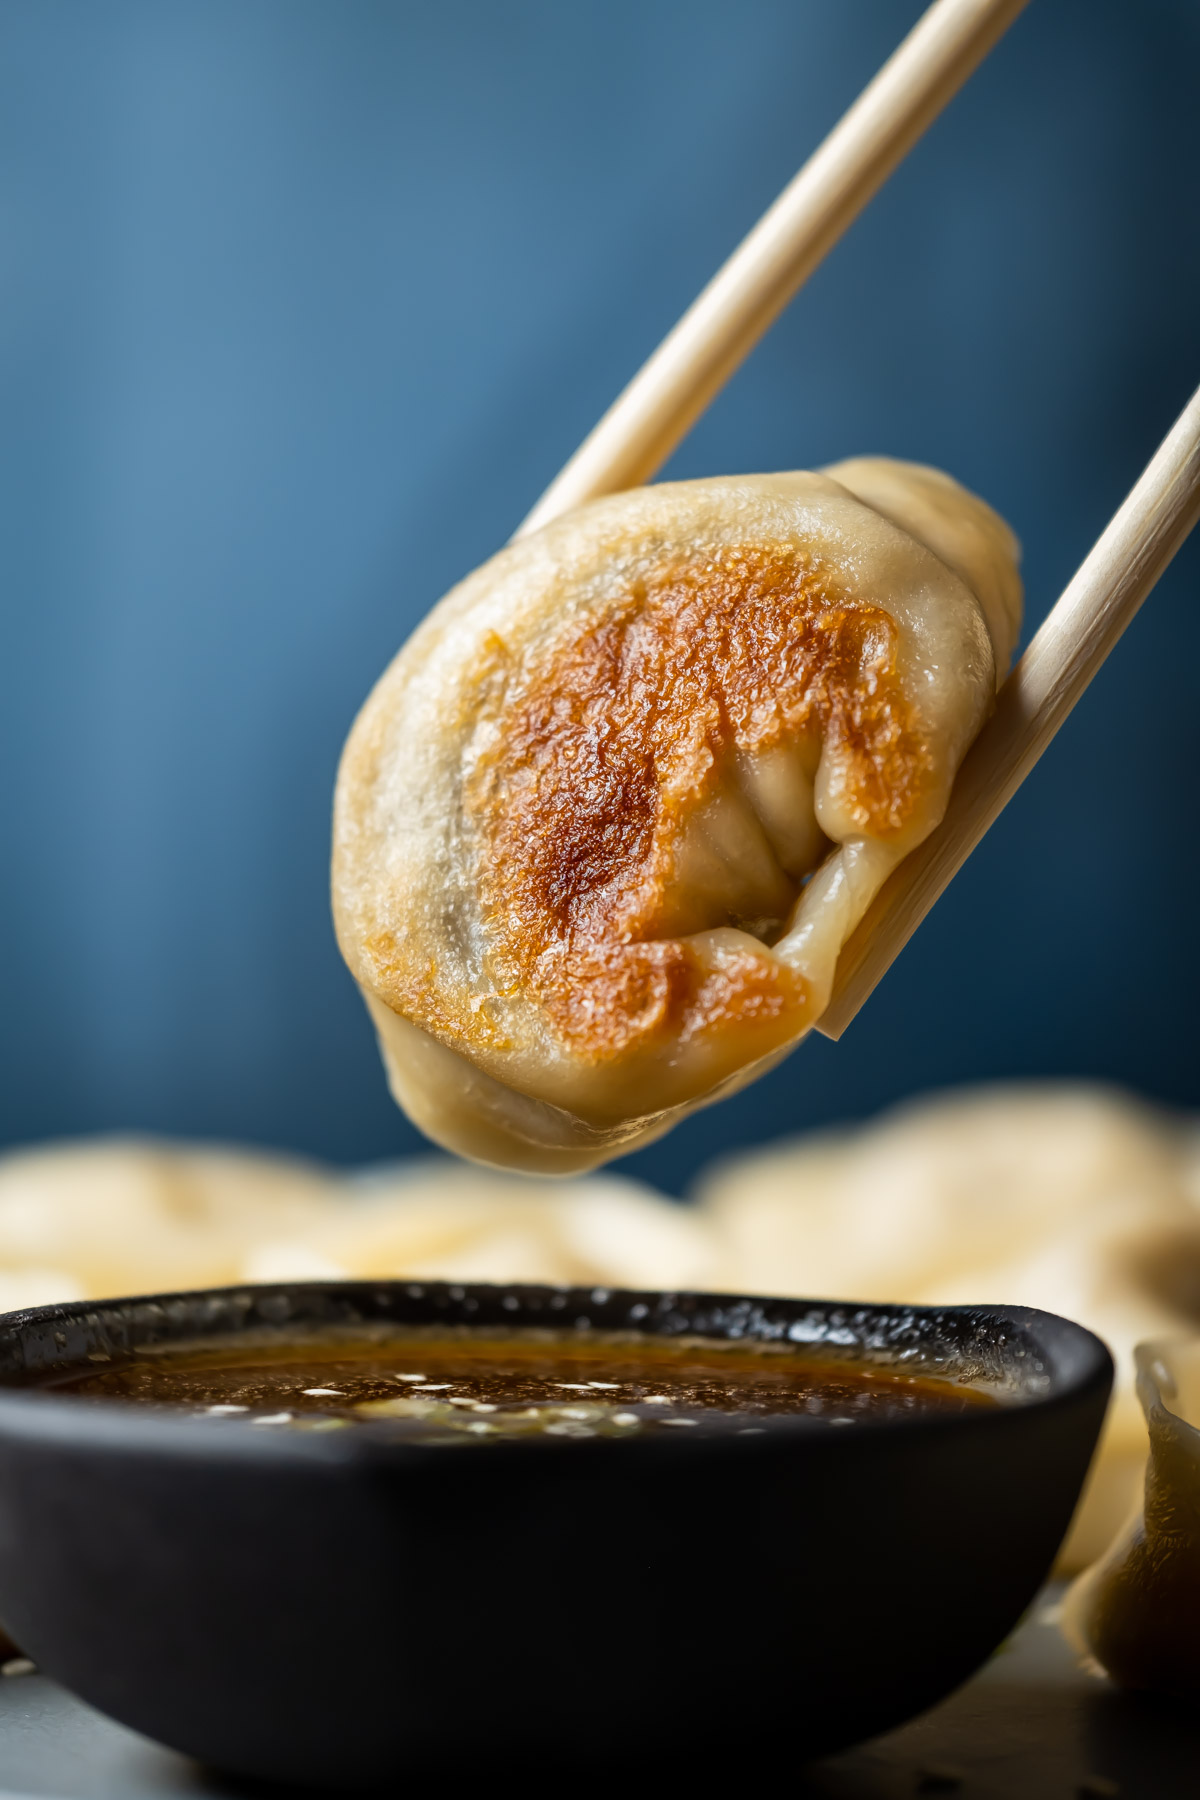
These dumplings are also known as vegan gyoza or vegan potstickers and they are steamed as well as fried so that they have a deliciously crispy bottom.
They are perfect for meal prep because you can make up a batch of these and then freeze them in perfect portions so that they are ready to be steamed/fried whenever you’re ready for them.
Ingredients You’ll Need For The Dumplings:
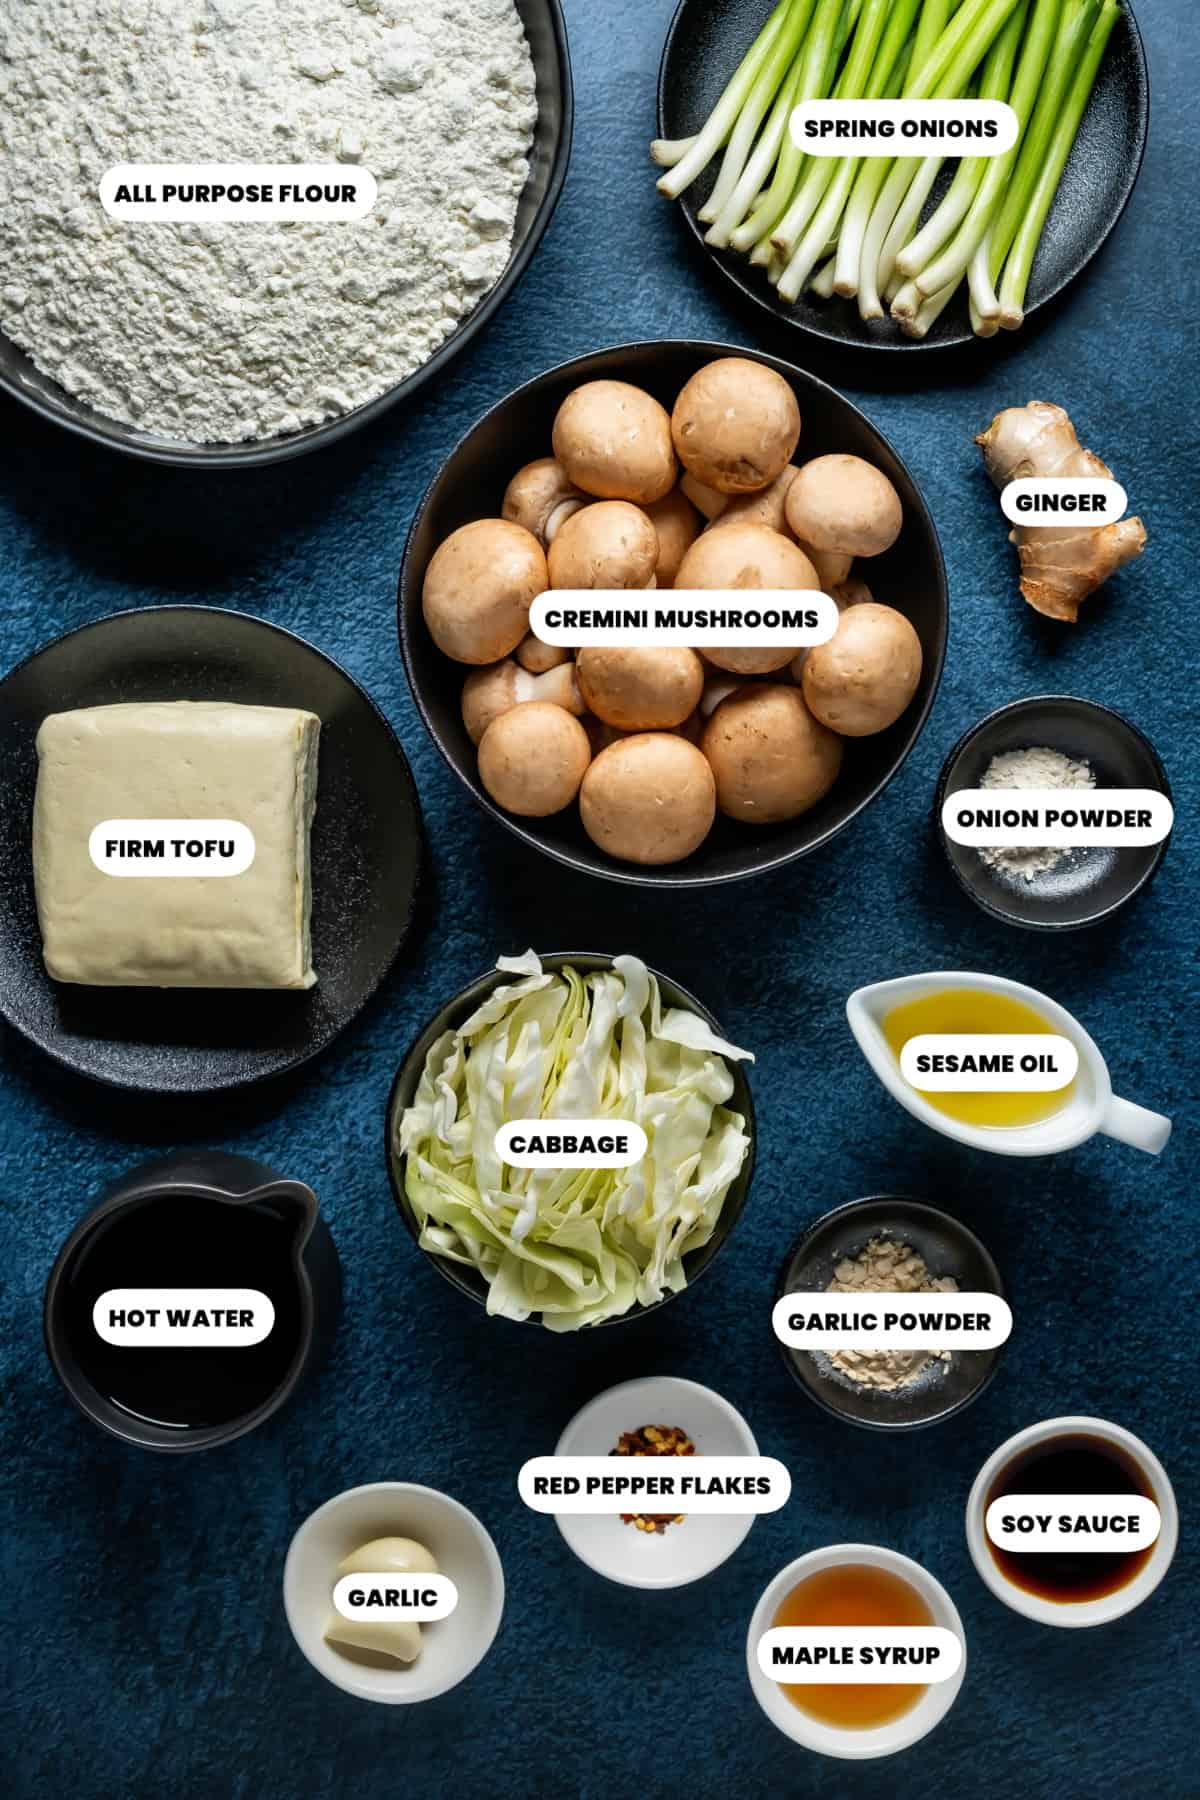
Ingredient Notes
- All purpose flour – the flour together with the hot water creates the dough that we use to make our own homemade dumpling wrappers for this recipe. To save time you can always buy your dumpling wrappers ready made and then just make the filling and dipping sauce from scratch (or even just the filling!).
- Spring onions – are also called green onions, salad onions or scallions.
- Cremini mushrooms – are also called portobellini mushrooms or baby bellas. You can also use white button mushrooms in this recipe.
- Firm tofu – or even extra firm tofu is great for this recipe. It does not need to be pressed first.
Ingredients You’ll Need For The Dipping Sauce:
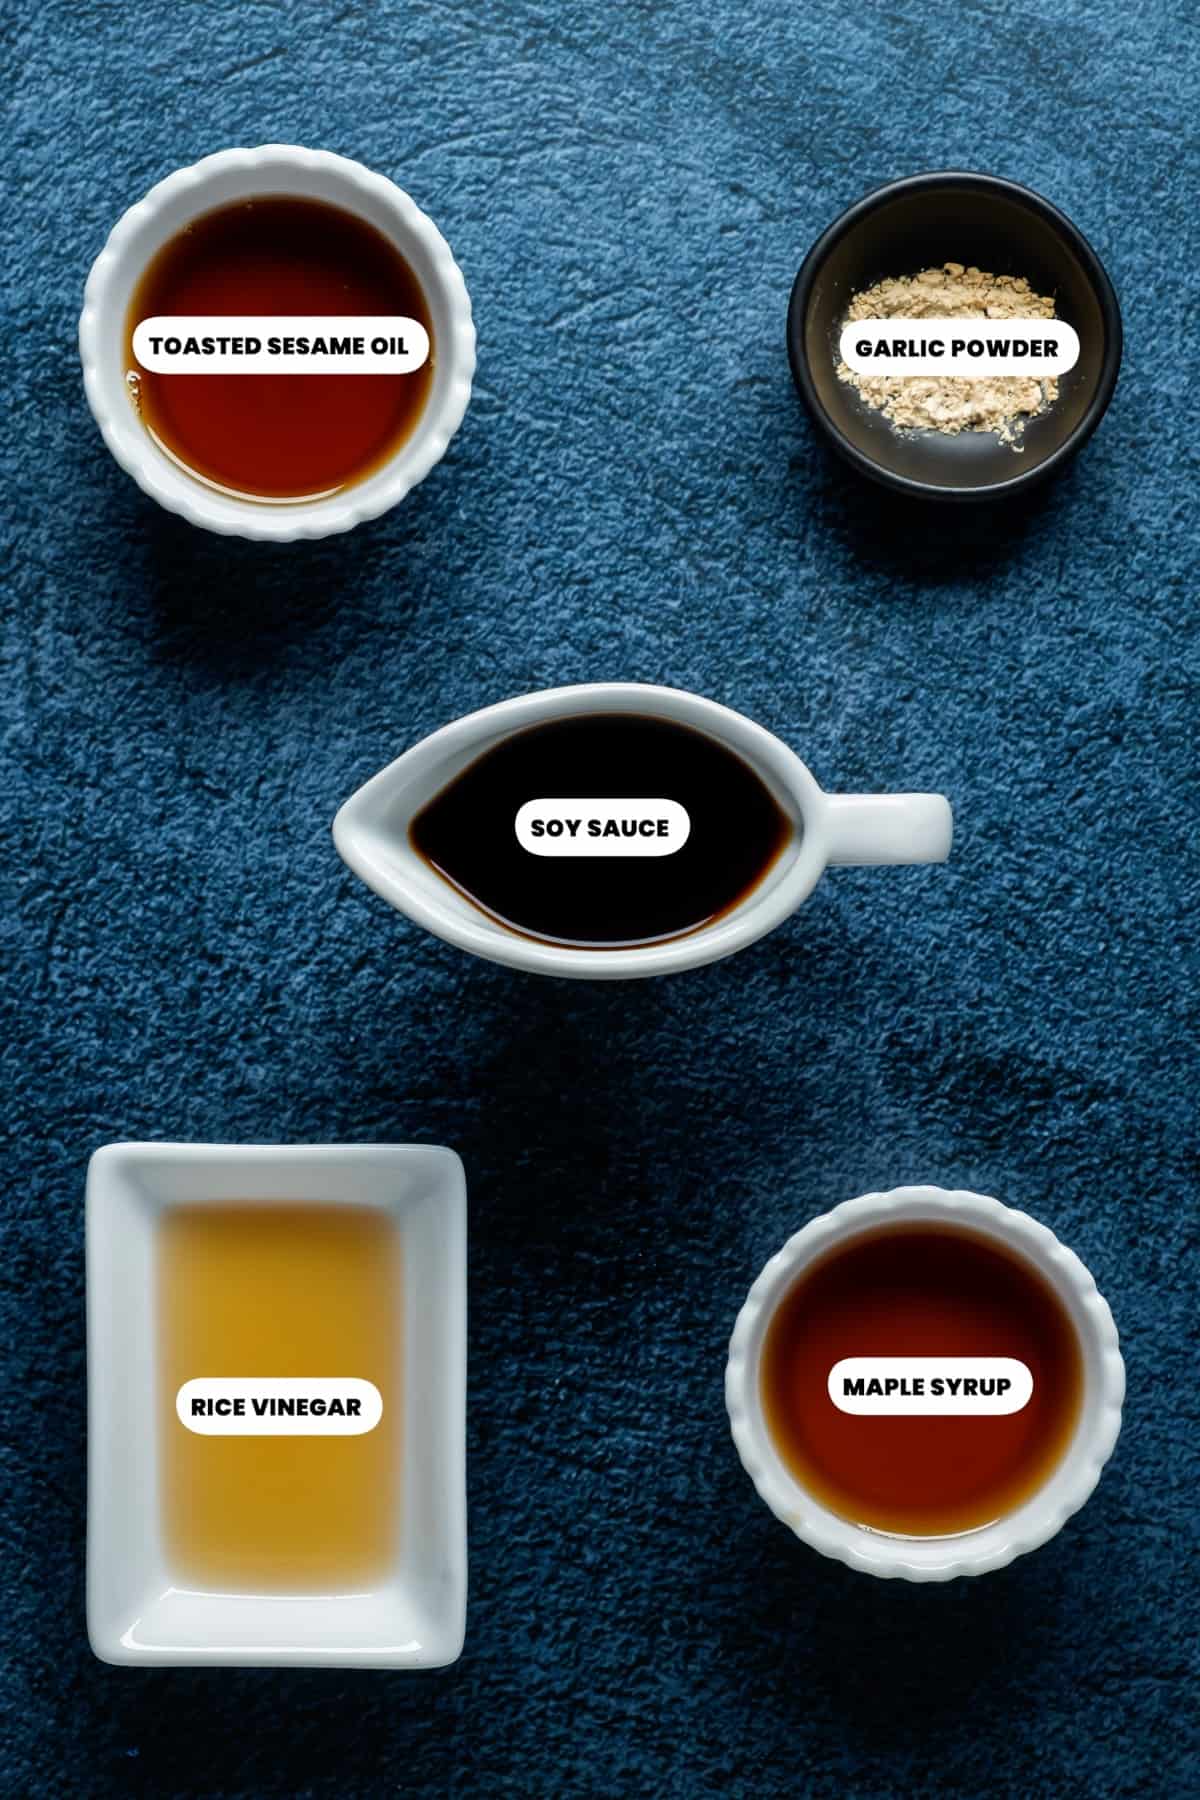
Dipping Sauce Notes
This dipping sauce is loaded with flavor and so easy to throw together so if you happen to have the ingredients on hand then it’s a great option.
However, we also found that dipping these potstickers into plain hoisin sauce or sweet soy sauce is just as delicious. So if you want to save time and use a ready made sauce that is also a great option.
How To Make Vegan Dumplings
You will find full instructions and measurements in the recipe card at the bottom of the post. This is a summary of the process to go along with the process photos.
There are a lot of step by step process photos below to make it as easy as possible for you to follow along with exactly how these vegan dumplings are made. We’ve split it up into 5 parts:
- The filling
- The homemade dumpling wrappers
- Assembling the dumplings
- Frying and steaming
- The dipping sauce
So if you are using pre-made dumpling wrappers or a ready-made dipping sauce then just skip over the sections that don’t apply to you.
The Filling:
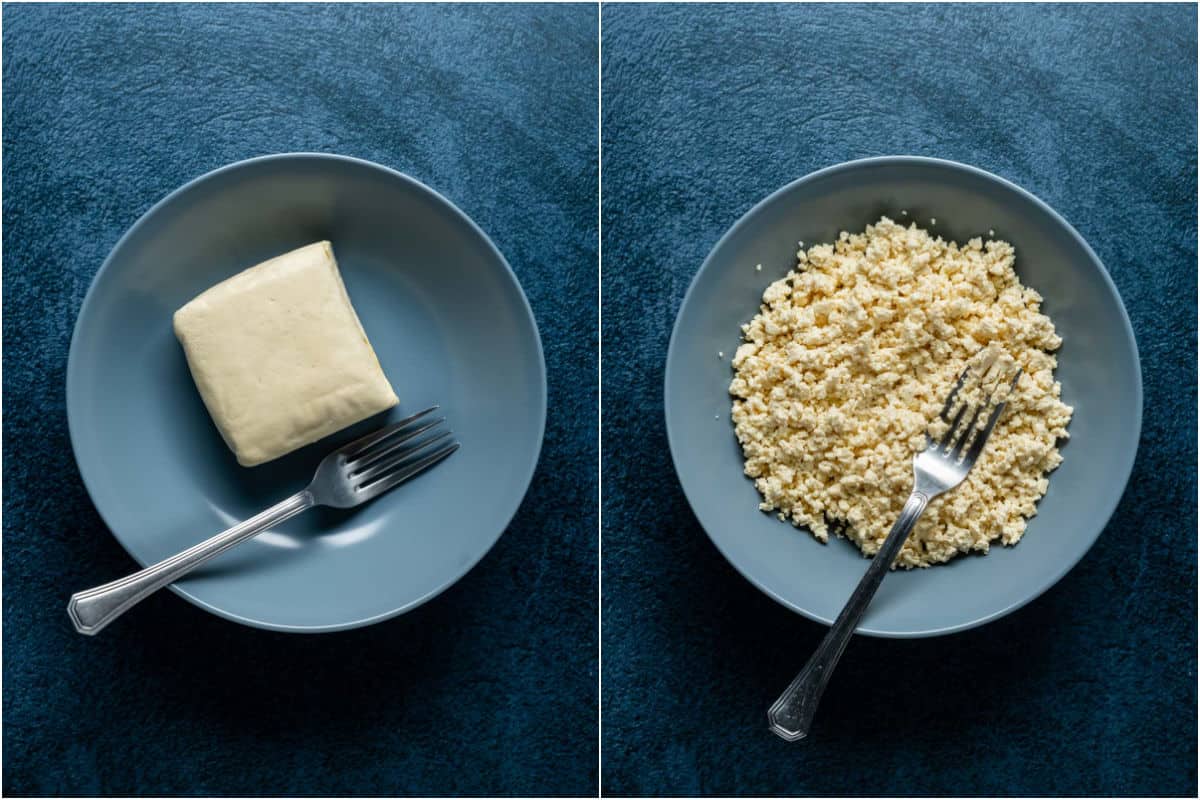
- Add the firm tofu to a bowl and mash it with a fork.
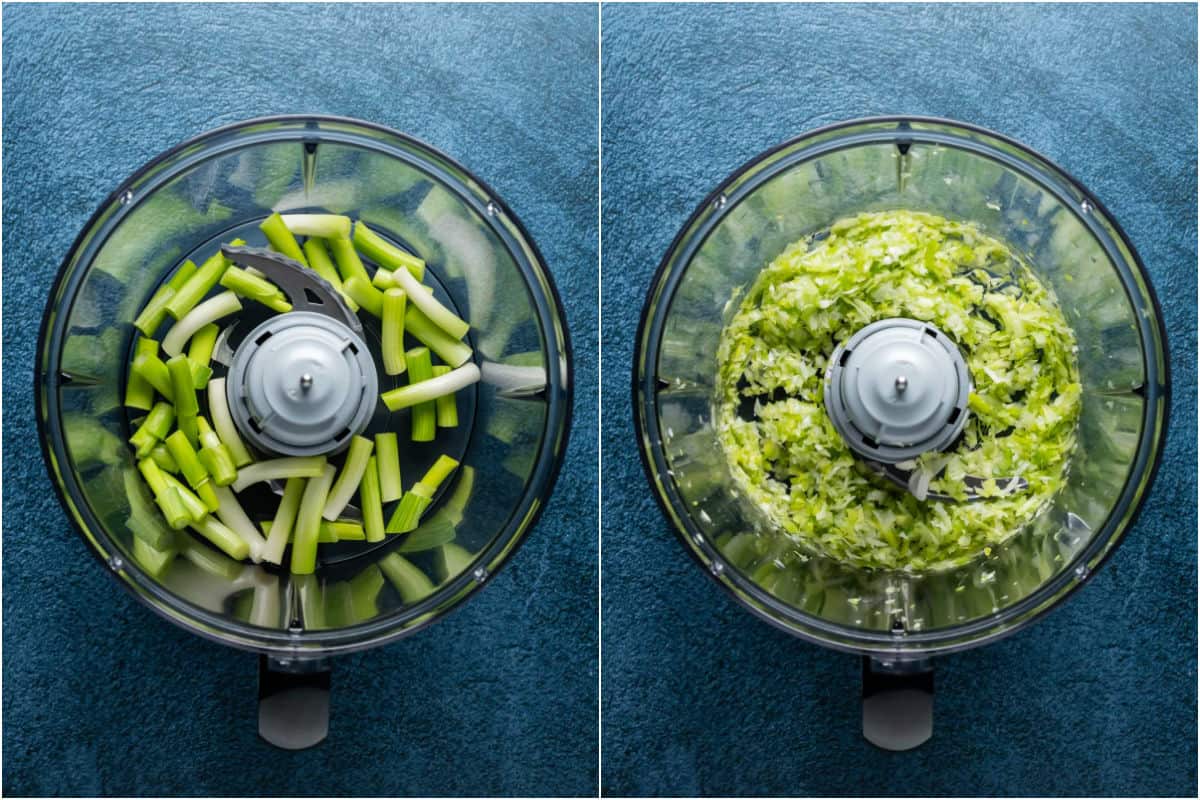
- Add spring onions to the food processor and process until finely chopped.
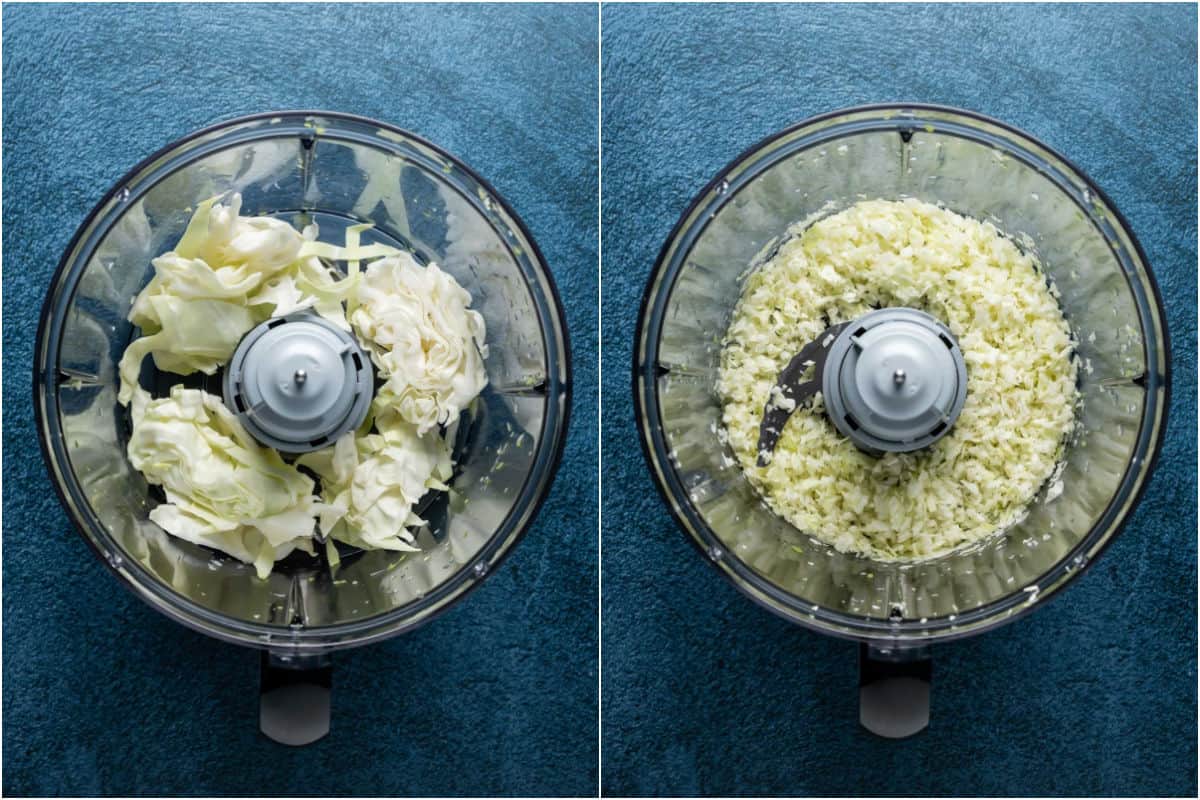
- Add cabbage to the food processor and process until finely chopped.
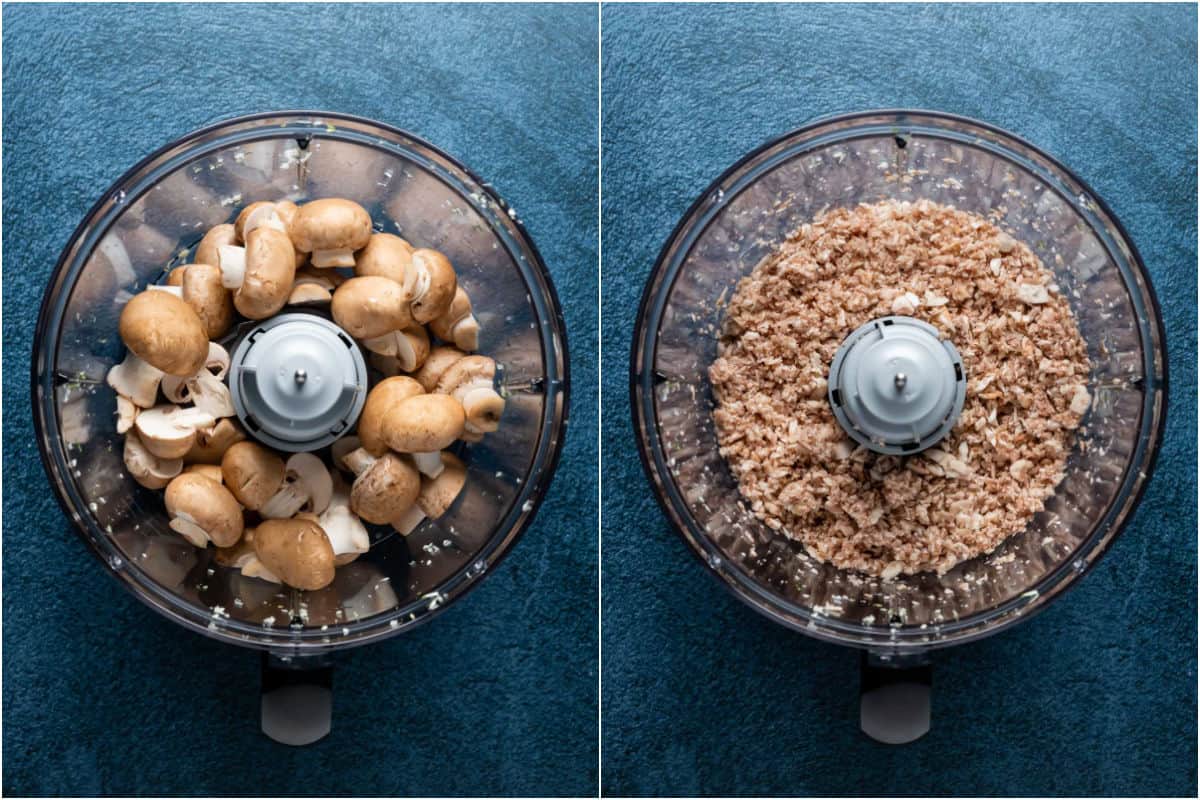
- Add mushrooms to the food processor and process until finely chopped.
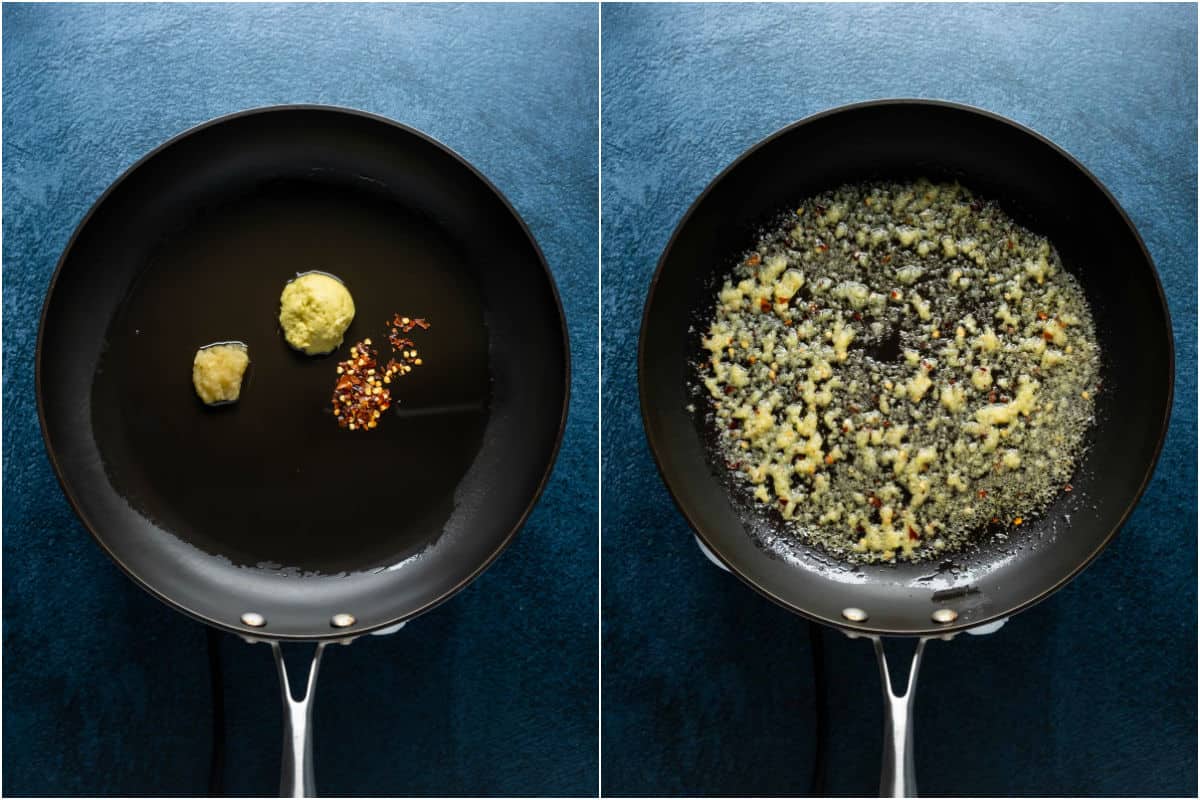
- In a frying pan or skillet on medium heat add sesame oil, crushed garlic, minced ginger and red pepper flakes and sauté for a minute until the spices are lightly toasted and fragrant.
- Add the tofu, chopped spring onion, cabbage, mushrooms, soy sauce, maple syrup, garlic powder and onion powder.
- Cook until the water has released from the vegetables and cooked off. About 10 minutes.
- When the filling seems dry, then it is done. Let it cool.

The Homemade Dumpling Wrappers:
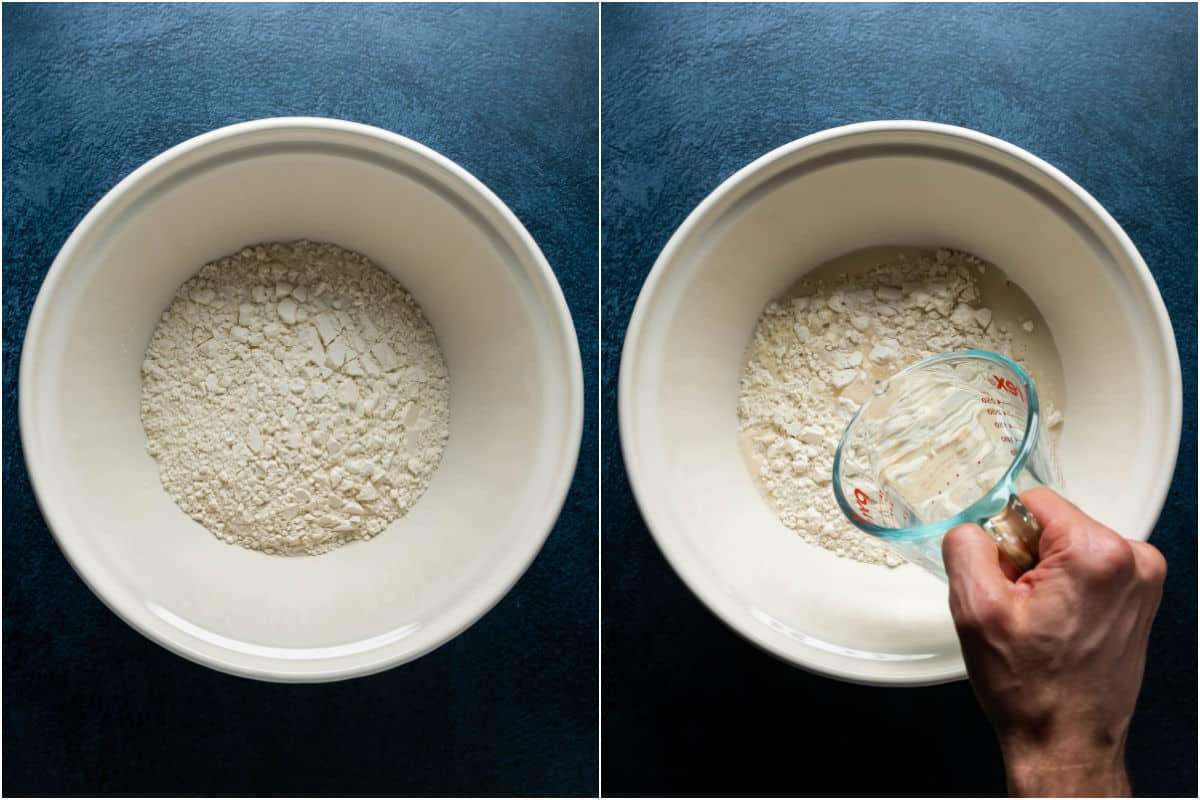
- Add all purpose flour to a mixing bowl.
- Mix freshly boiled water from a kettle with cold tap water to make ¾ cup (180ml) of hot water. Use an instant read digital thermometer to get the water to 120°F (50°C). Add either more hot water or more cold water to get the right temperature.
- Pour the water over the flour.
- Use a fork to mix the flour and water together until the water is absorbed and little pieces of dough start to form.
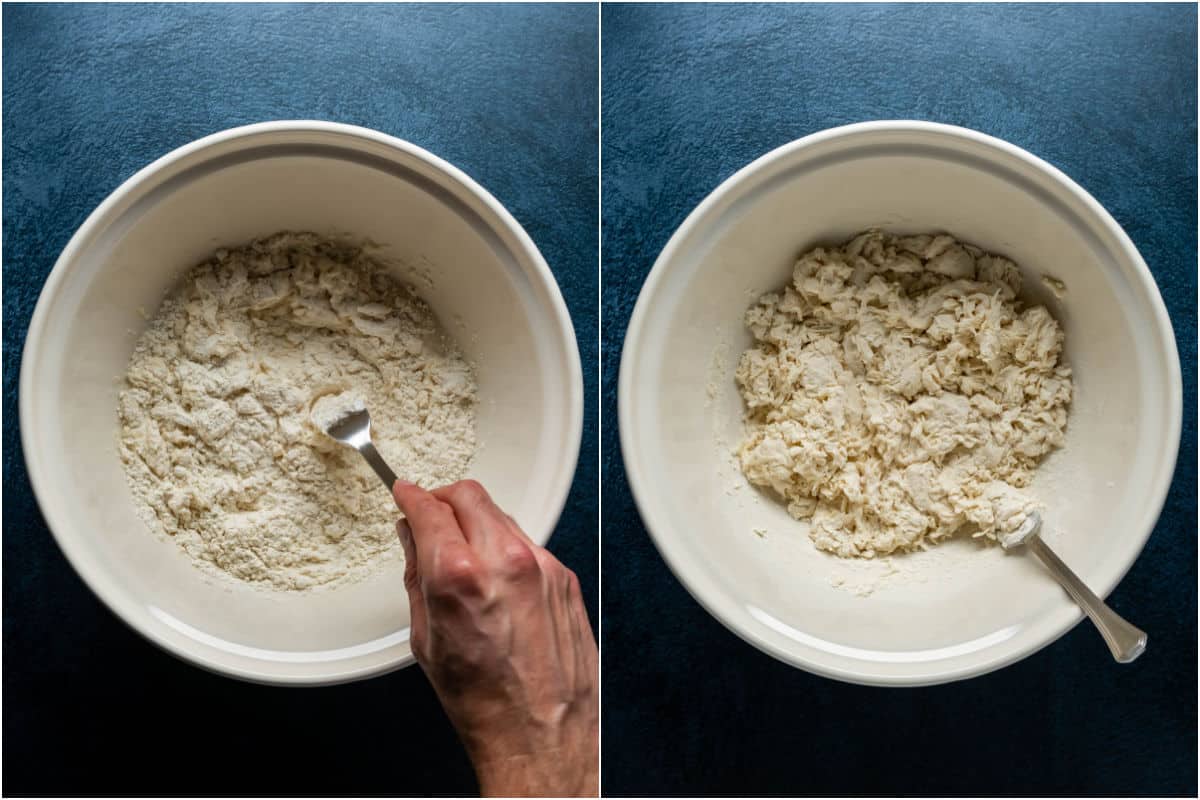
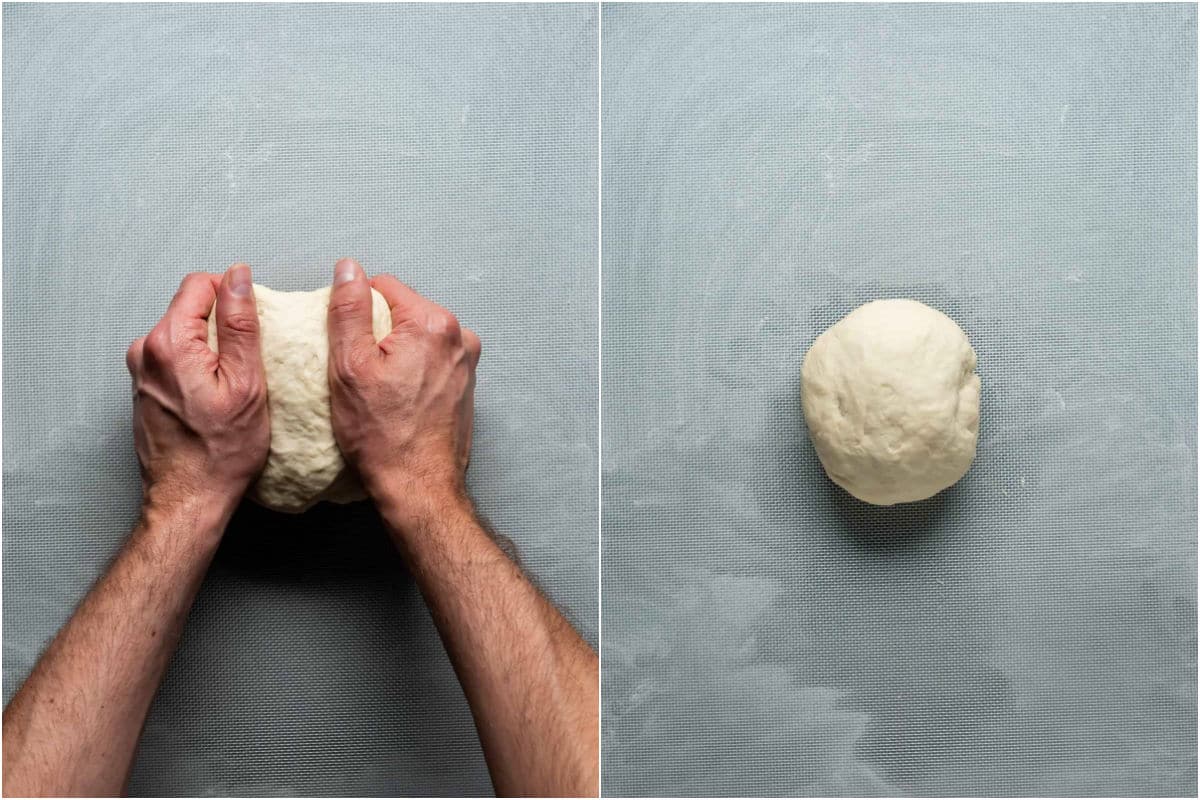
- Then use your hands to keep mixing the dough and use your fingers to gather up all the flour and little bits from the bowl and form it into a ball.
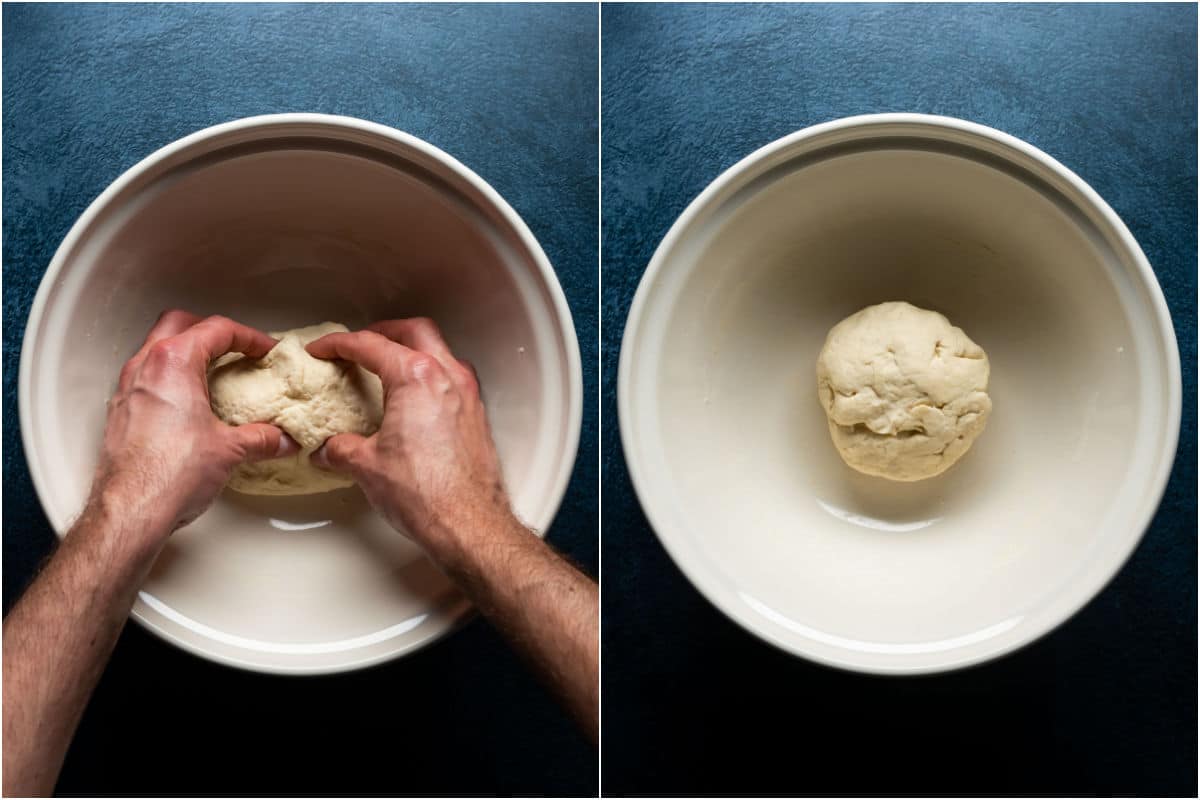
- When you have a firm ball with no bits left behind, transfer the dough to a lightly floured surface and knead it for about 3 minutes, until the dough is fairly smooth and not sticky.
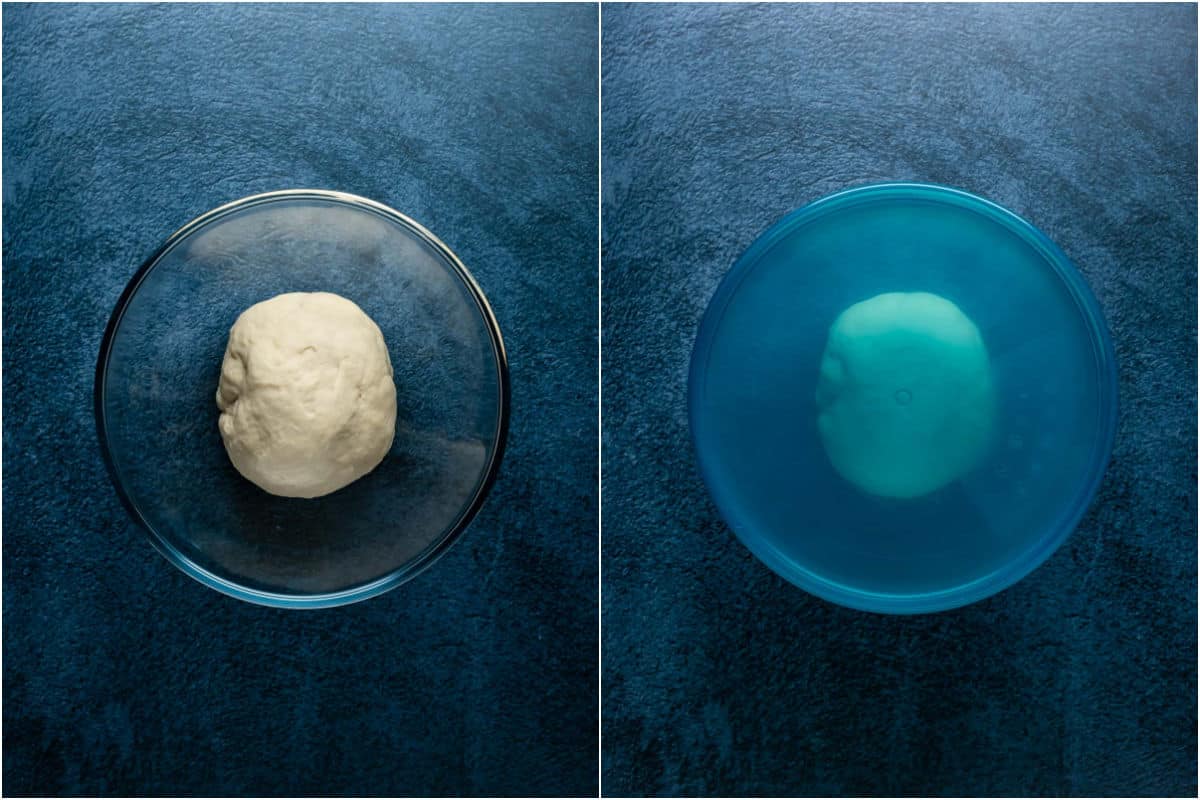
- Place the ball of dough into a bowl, cover with a lid or damp towel and leave to rest for 60 minutes.
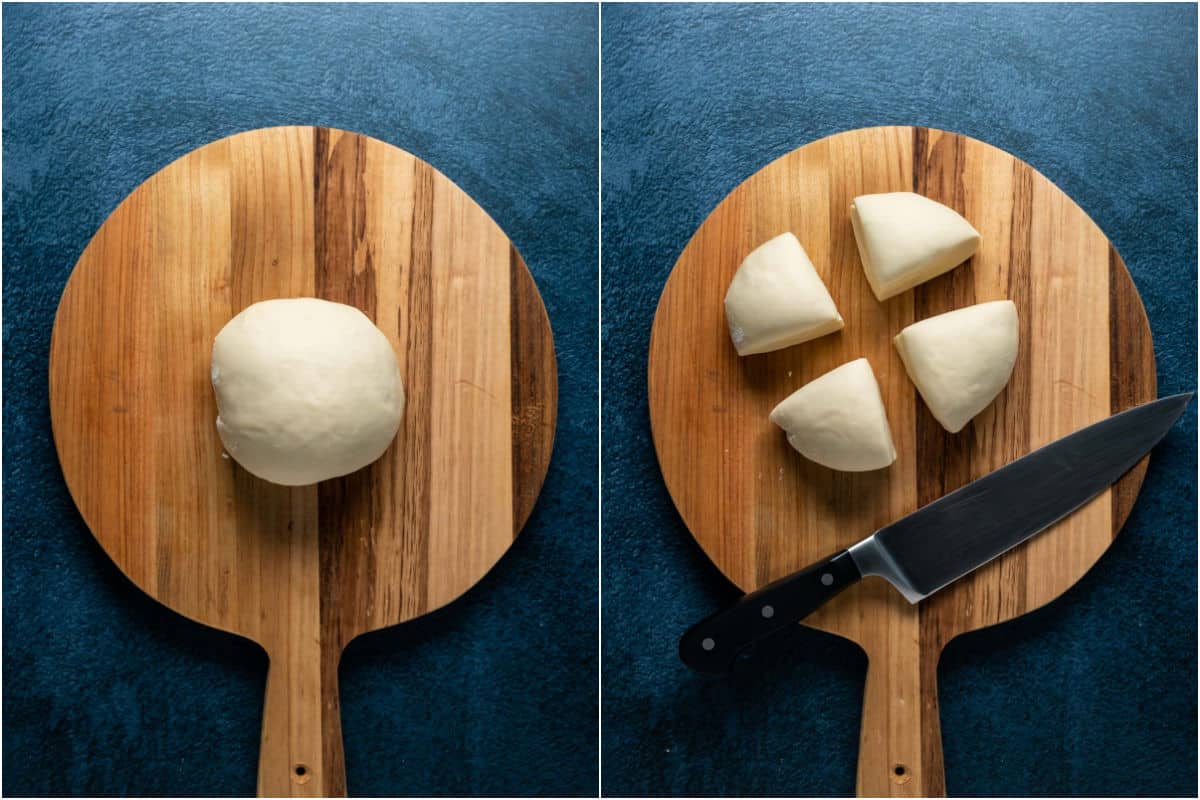
- After 60 minutes cut the dough into four parts.
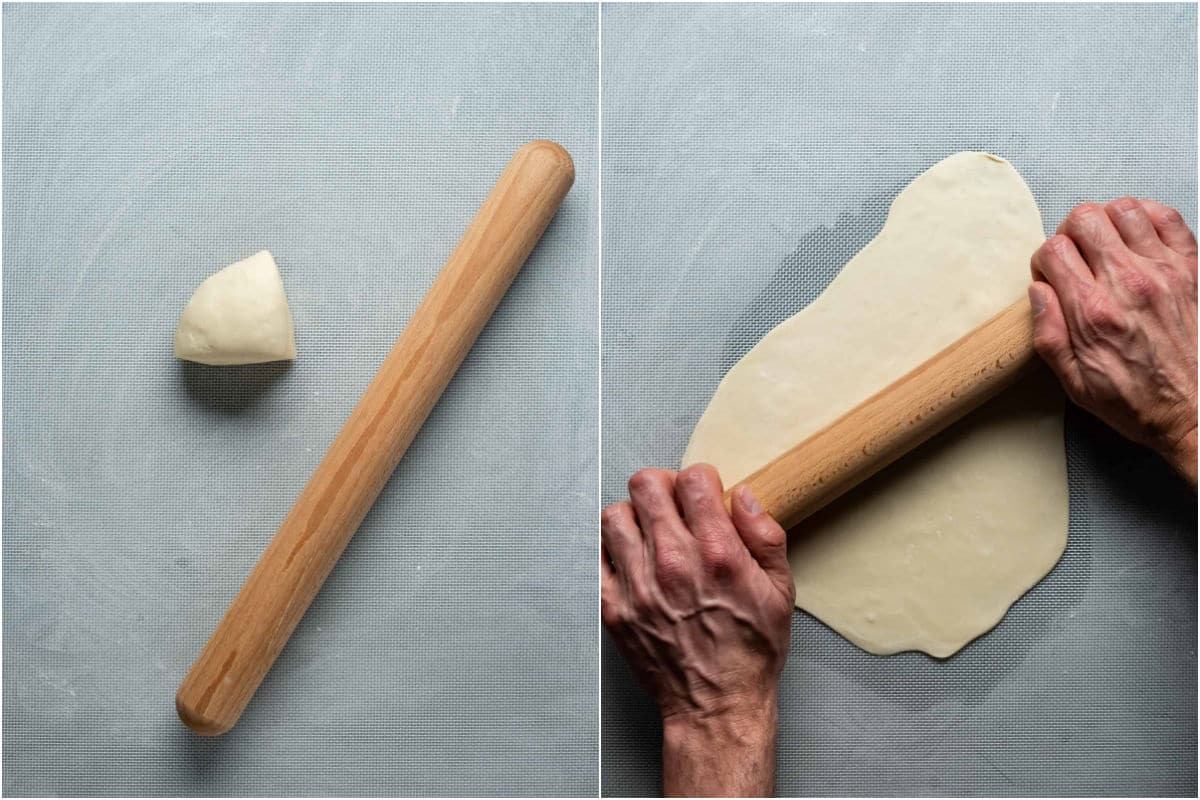
- Take one of the parts and roll it out on a lightly floured surface until you have a thin sheet. Lightly dust the dough with flour while rolling it out to prevent your rolling pin from sticking.
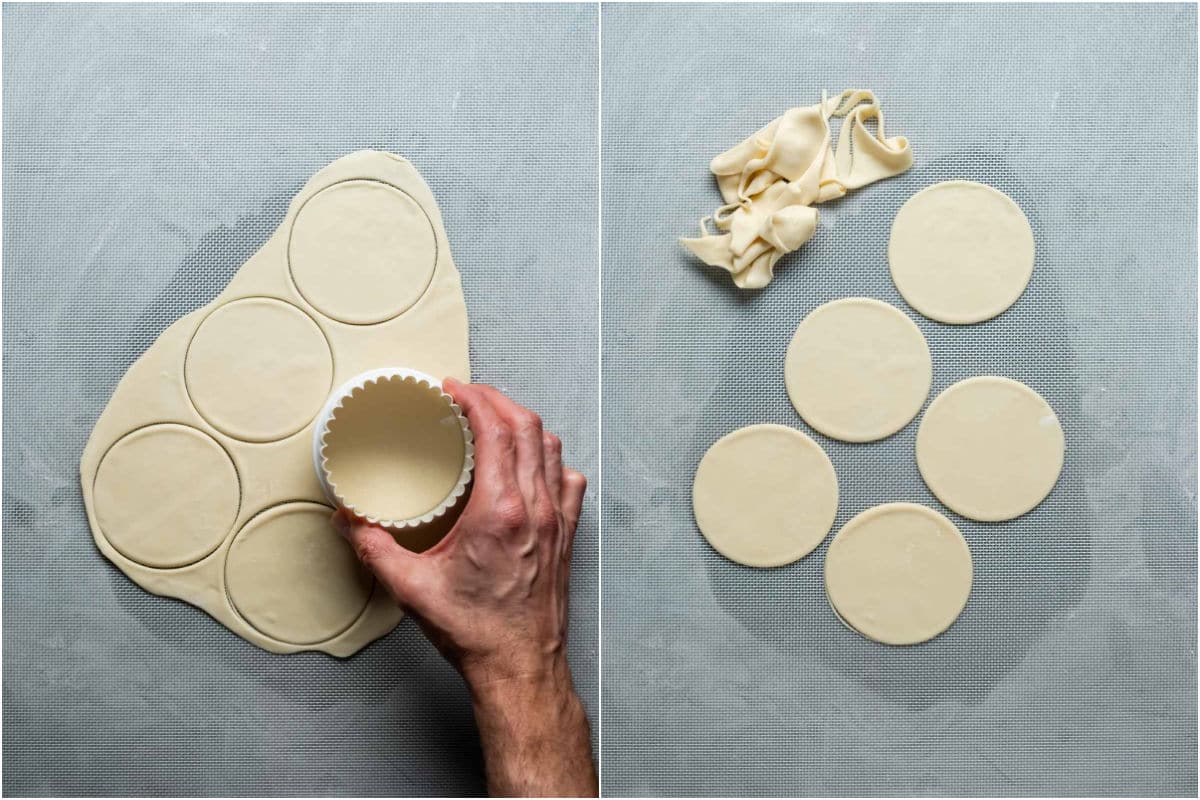
- Use a cookie cutter to cut out circles in your thin sheet of dough.
- Then roll out the leftover dough and cut out more circles.
- Repeat until you don’t have enough dough to cut out another circle.
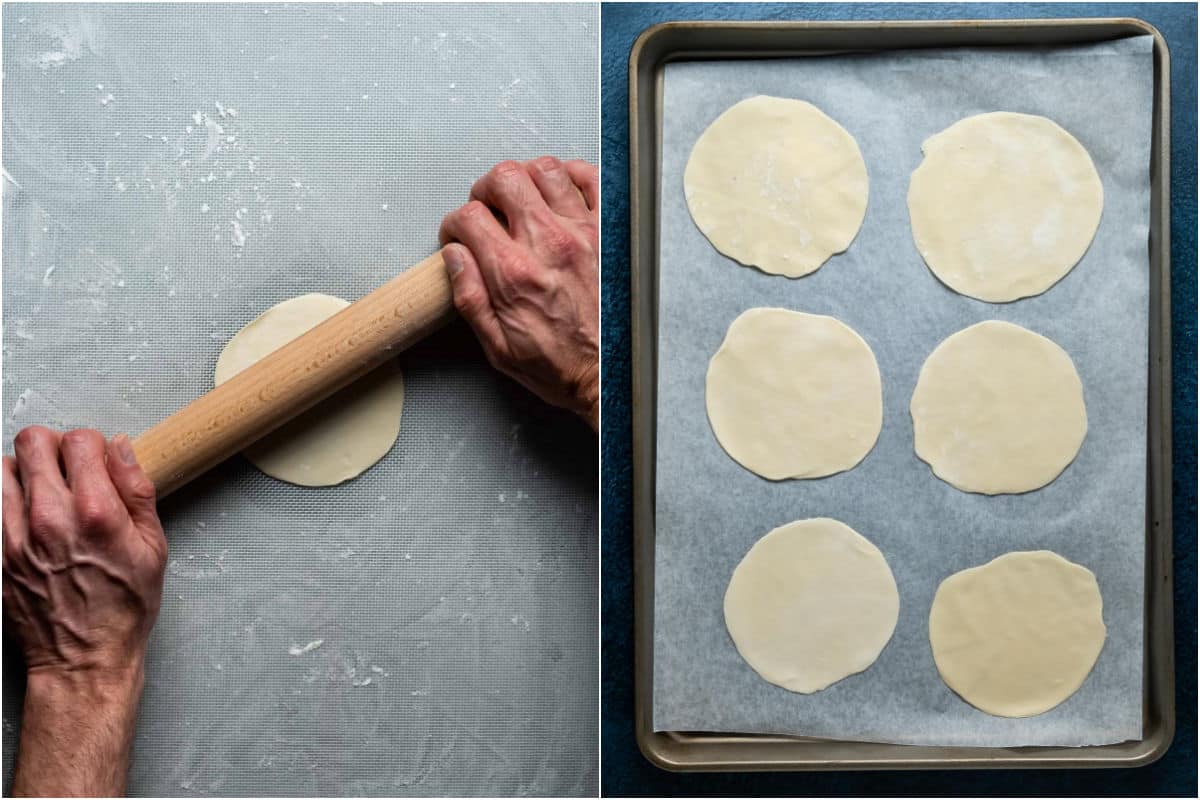
- Then gently roll out each of your circles until they are thin and round. They don’t have to be perfect circles. If needed, use a light dusting of flour to prevent sticking.
- Place them onto a parchment lined baking sheet.
- Repeat the process with each of the other three pieces of dough, until all the dough is used and you have around 30 dumpling wrappers.
Assembling the Dumplings:
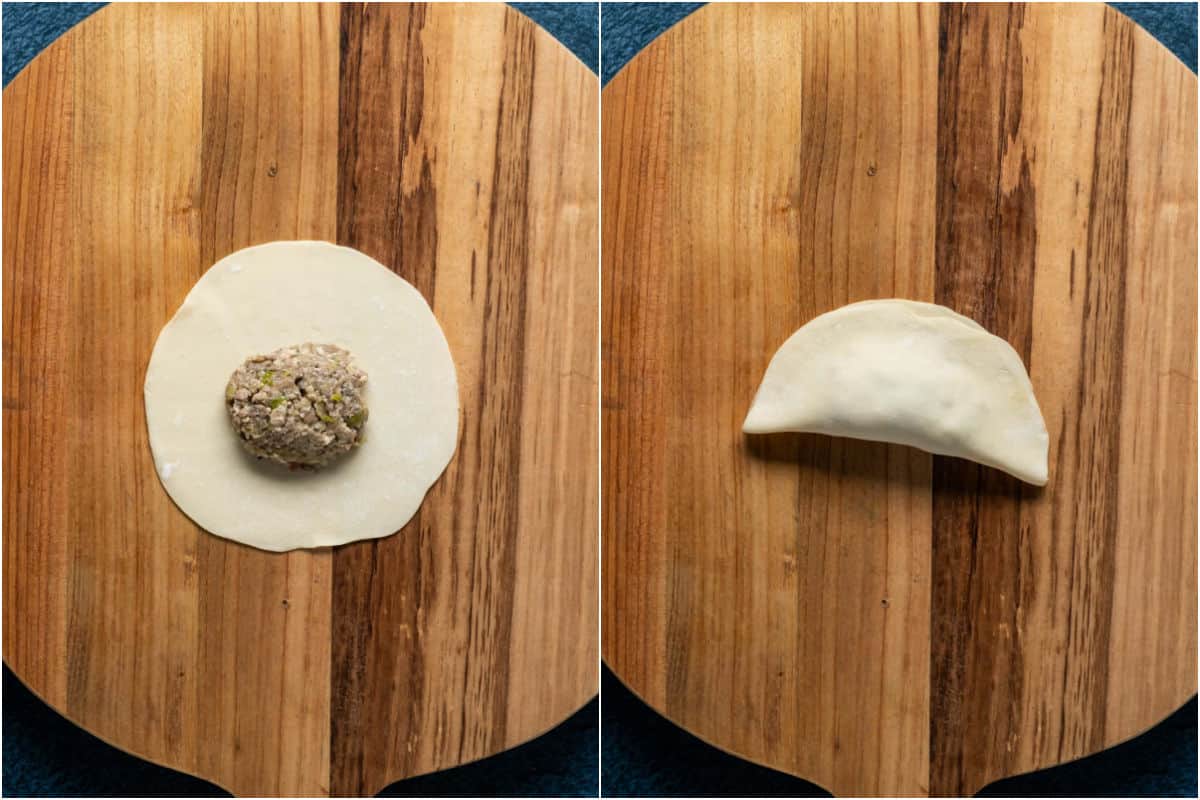
- Place 1 tablespoon of filling in the center of a dumpling wrapper.
- Then fold the wrapper in half, bringing one outer edge over the filling to meet the opposite outer edge.
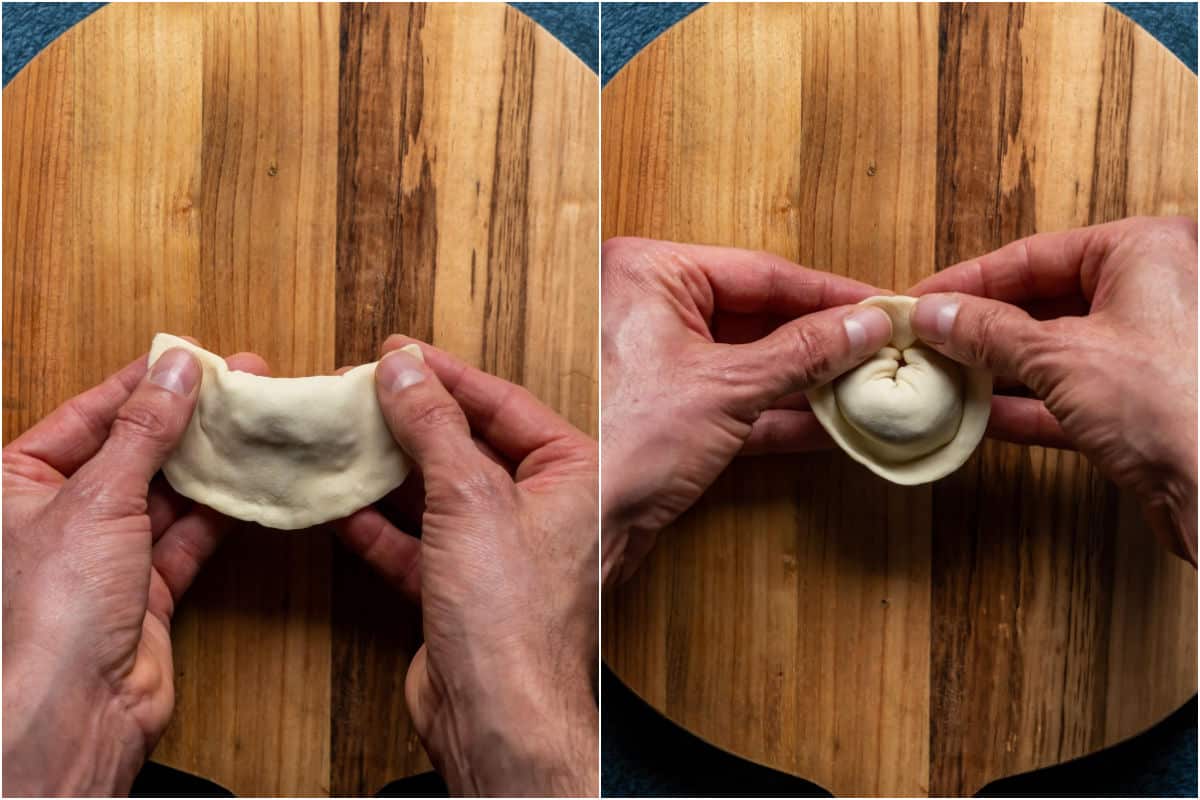
- Run your fingers along where the edges meet, pinching the two edges together to seal the dumpling.
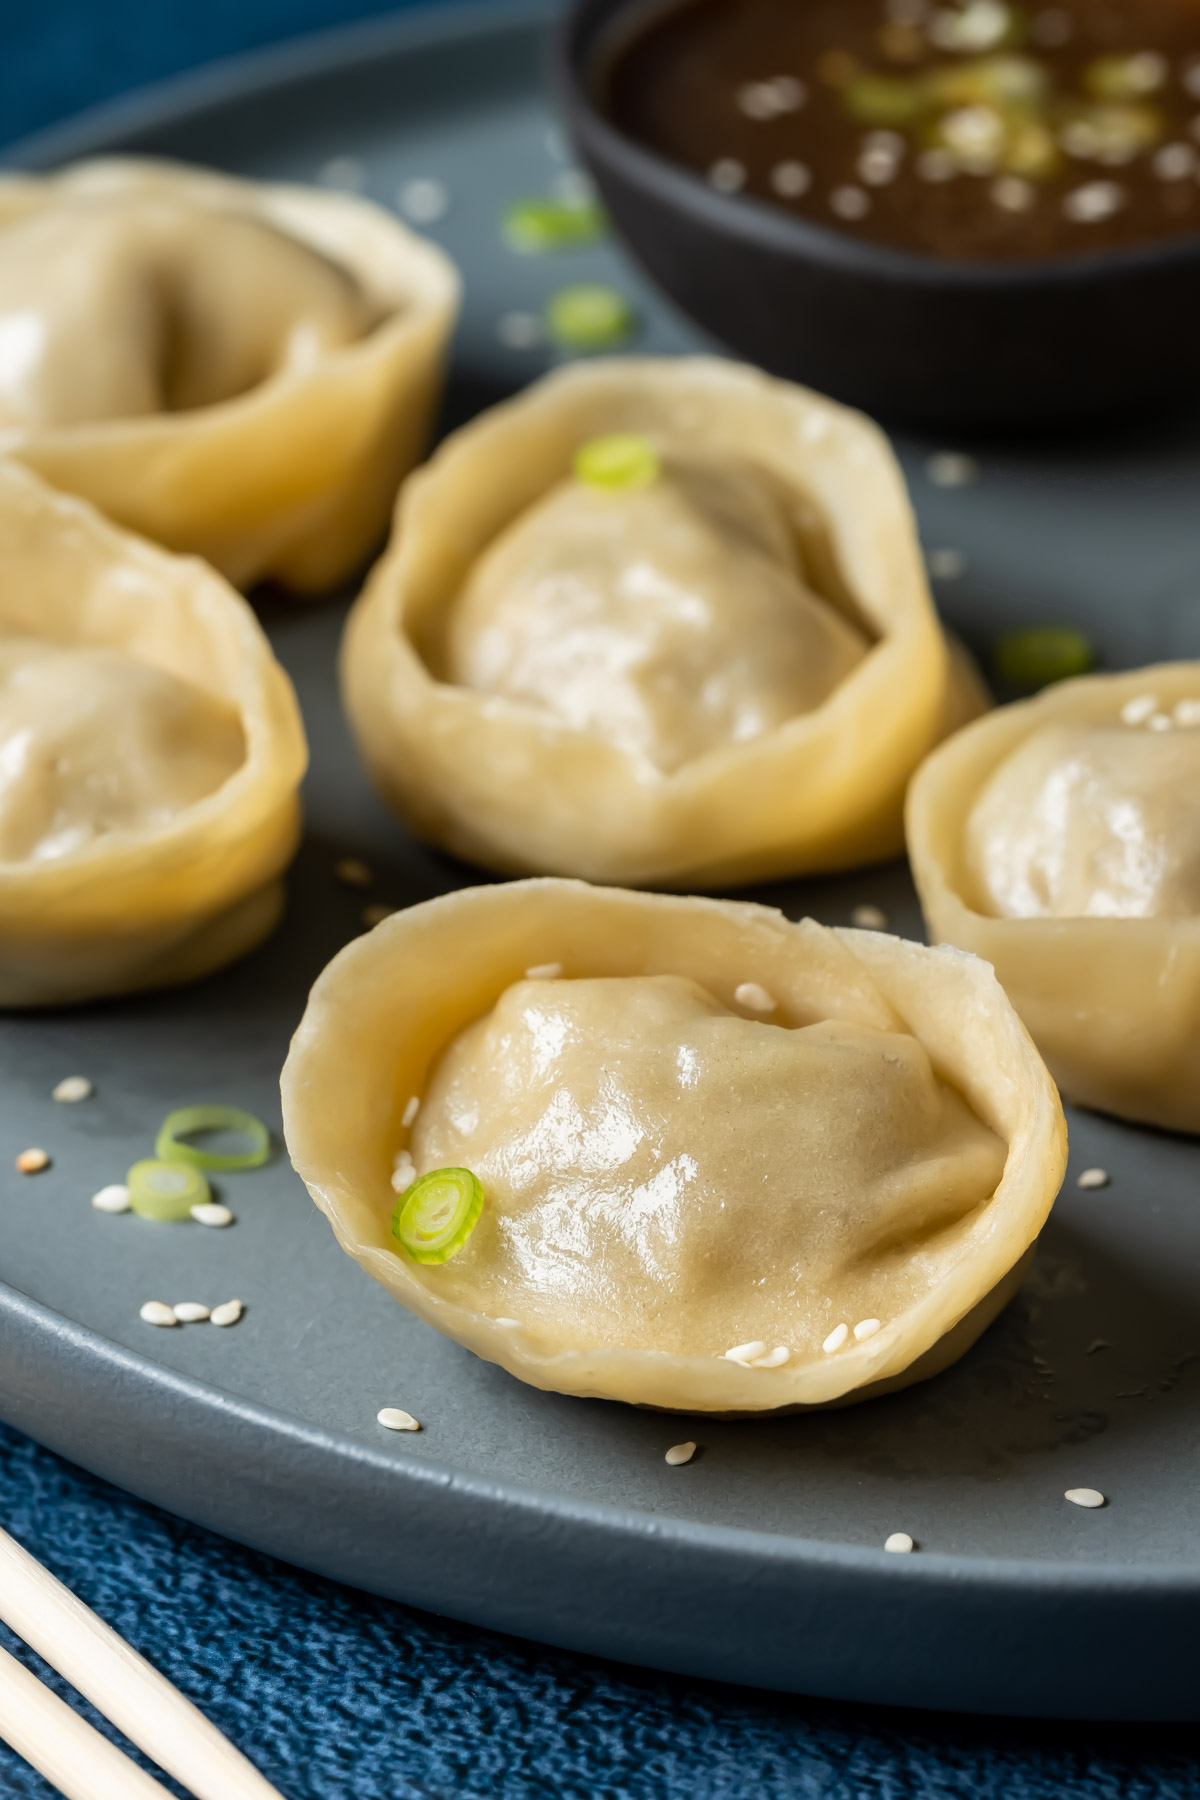
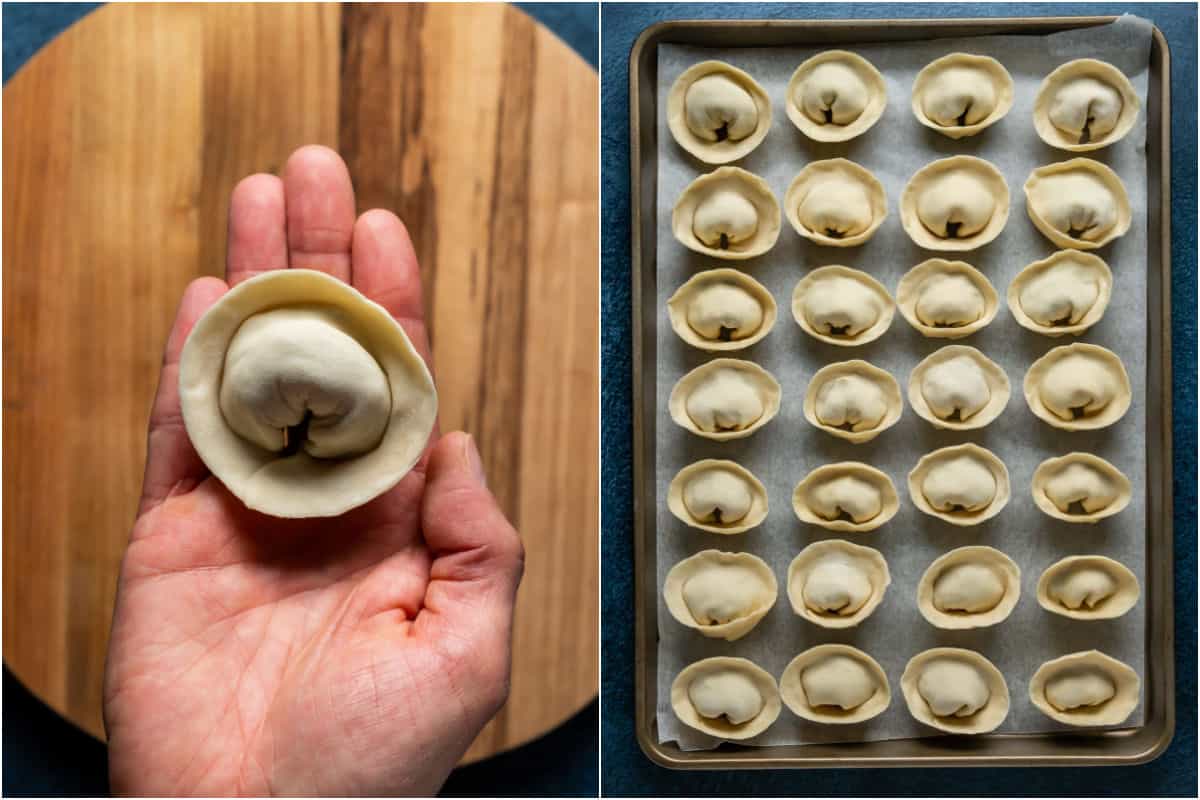
- Then gently pull the two opposite ends of the dumpling towards each other to meet and stick together. The dumpling will form into a circle shape, like a flower.
- Pinch the ends together to make them stick.
- Place the dumpling back onto the parchment lined tray.
- Repeat the process to stuff the other dumpling wrappers.
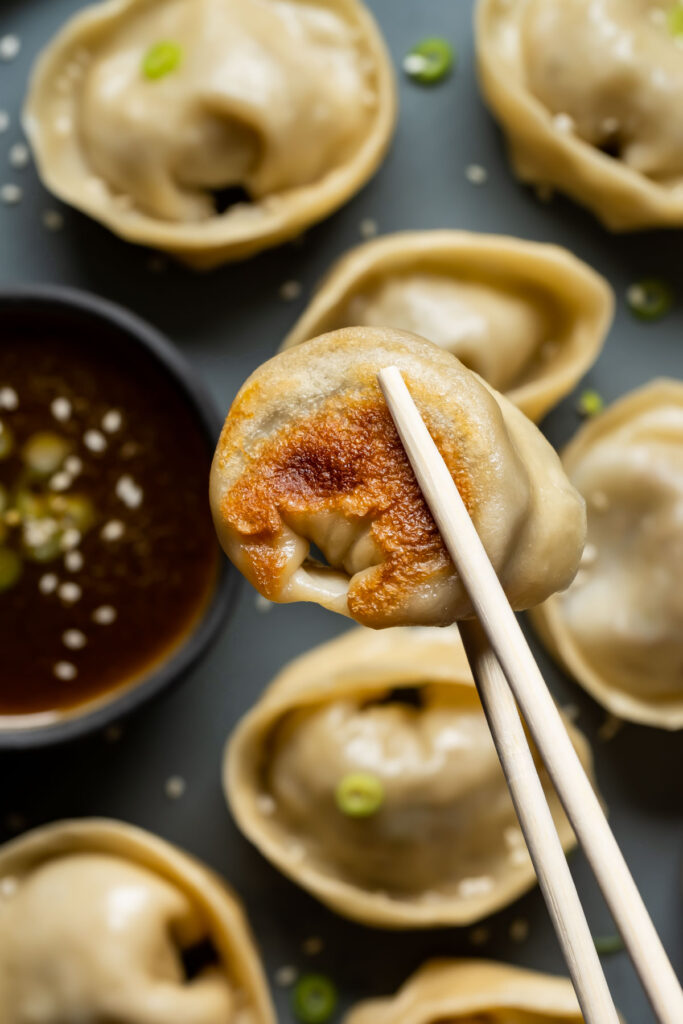
Frying and Steaming:
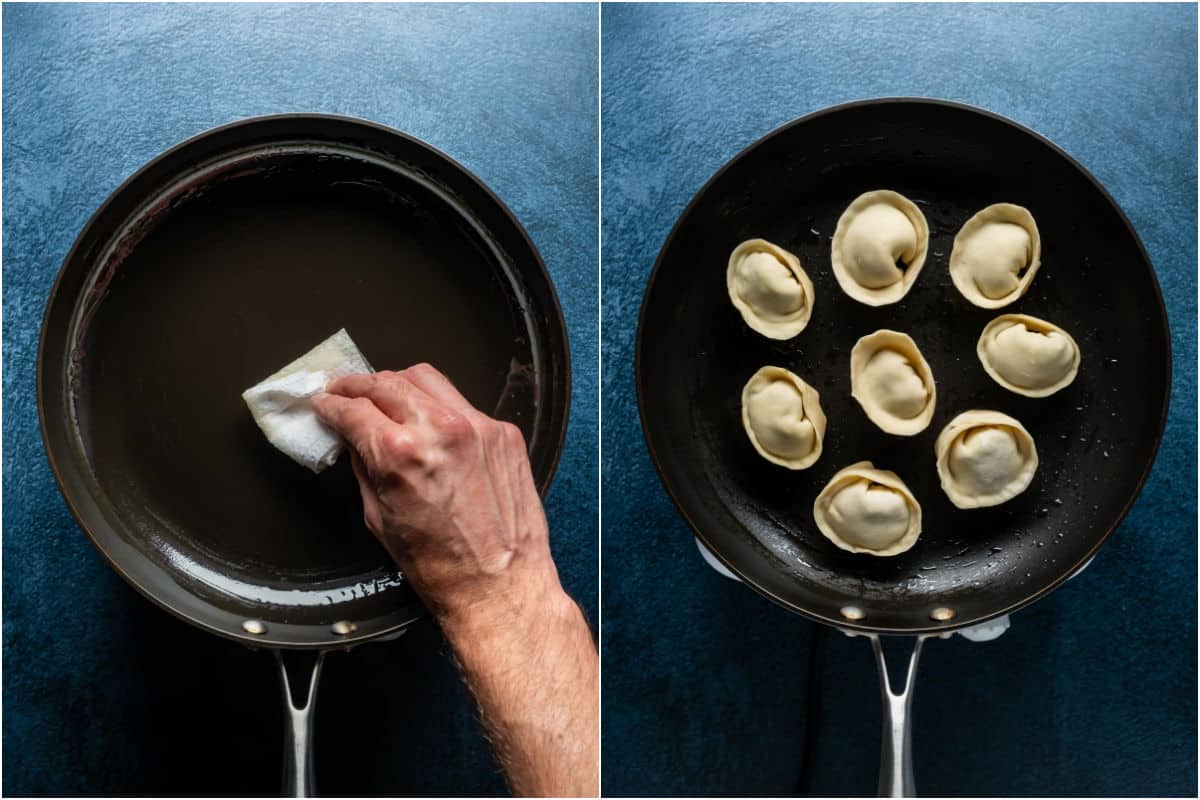
- In a frying pan or skillet on medium heat, add 1 tablespoon sesame oil, then use a paper towel to spread the oil and grease the whole pan.
- Add 8 dumplings to the pan (or as many as comfortably fit into your pan) and fry for 2-3 minutes to brown and crisp the bottom of the dumplings.
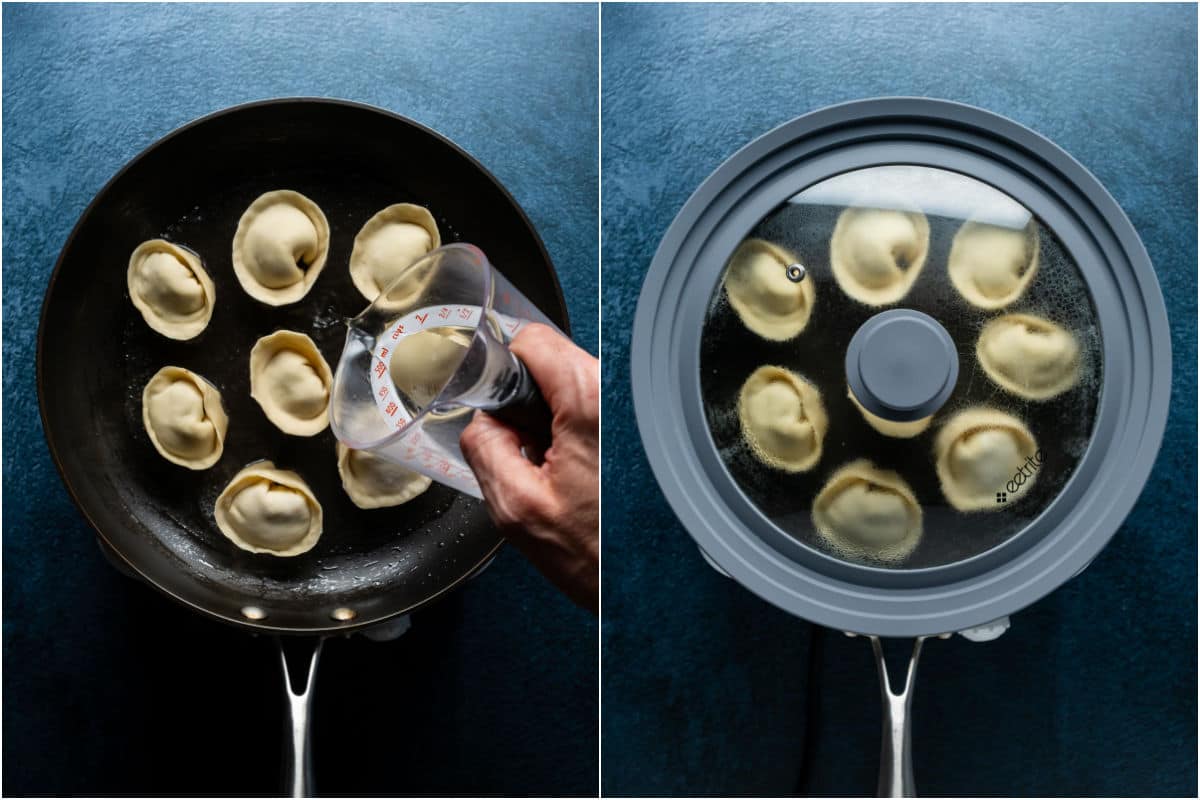
- Then add ½ cup water to the pan, so that the bottoms of the dumplings are in water.
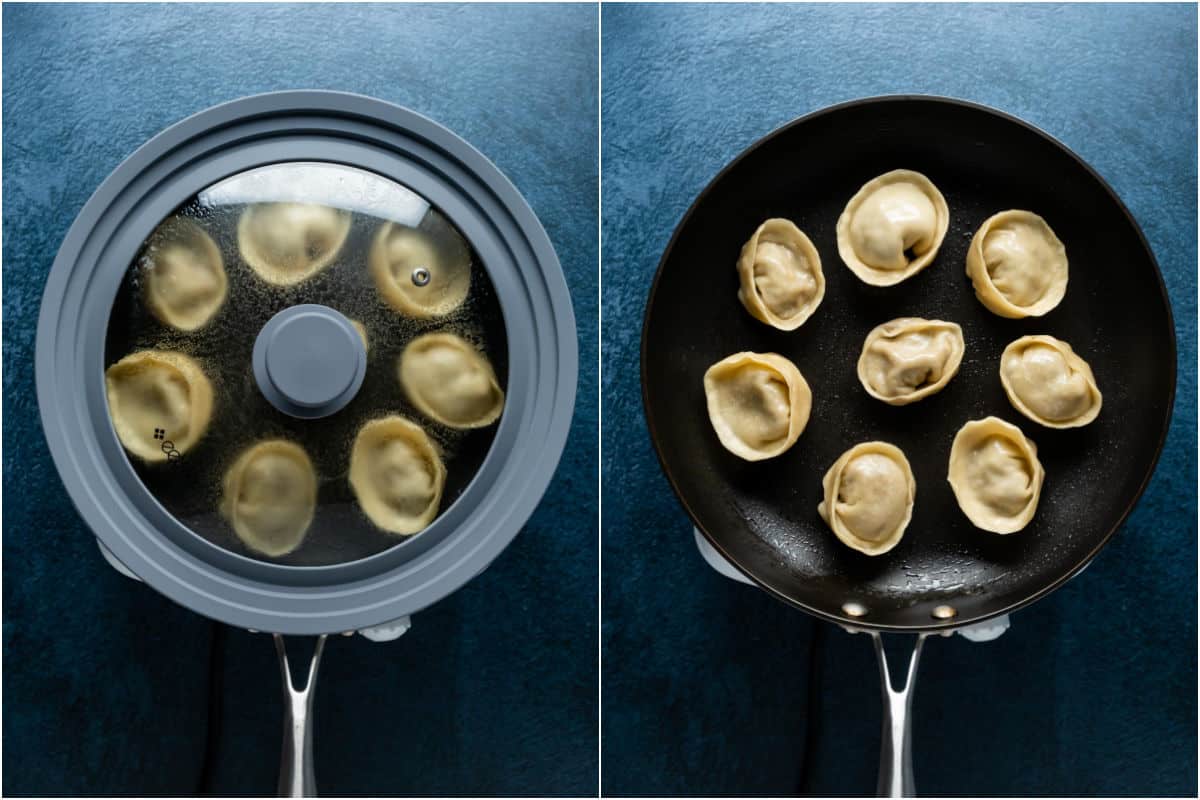
- Place a lid on the pan and let them steam for 5-6 minutes, or until all the water has cooked off.
- Then remove the lid and fry for a minute more to crisp the bottoms of the dumplings.
- Repeat with the next batch.
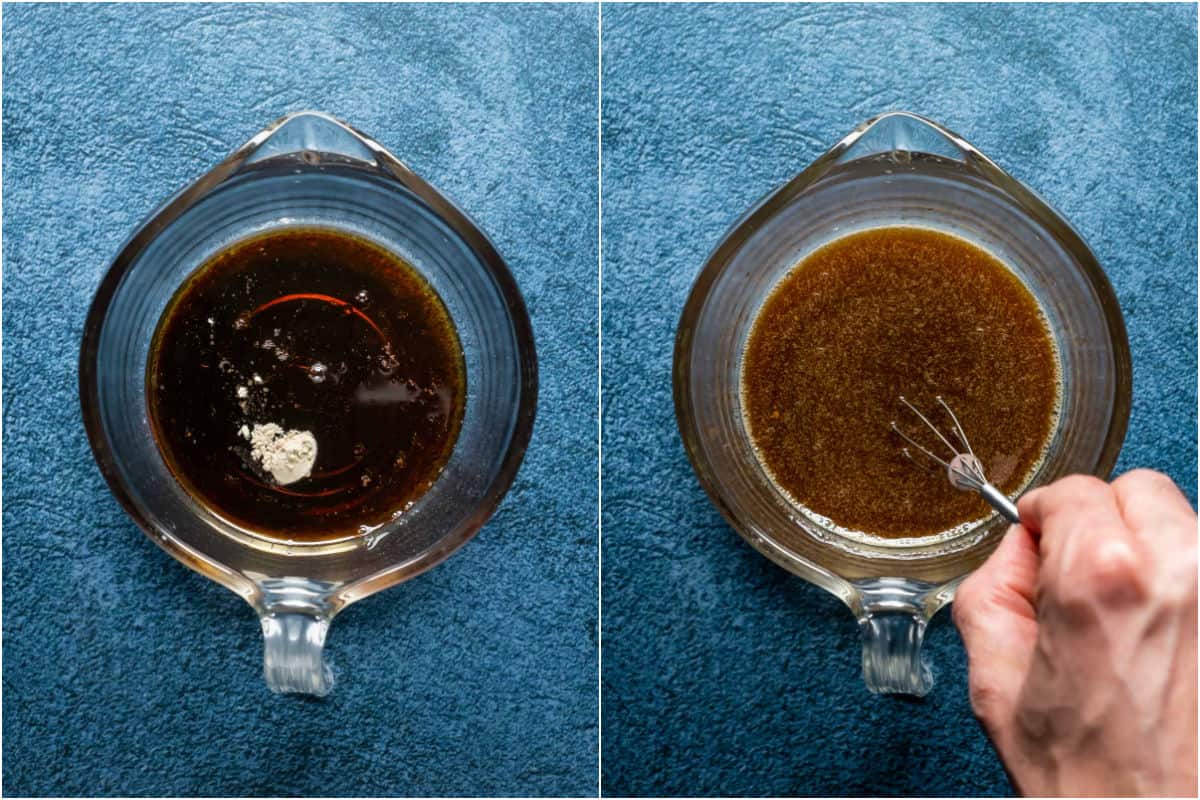
Dipping Sauce:
- Add toasted sesame oil, maple syrup, soy sauce, rice vinegar and garlic powder to a measuring jug and whisk it into a dipping sauce.
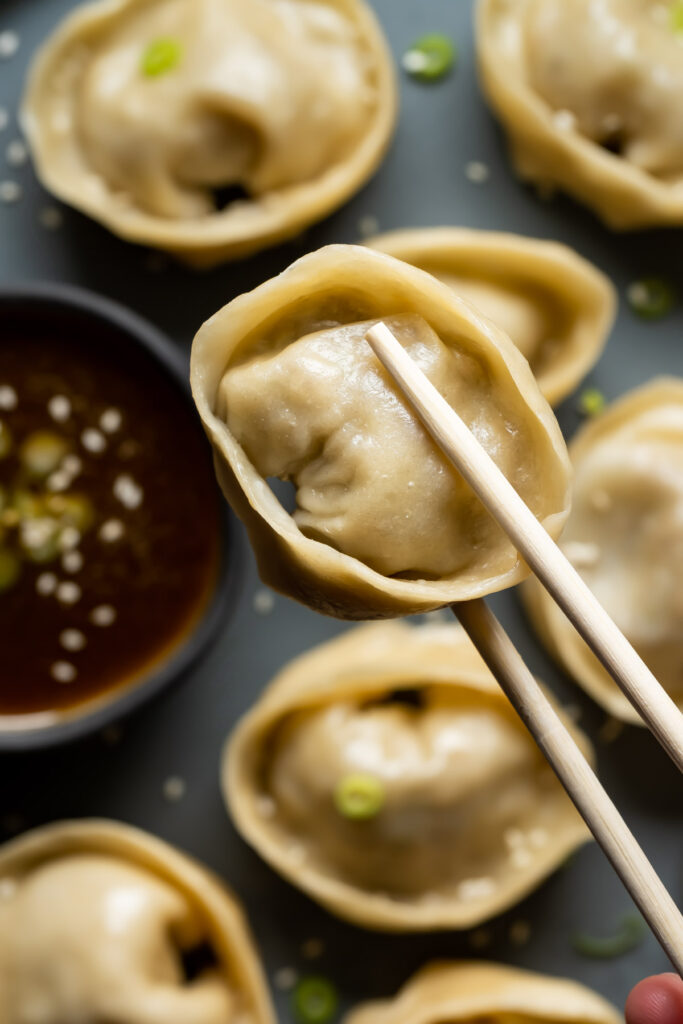
Serving:
- Serve your dumplings sprinkled with sesame seeds and chopped spring onions, with the dipping sauce on the side.

Recipe Tips
Don’t let your dumpling wrappers dry out. If you are making homemade dumpling wrappers then try to time it so that when your filling is ready you can immediately roll out the wrappers, fill them and fold them. If they sit for too long after rolling them out then they can dry out and become brittle.
Fold them how you like. We liked to fold each wrapper to seal it and then fold it corner to corner again to make a circle shape. But there are lots of different ways to fold your dumplings and as long as the filling is sealed in that’s the most important thing. How they look is not that important.
How To Freeze Vegan Gyoza
These vegan dumplings freeze wonderfully well. Before you steam/fry them all you have to do is place the uncooked dumplings on a parchment lined tray and place them into the freezer for 60 minutes. Then transfer them to a ziploc bag or a freezer safe container and freeze them for up to 3 months.
When you’re ready for them you can proceed to cook them directly from frozen, following the cooking directions in the recipe card, and just allowing an extra couple of minutes of steaming time.
More Delicious Asian Inspired Recipes
Did you make this recipe? Be sure to leave a comment and rating below!
Vegan Dumplings (Vegan Gyoza / Potstickers)
Ingredients
The Filling:
- 8 ounces Firm Tofu (226g)
- ¾ cup Spring Onions (75g) Green Onions
- 1 cup Cabbage (90g) Shredded
- 2 ½ cups Cremini Mushrooms (240g)
- 2 Tablespoons Sesame Oil
- 2 Cloves Garlic Crushed
- 1 Tablespoon Ginger Minced
- ¼ teaspoon Red Pepper Flakes
- 1 Tablespoon Soy Sauce
- 1 Tablespoon Maple Syrup
- 1 teaspoon Garlic Powder
- 1 teaspoon Onion Powder
Homemade Dumpling Wrappers:
- 2 ½ cups All Purpose Flour + 1 tablespoon (320g)
- ¾ cup Hot Water (120°F / 50°C)
Dipping Sauce:
- 2 Tablespoons Toasted Sesame Oil
- 2 Tablespoons Maple Syrup
- 4 Tablespoons Soy Sauce
- 1 Tablespoon Rice Vinegar
- ¼ teaspoon Garlic Powder
Frying:
- Sesame Oil
Serving:
- Sesame Seeds
- Spring Onions Chopped
Instructions
The Filling:
- Add the firm tofu to a bowl and mash it with a fork.
- Add spring onions to the food processor and process until finely chopped.
- Add cabbage to the food processor and process until finely chopped.
- Add mushrooms to the food processor and process until finely chopped.
- In a frying pan or skillet on medium heat add sesame oil, crushed garlic, minced ginger and red pepper flakes and sauté for a minute until the spices are lightly toasted and fragrant.
- Add the tofu, chopped spring onion, cabbage, mushrooms, soy sauce, maple syrup, garlic powder and onion powder.
- Cook until the water has released from the vegetables and cooked off. About 10 minutes.
- When the filling seems dry, then it is done. Let it cool.
Homemade Dumpling Wrappers:
- Add all purpose flour to a mixing bowl.
- Mix freshly boiled water from a kettle with cold tap water to make ¾ cup (180ml) of hot water. Use an instant read digital thermometer to get the water to 120°F (50°C). Add either more hot water or more cold water to get the right temperature.
- Pour the water over the flour.
- Use a fork to mix the flour and water together until the water is absorbed and little pieces of dough start to form.
- Then use your hands to keep mixing the dough and use your fingers to gather up all the flour and little bits from the bowl and form it into a ball.
- When you have a firm ball with no bits left behind, transfer the dough to a lightly floured surface and knead it for about 3 minutes, until the dough is fairly smooth and not sticky.
- Place the ball of dough into a bowl, cover with a lid or damp towel and leave to rest for 60 minutes.
- After 60 minutes cut the dough into four parts.
- Take one of the parts and roll it out on a lightly floured surface until you have a thin sheet. Lightly dust the dough with flour while rolling it out to prevent your rolling pin from sticking.
- Use a cookie cutter to cut out circles in your thin sheet of dough.
- Then roll out the leftover dough and cut out more circles.
- Repeat until you don't have enough dough to cut out another circle.
- Then gently roll out each of your circles until they are thin and round. They don't have to be perfect circles. If needed, use a light dusting of flour to prevent sticking.
- Place them onto a parchment lined baking sheet.
- Repeat the process with each of the other three pieces of dough, until all the dough is used and you have around 30 dumpling wrappers.
Assembling:
- Place 1 tablespoon of filling in the center of a dumpling wrapper.
- Then fold the wrapper in half, bringing one outer edge over the filling to meet the opposite outer edge.
- Run your fingers along where the edges meet, pinching the two edges together to seal the dumpling.
- Then gently pull the two opposite ends of the dumpling towards each other to meet and stick together. The dumpling will form into a circle shape, like a flower.
- Pinch the ends together to make them stick.
- Place the dumpling back onto the parchment lined tray.
- Repeat the process to stuff the other dumpling wrappers.
Frying and Steaming:
- In a frying pan or skillet on medium heat, add 1 tablespoon sesame oil, then use a paper towel to spread the oil and grease the whole pan.
- Add 8 dumplings to the pan (or as many as comfortably fit into your pan) and fry for 2-3 minutes to brown and crisp the bottom of the dumplings.
- Then add ½ cup water to the pan, so that the bottoms of the dumplings are in water.
- Place a lid on the pan and let them steam for 5-6 minutes, or until all the water has cooked off.
- Then remove the lid and fry for a minute more to crisp the bottoms of the dumplings.
- Repeat with the next batch.
Dipping Sauce:
- Add toasted sesame oil, maple syrup, soy sauce, rice vinegar and garlic powder to a measuring jug and whisk it into a dipping sauce.
Serving:
- Serve your dumplings sprinkled with sesame seeds and chopped spring onions, with the dipping sauce on the side.
Notes
- Spring onions are also called green onions, salad onions or scallions.
- Cremini mushrooms are also called portobellini or baby bellas. You can also use white button mushrooms in this recipe.
- Dumpling wrappers. If you can buy ready-made dumpling wrappers then you can definitely use those to save time in this recipe.
- Dipping sauce. You can make a dipping sauce from scratch like we did, or just use hoisin sauce or sweet soy sauce as a ready made dipping sauce.
- Freezing: These dumplings freeze wonderfully well and this is the best way to store any dumplings you won’t eat right away. Before you steam/fry them all you have to do is place the uncooked dumplings on a parchment lined tray and place them into the freezer for 60 minutes. Then transfer them to a ziploc bag or a freezer safe container and freeze them for up to 3 months.When you’re ready for them you can proceed to cook them directly from frozen, following the cooking directions above, and just allowing an extra couple of minutes of steaming time.
- Nutritional information is per dumpling, including dipping sauce and homemade wrappers.
Thanks for sharing this recipe! What a great idea to fry it and bring out the fragrance first before wrapping! I used to wrap raw ingredients. ‘:P Next time will add some fresh water chestnuts for crunchiness! Thank you for the inspiration! =^.^=
My first attempt at making dumplings
I happened to have some dumpling wrappers in my freezer so although not a complete make, I can honestly say that these were easy to make ( I called in another pair of hands to fill the dumplings leaving me to fold and pinch- my helper was well fed in return ), simple to cook ( steamed perfectly in a frying pan covered with another frying pan ) and extremely tasty. Served with some kelp seasoned cauliflower rice and steamed greens with honey soy dressing.
Thanks for sharing this and I feel inspired to experiment with some other variations in filling.
Nom nom
Fantastic! So happy they were a success. Thanks for the awesome review!
Just made it. It’s insanely good. Thanks 😊
Yay! Thanks so much for posting!
We haven’t made these yet, but our neighbor did, and he shared them with us. They were amazing, and we wanted more, so asked him for the recipe. He said he got it here on loving it vegan. I just printed the recipe, and will be making these once I secure some fresh ginger. Thanks to Alison for sharing her recipe!
That’s awesome Victoria! So happy to hear that! Hope you will enjoy making them as well. 🙂
So delicious! Couldn’t believe how easy it is to actually make these!