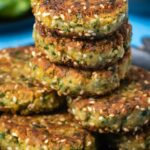
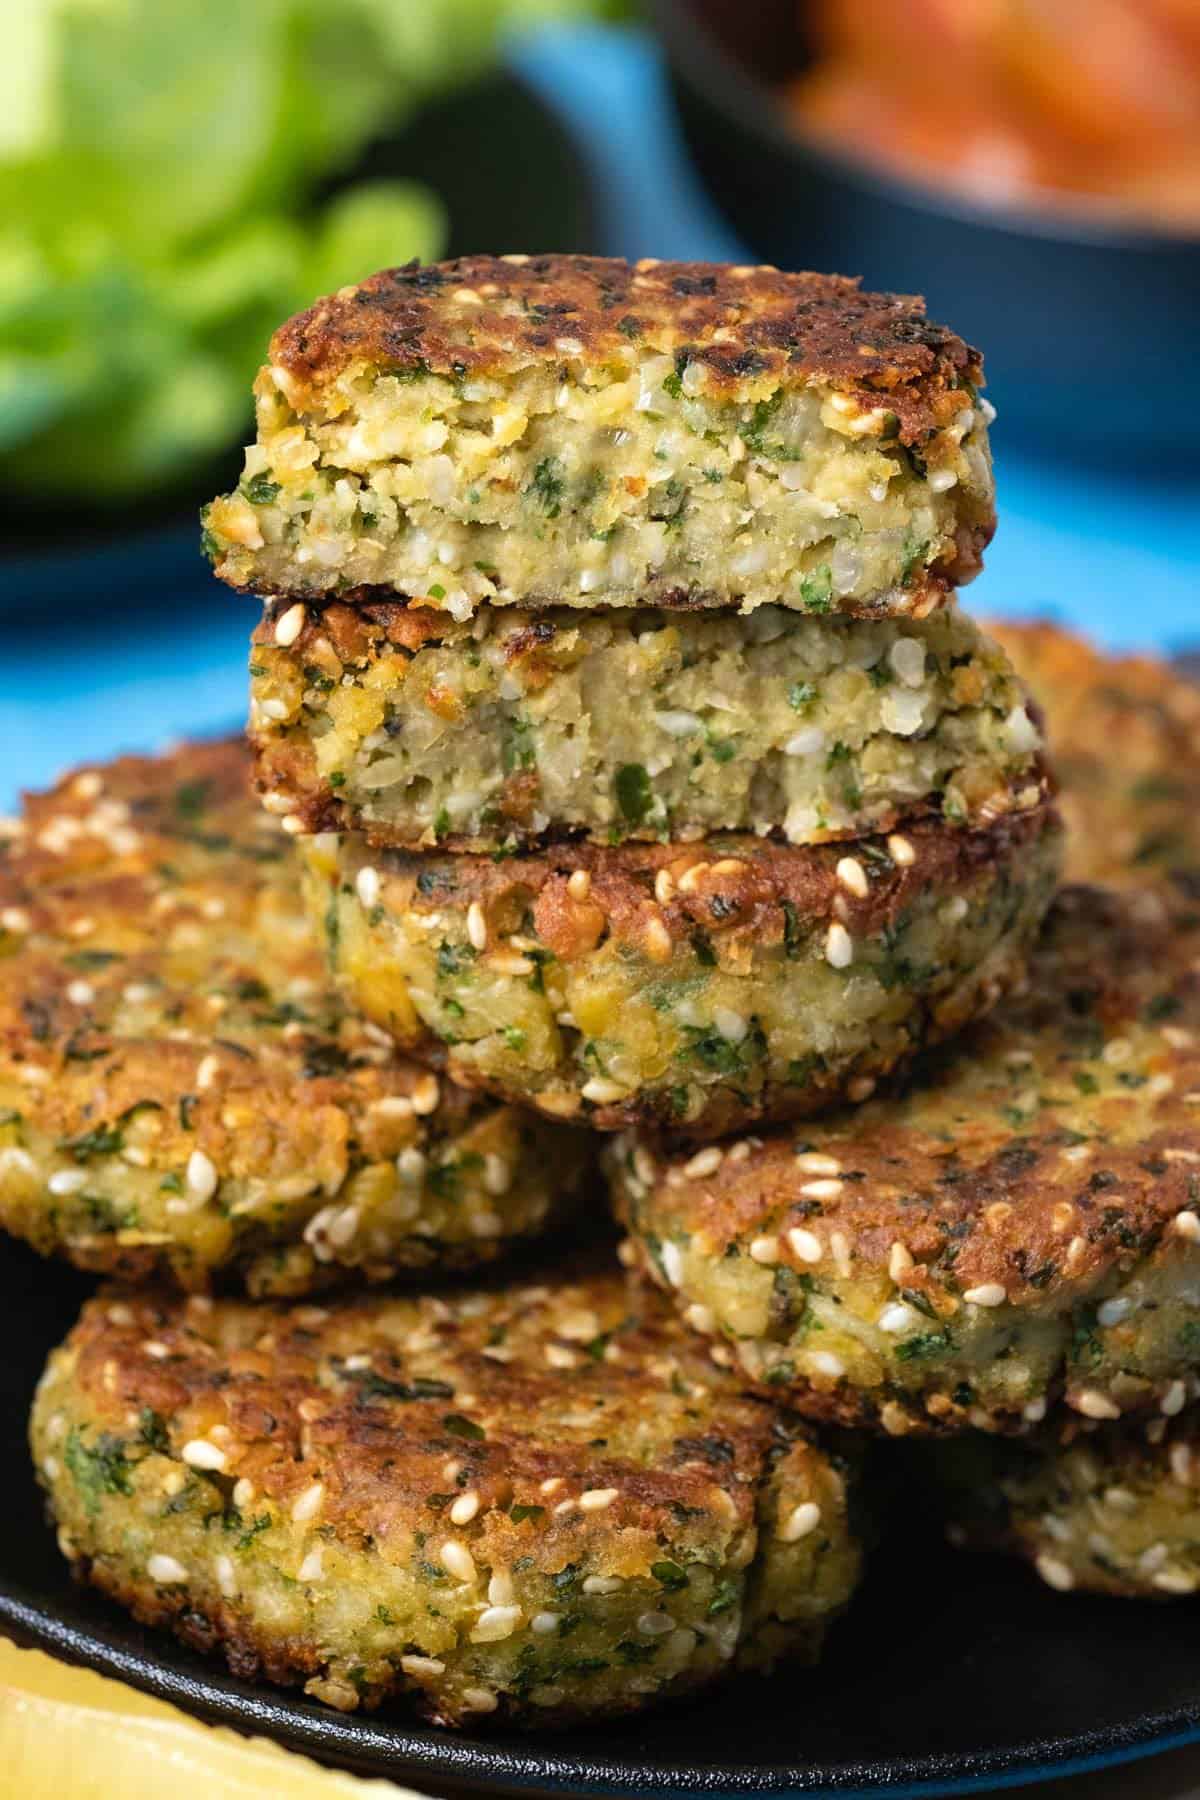
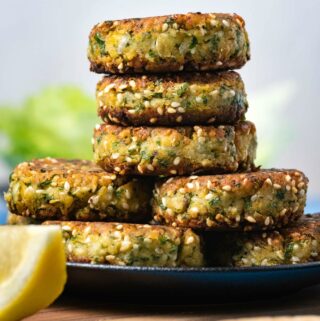
Crispy and delicious vegan falafel. Simple, flavorful, filling, and restaurant quality. Served with a delicious tahini sauce!

We lived in Dubai for 9 years and one of the major perks was the availability of falafel! Pretty much every shopping mall would have a place to buy a quick and easy (and totally delicious) falafel.
And with a special request or two (to leave off the yogurt sauce for instance) it could be entirely vegan.
Since we’re not in Dubai anymore and it’s not quite as easily available now, we needed a quick and easy recipe to make restaurant quality falafel at home.
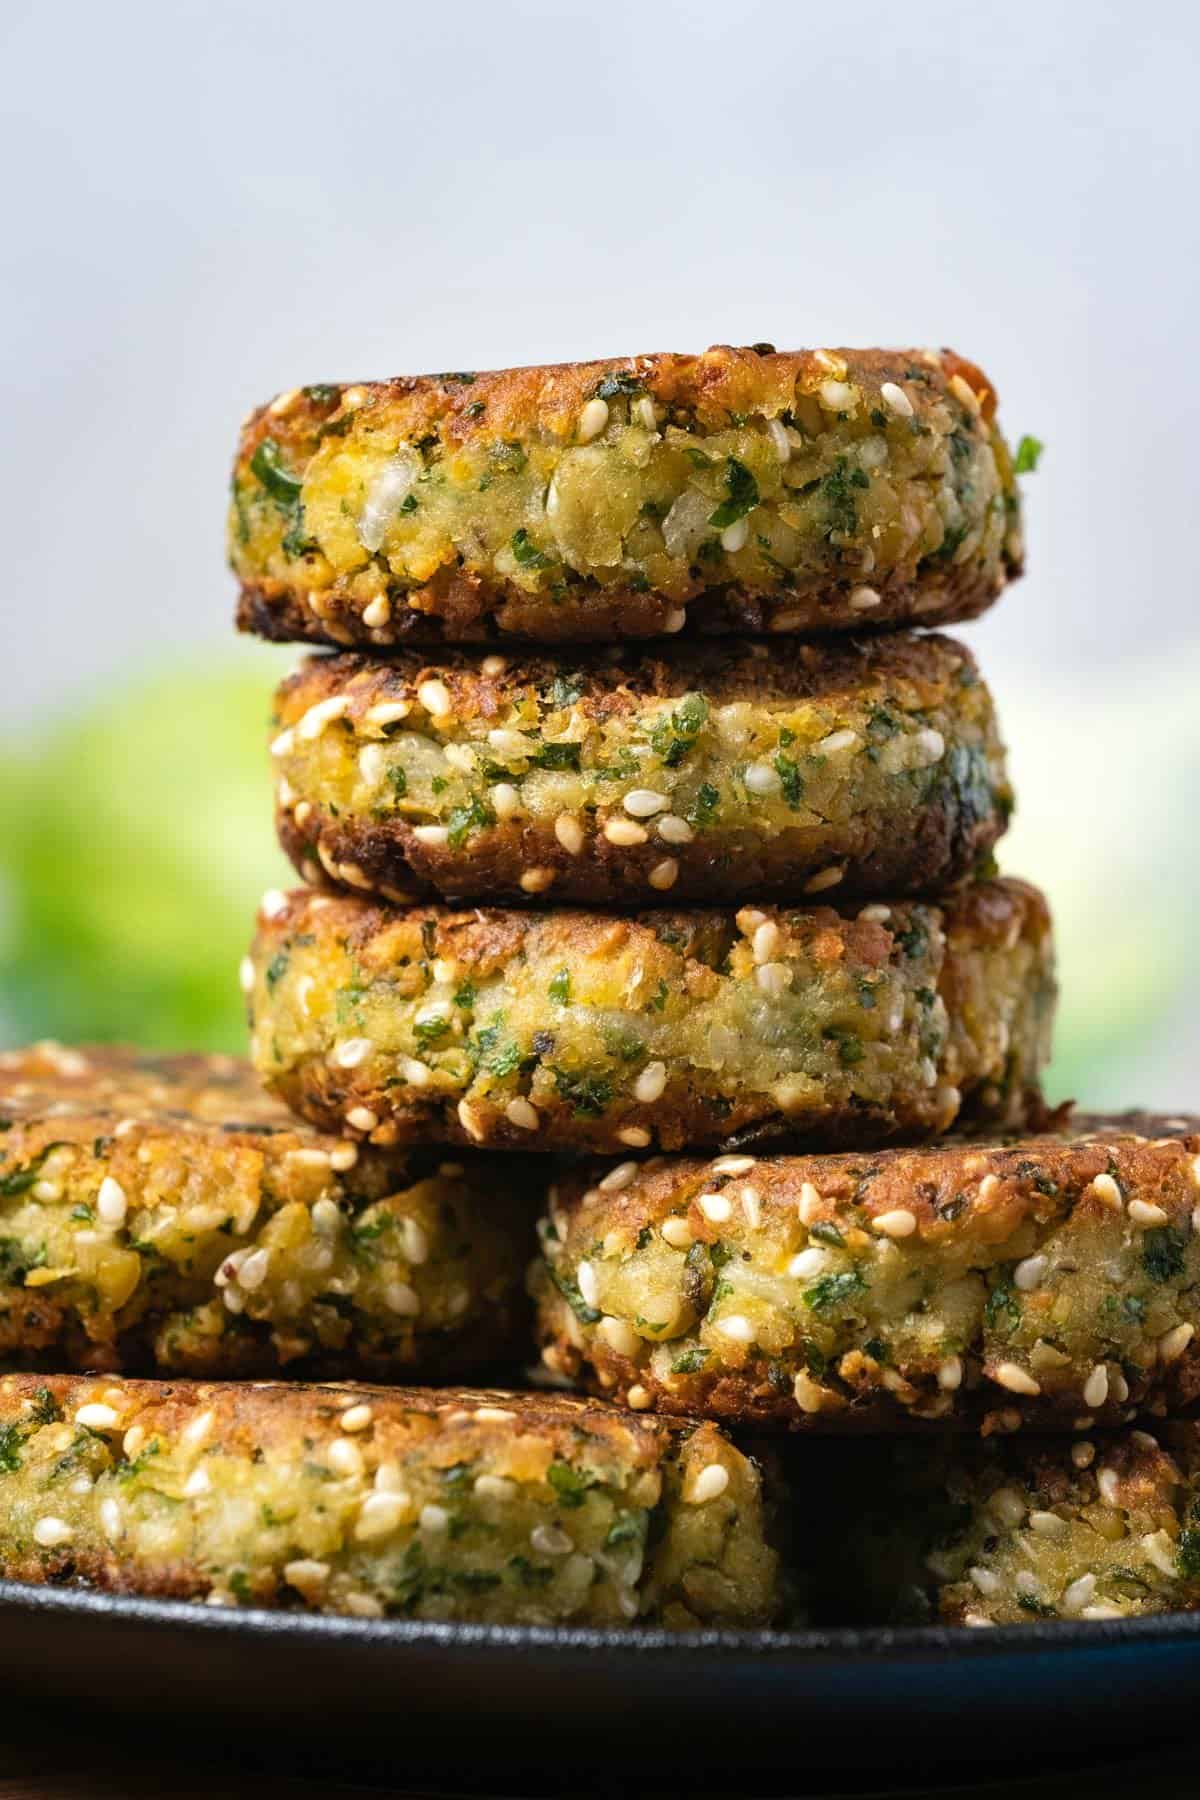
And this is it! This vegan falafel recipe is super easy, super quick and super delicious. Served with a fabulous tahini sauce your falafel cravings will be entirely satisfied.
And if you love delicious vegan wraps then also check out our vegan gyros!
Is Falafel Always Vegan?
Falafel is almost always vegan. But they’re often served in a wrap and the sauces added may not be vegan as they are sometimes yogurt based. But the falafels themselves are vegan.
How To Make Vegan Falafel
You will find full instructions and measurements in the recipe card at the bottom of the post. This is a summary of the process to go along with the process photos.
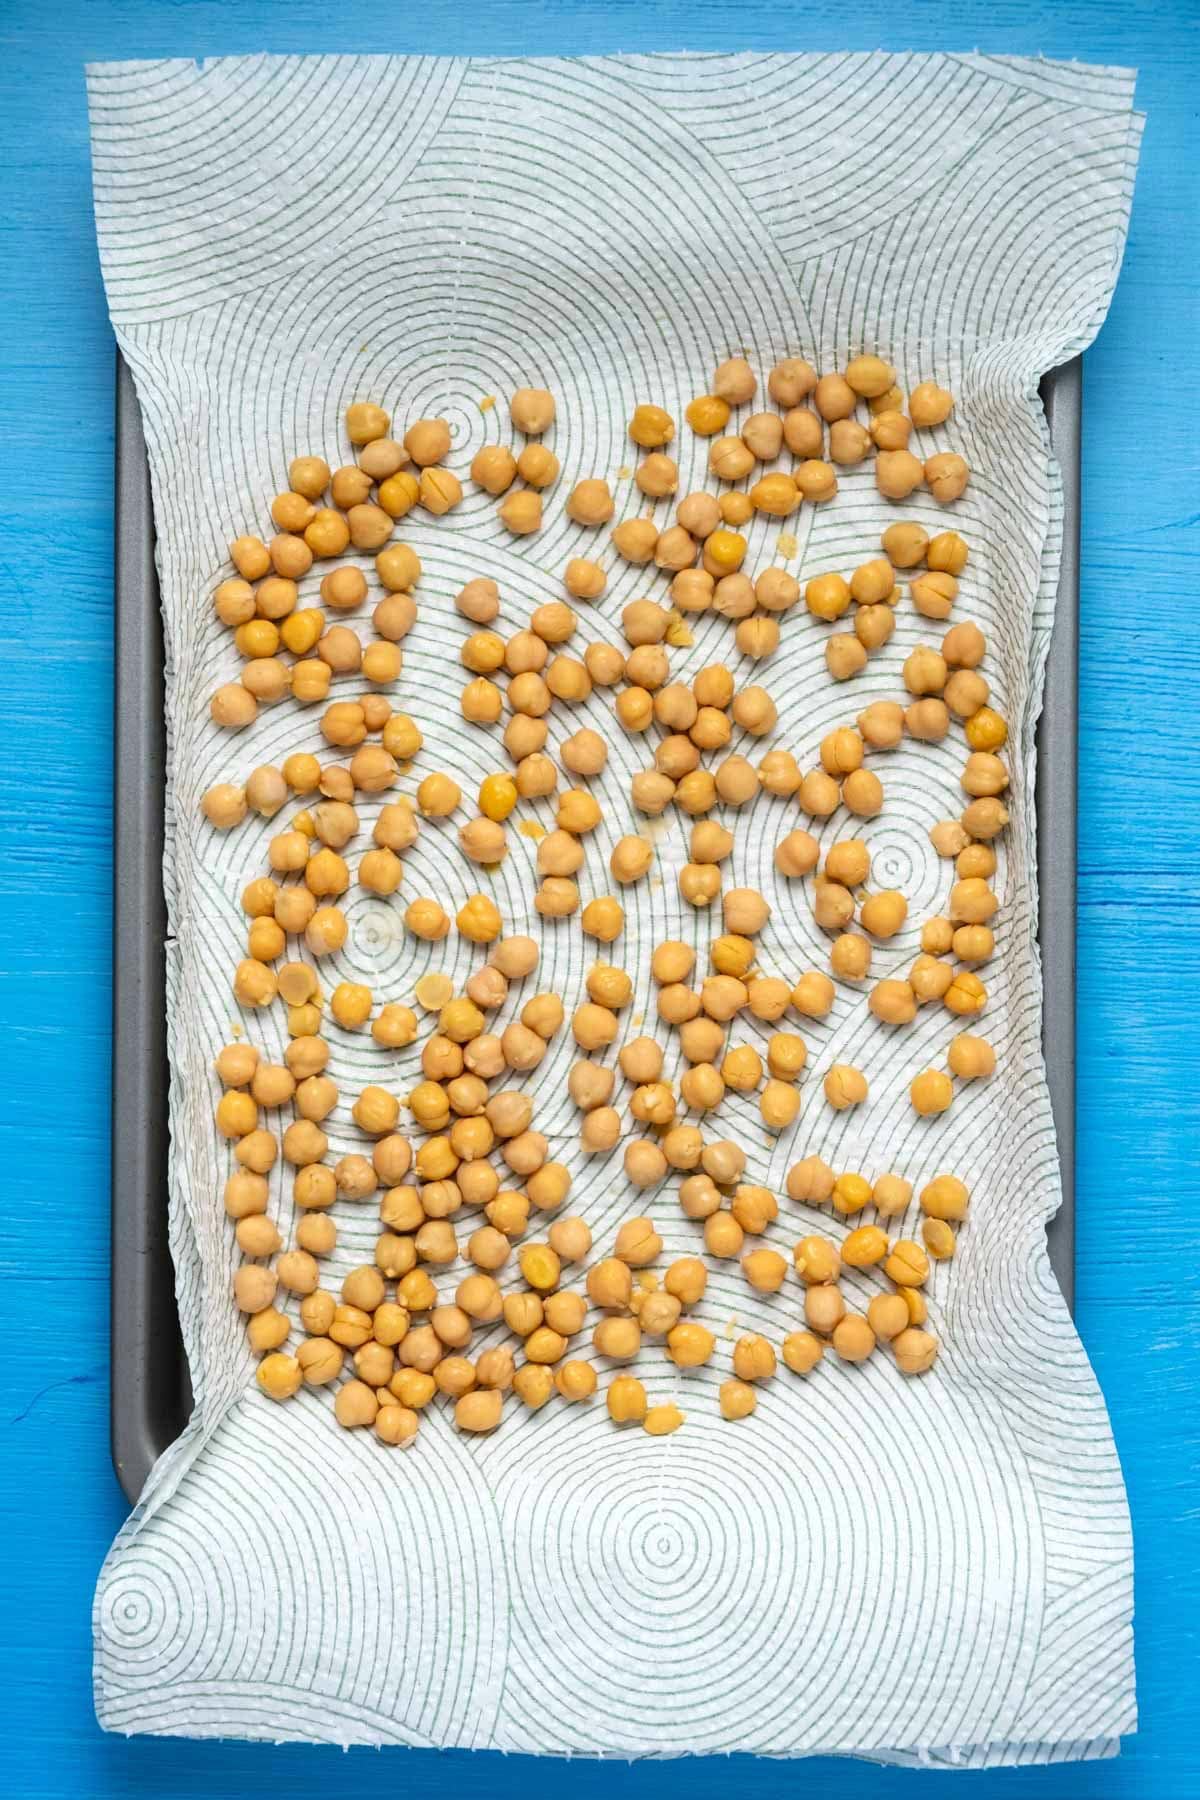
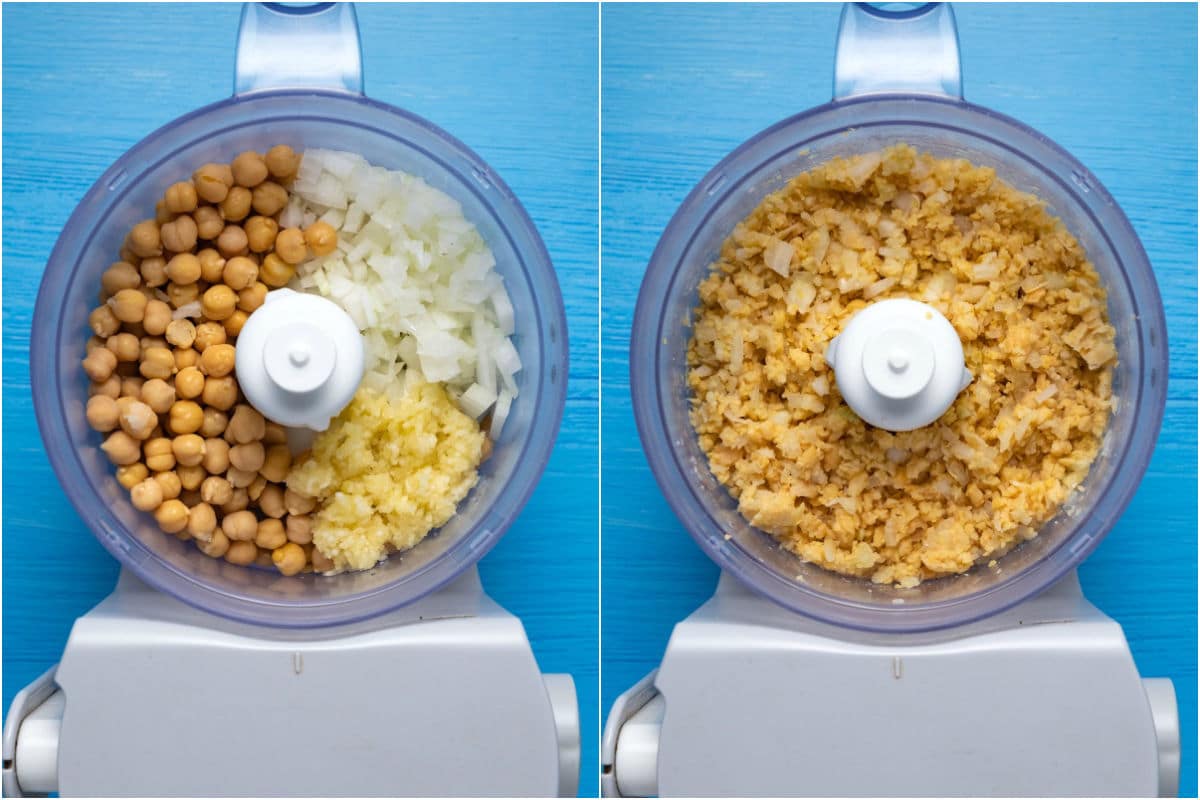
- Drain canned chickpeas and dry them on paper towels.
- Add the chickpeas to the food processor along with chopped onion and crushed garlic and process until roughly chopped.
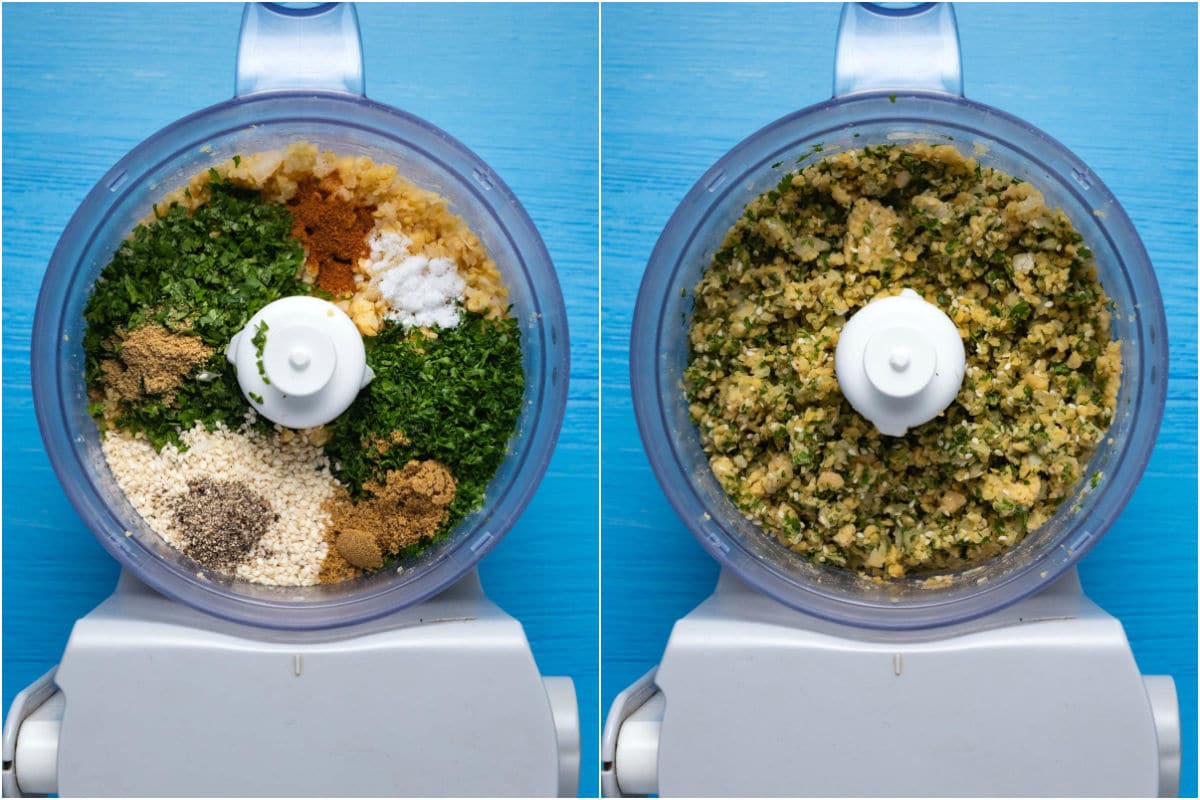
- Add finely chopped cilantro and parsley, white sesame seeds, salt, ground black pepper, cayenne pepper, ground coriander and cumin and process again until roughly mixed.
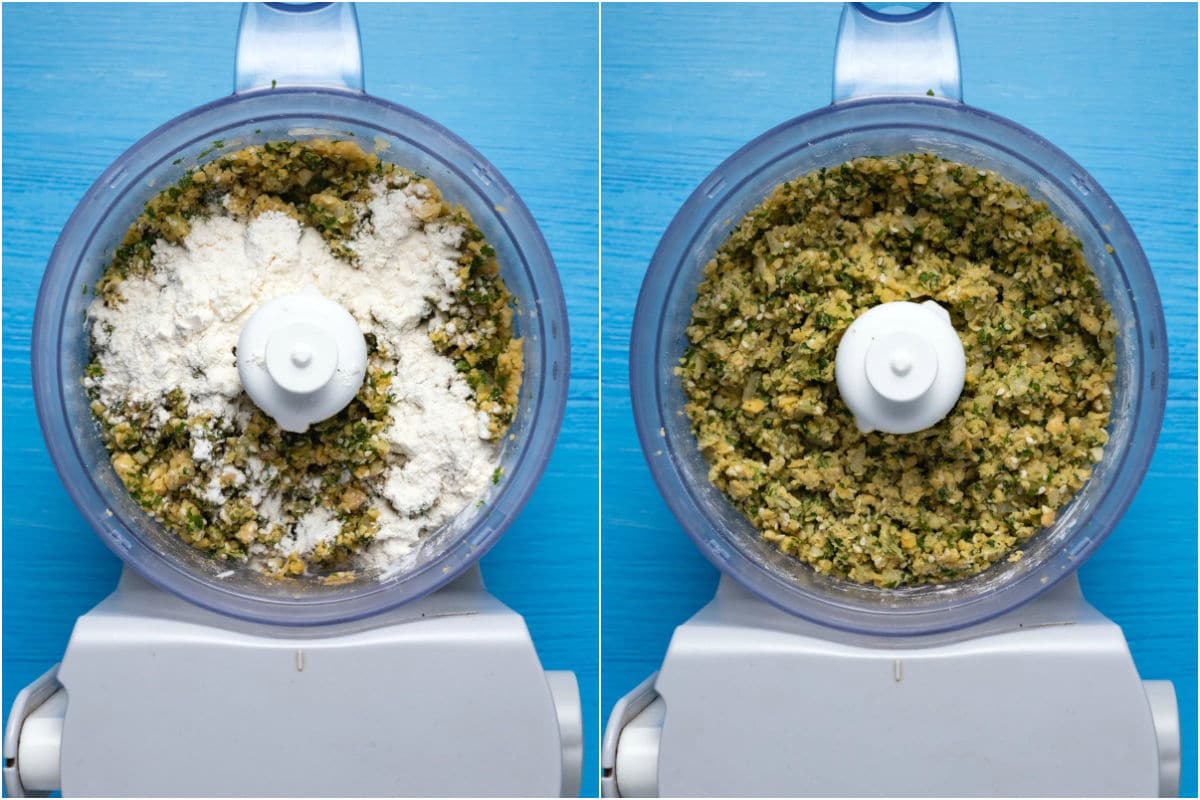
- Add in all purpose flour and process briefly.
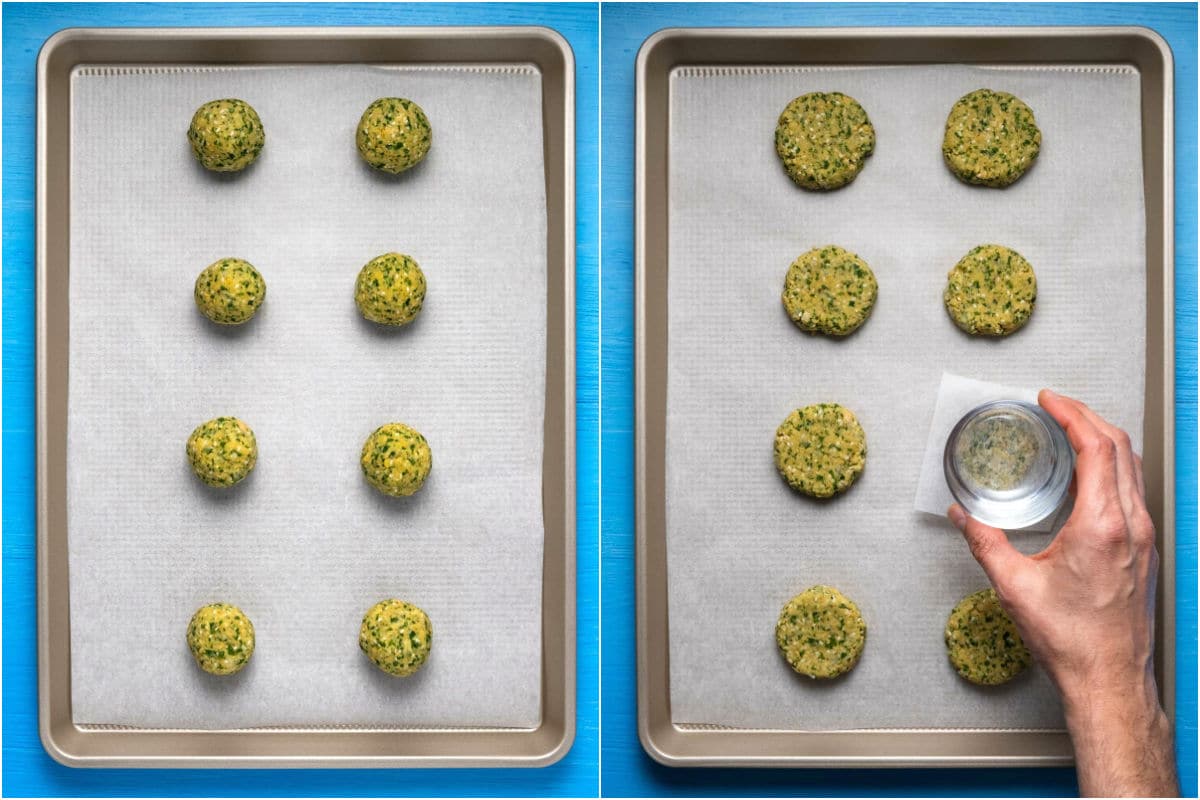
- Roll the mixture into balls and place them onto a parchment lined baking tray.
- Use a small square of parchment paper and the bottom of a glass to gently flatten the balls.
- Place into the freezer for 20 minutes to firm up.
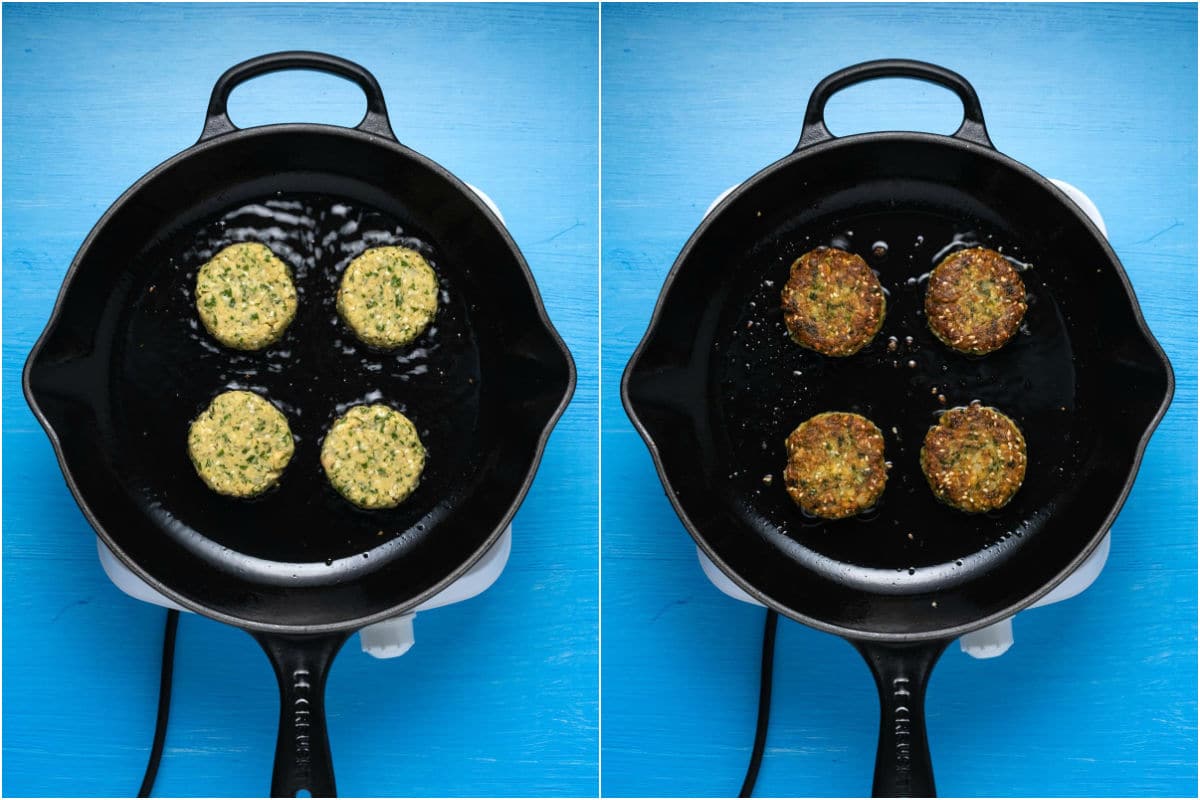
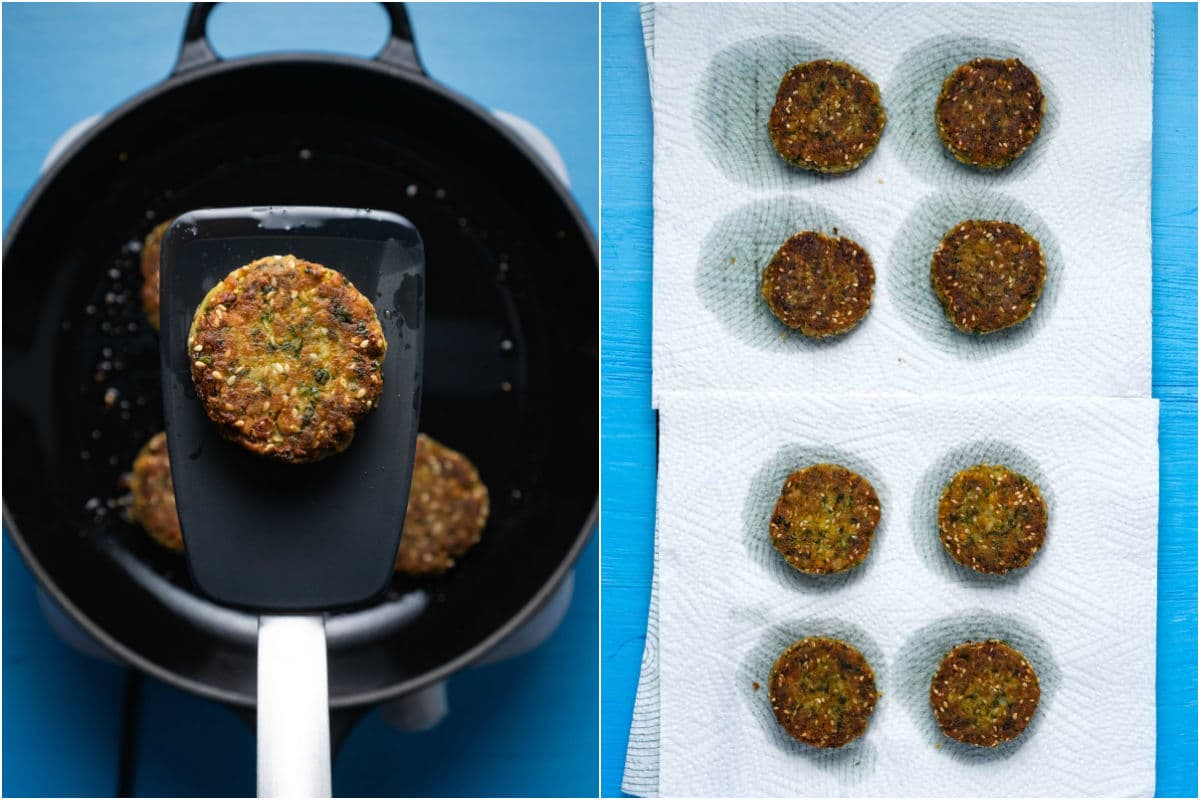
- Add olive oil to a frying pan and when the oil is hot, add in 4 falafels (providing your pan is big enough). Fry until crispy and browned on each side, about 3 minutes each side.
- Place the falafels onto paper towels to absorb excess oil.
- Repeat for the second 4 falafel.
Chef’s Tips
Dry the chickpeas on a paper towel. It’s important that you drain the canned chickpeas really well, and ideally also dry them off more using paper towels. We’re not using a lot of flour in this recipe so making sure the canned chickpeas are well drained and dried off keeps your falafel from being too wet inside.
Place into the freezer to set for 20 minutes before frying. This enables them to be really firm and maintain their shape perfectly when frying.
Make sure the oil is hot before adding the falafels. When the falafels go into the frying pan they should be sizzling. This helps to seal off the falafel so they hold their shape really well and don’t stick to the pan.
Make them gluten-free. You can easily make these falafels gluten-free by using a gluten-free all purpose flour blend that is meant to replace regular wheat flour.
Bake them instead. You can also bake these falafel. Place them on a parchment lined baking tray and bake at 350°F for 15 minutes then flip them and bake on the other side for 10-15 mins.
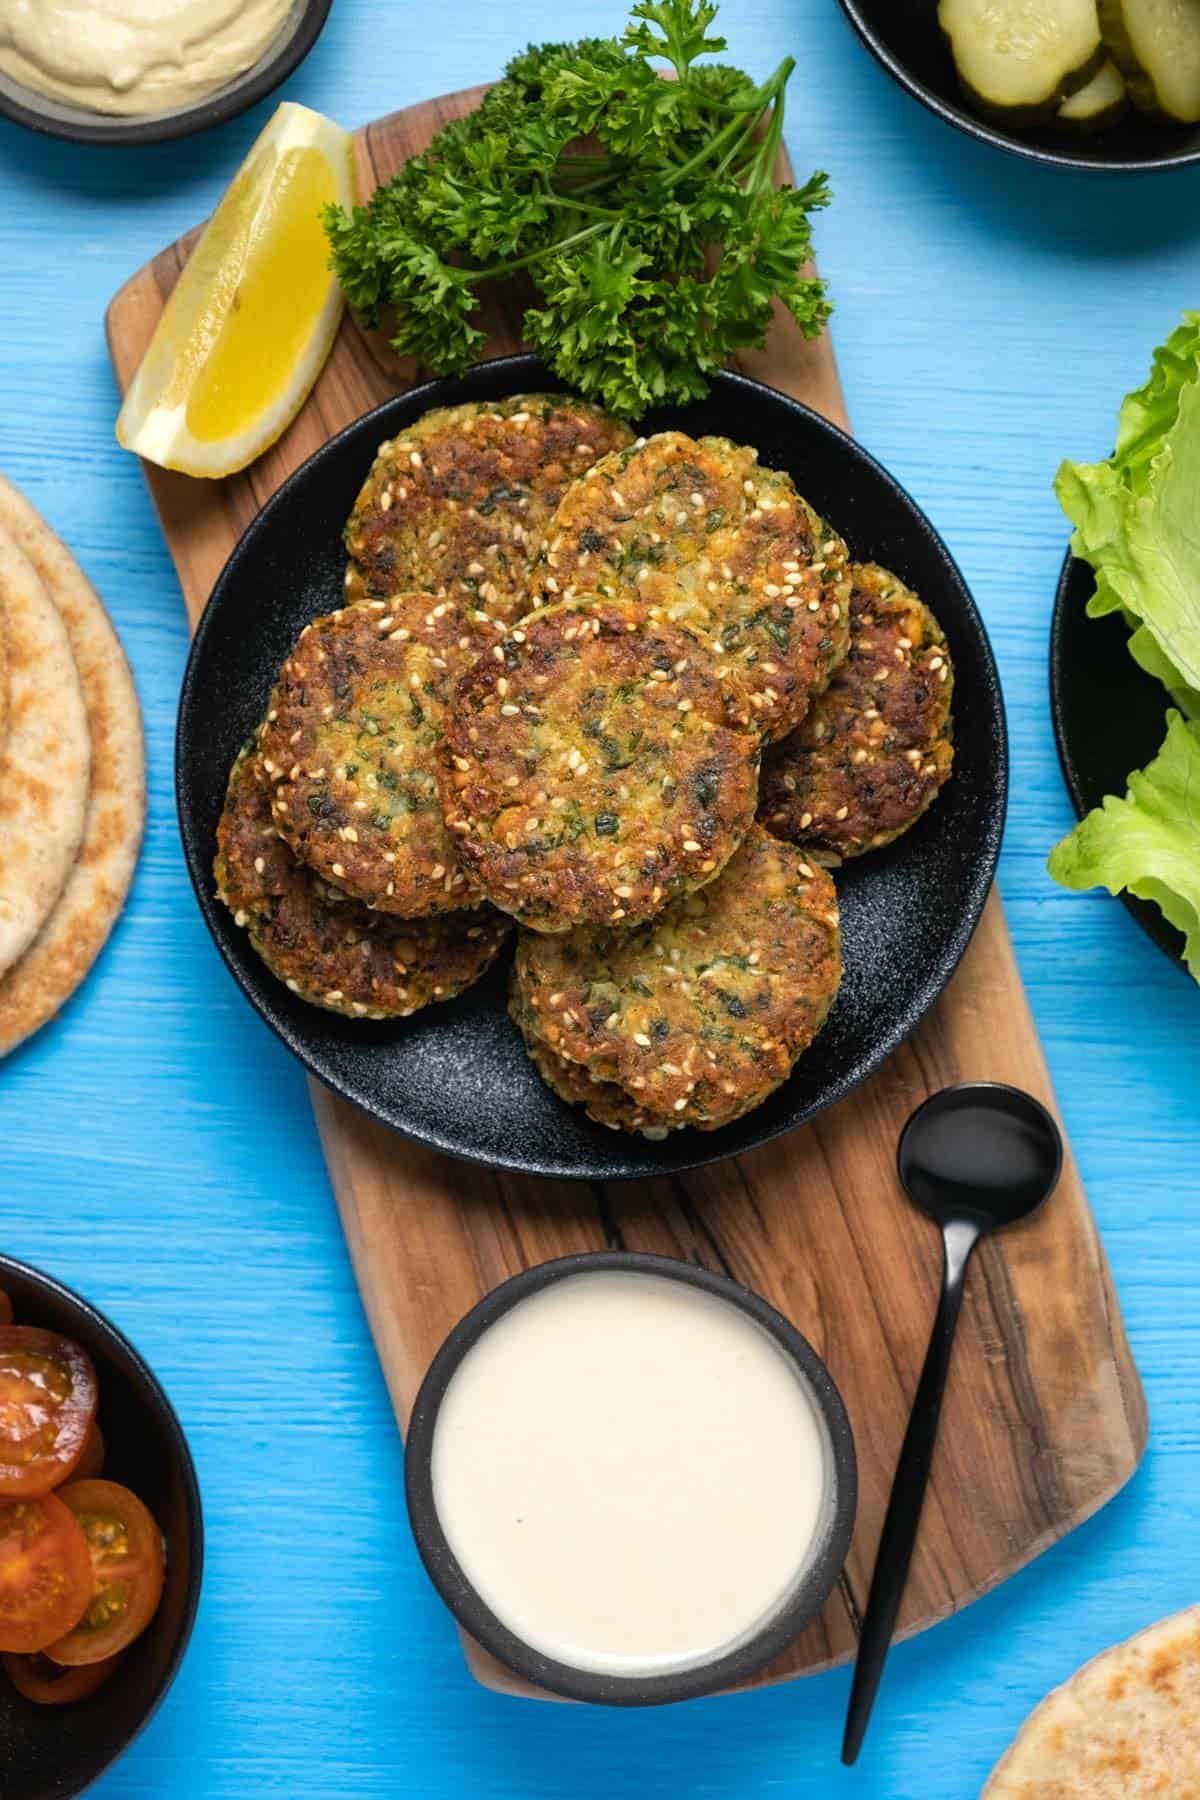
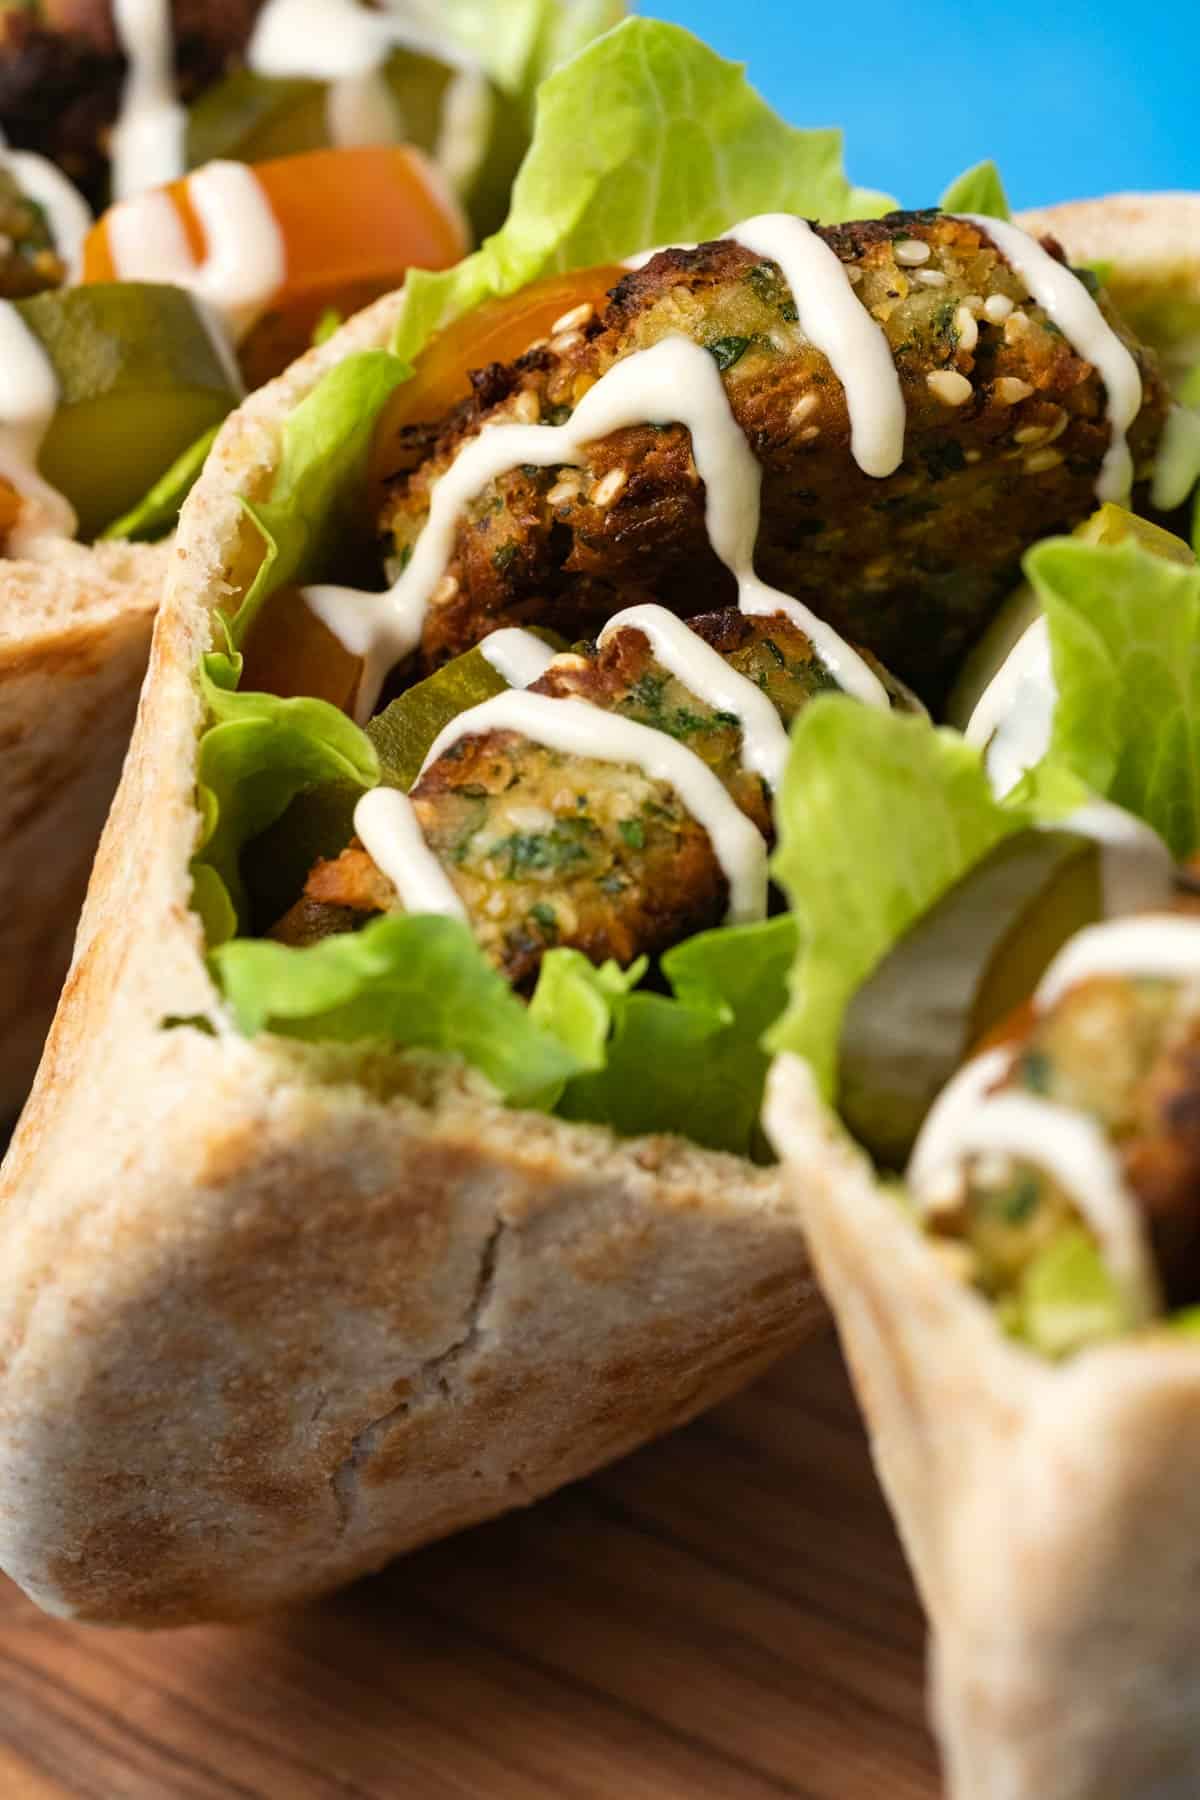
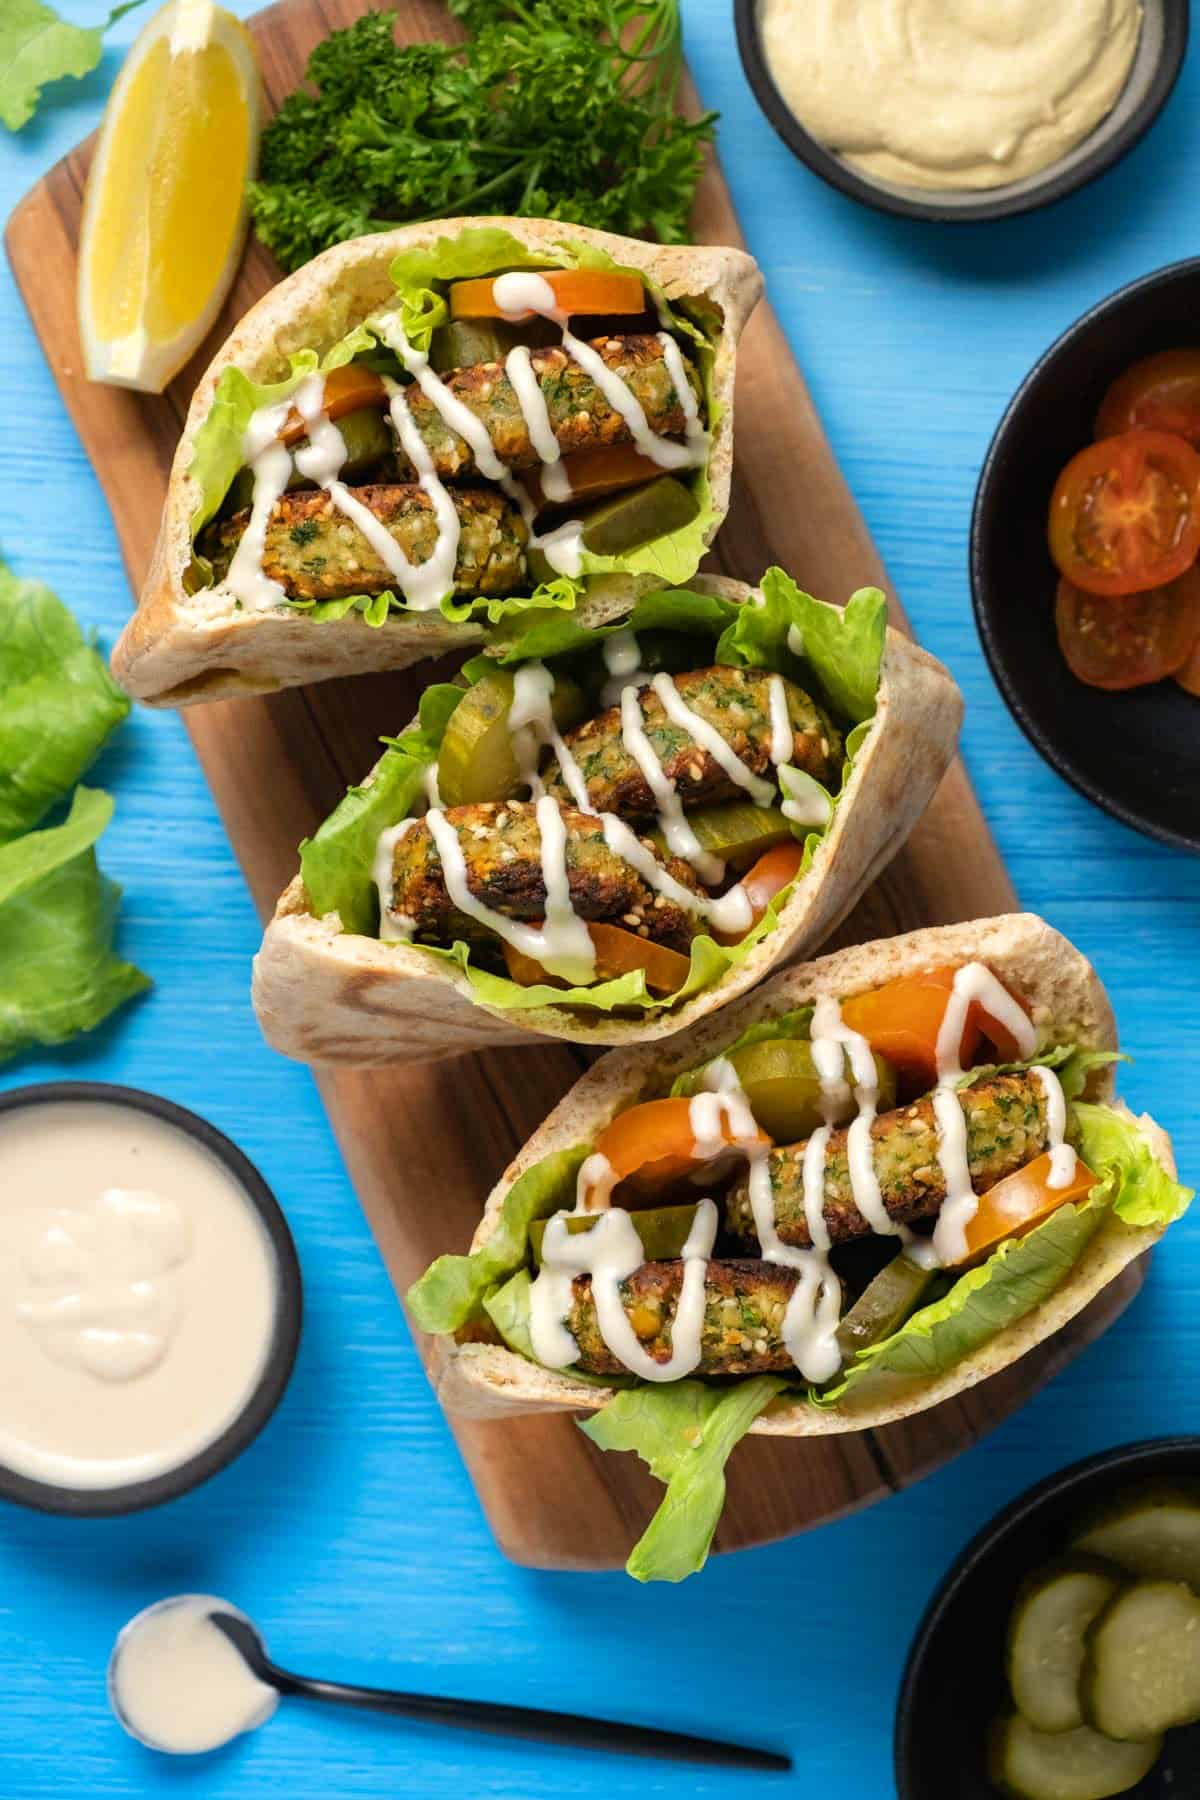
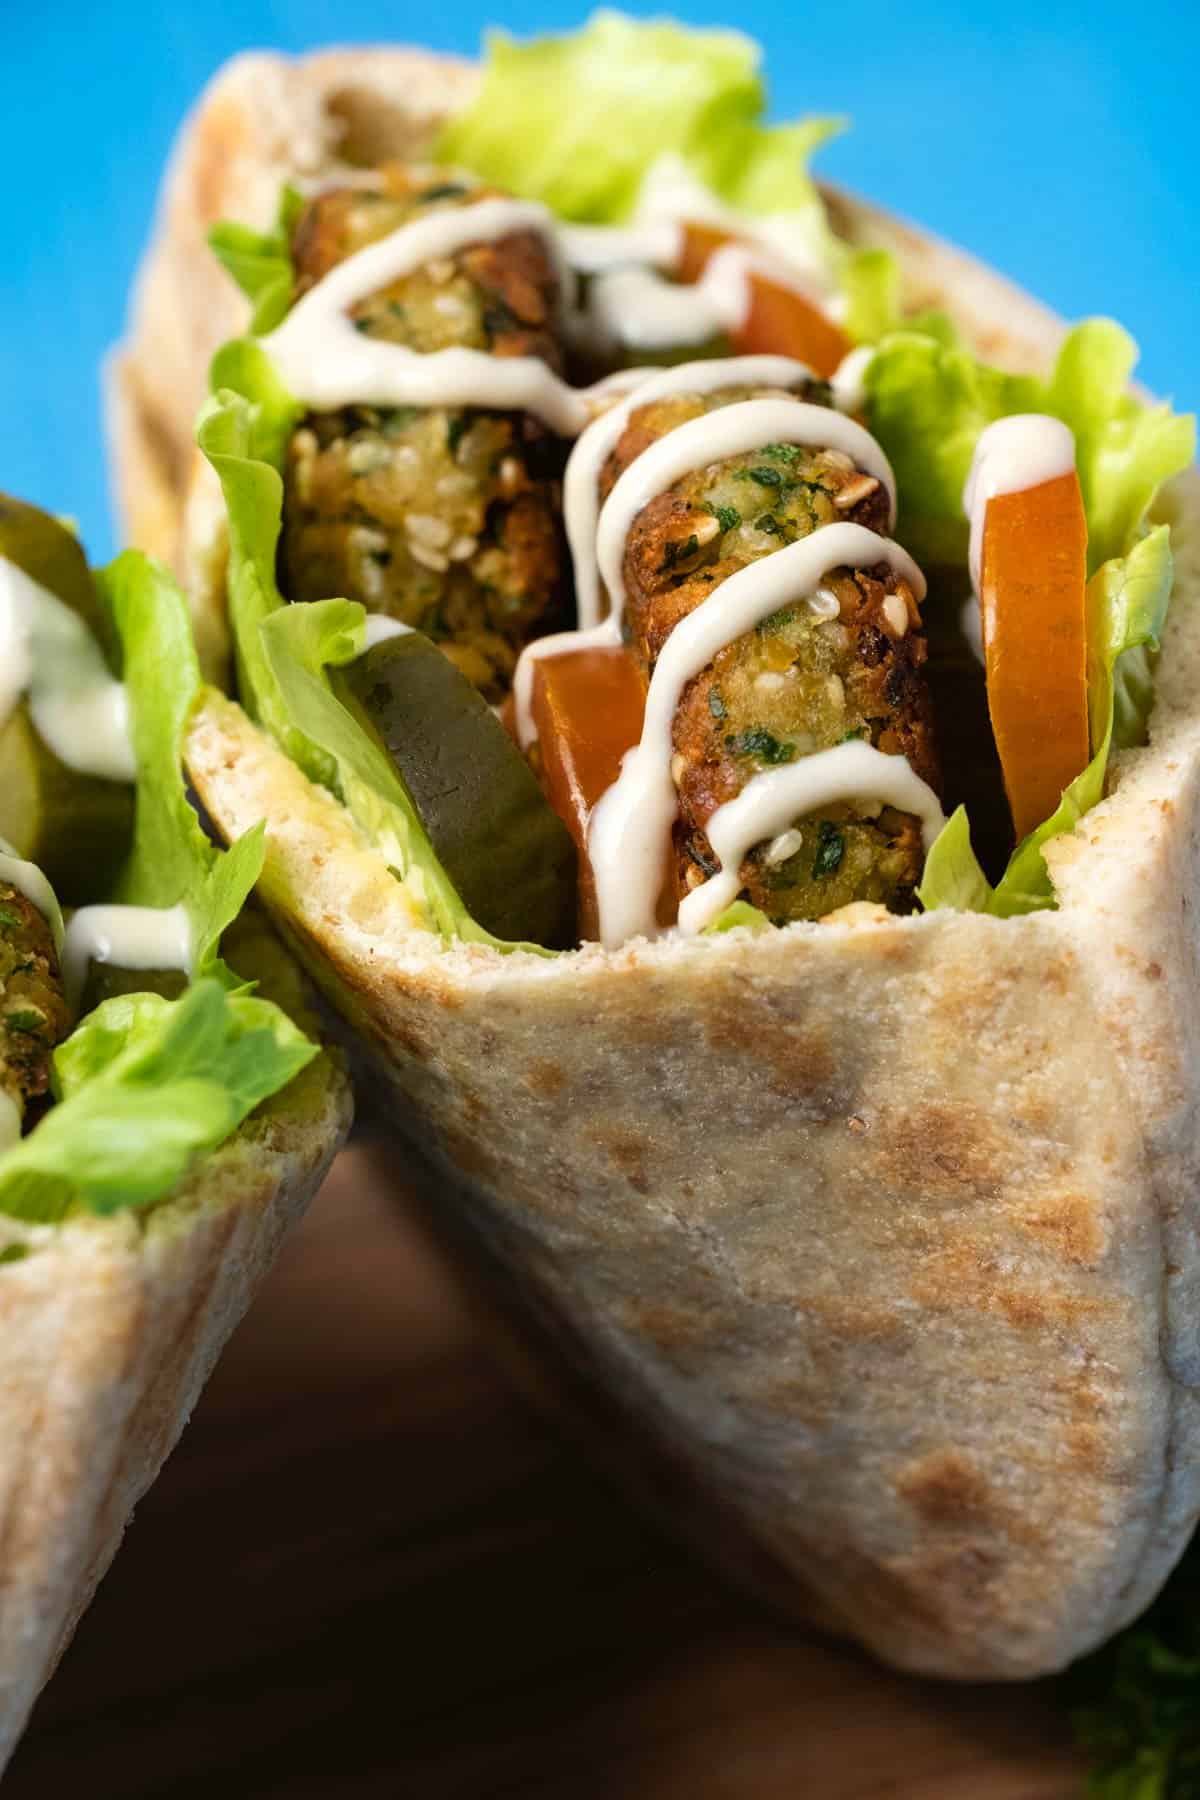
How To Serve Falafel
Serve your falafels in pita breads with lettuce, sliced cherry tomatoes, pickles, and hummus, with a drizzle of tahini sauce over the top.
Another great sauce option is vegan tzatziki which also pairs well with falafel.
Storing and Freezing
Leftover falafel keeps very well in the fridge for 4-5 days.
They are also freezer friendly and can be frozen before frying or after. Check out this article from The Spruce Eats with lots of tips on freezing and reheating falafel.
More Delicious Chickpea Recipes
- Vegan Chickpea Burgers
- Vegan Chickpea Curry
- Vegan Chickpea Salad
- Vegan Meatloaf
- Chickpea Meatballs
- Vegan Tuna (made with chickpeas!)
Did you make this recipe? Be sure to leave a comment and rating below!
Vegan Falafel
Ingredients
For the Falafel:
- 15 ounce Can Chickpeas drained, or 1 and ½ cups cooked chickpeas
- ½ Medium Onion White, Yellow or Brown, Chopped
- 3 Cloves Garlic Crushed
- ⅓ cup Cilantro Finely Chopped
- ⅓ cup Parsley Finely Chopped
- 2 Tbsp White Sesame Seeds
- ½ tsp Salt
- ½ tsp Ground Black Pepper
- ¼ tsp Cayenne Pepper
- ¼ tsp Ground Coriander
- 1 tsp Cumin
- 2 Tbsp All Purpose Flour
- 4 Tbsp Olive Oil Divided, For Frying
For Serving (Optional):
- Pita Breads
- Lettuce
- Cherry Tomatoes Sliced
- Pickles Sliced
- Hummus
- Tahini Sauce
Instructions
- Drain canned chickpeas and dry them on paper towels. Add the chickpeas to the food processor along with the chopped onion and crushed garlic and process until roughly chopped.
- Add the finely chopped cilantro and parsley, white sesame seeds, salt, ground black pepper, cayenne pepper, ground coriander and cumin and process again until roughly mixed.
- Add the all purpose flour and process briefly.
- Roll the mixture into balls and place them onto a parchment lined baking tray.
- Use a small square of parchment paper and the bottom of a glass to gently flatten the balls.
- Place into the freezer for 20 minutes to firm up.
- Add 2 Tbsp olive oil to a frying pan and when the oil is hot, add in 4 falafels (providing your pan is big enough to fit all 4). Fry until crispy and browned on each side, about 3 minutes each side.
- Place the falafels onto paper towels to absorb excess oil.
- Add the remaining 2 Tbsp olive oil to the pan and when hot, add in the remaining 4 falafels and cook until browned and crispy.
- Serve with pita breads, lettuce, cherry tomatoes, pickles, hummus and tahini sauce.
Notes
- Dry the chickpeas on a paper towel. It’s important that you drain the canned chickpeas really well, and ideally also dry them off more using paper towels. We’re not using a lot of flour in this recipe so making sure the canned chickpeas are well drained and dried off keeps your falafel from being wet inside.
- Make them gluten-free. You can easily make these falafels gluten-free by using a gluten-free all purpose flour blend that is meant to replace regular wheat flour.
- Bake them instead. You can also bake these falafel. Place them on a parchment lined baking tray and bake at 350°F for 15 minutes then flip them and bake on the other side for 10-15 mins.
- Storing: Leftover falafel keeps very well in the fridge for 4-5 days.
- Prep time includes the time spent chilling in the freezer.
- Nutritional information is for falafel only and excludes anything they’re served with.
- This recipe was first published in May 2017 but has now been updated with better photos and an improved method.
Your recipe is absolute heaven, brought me back to Jerusalem from six years ago with my kids! Unfortunately only my eldest and I made it to Jerusalem with an Auntie due to the turmoil at the time. Emma said this is so good mom, like what we had. My son will be doing a video of making this recipe for his communication class! So glad I didn’t have to search for another recipe to try. Don’t think I will use another boxed falafel!!
That’s amazing Beth! Thanks for sharing and for your great review!
I made these in the air fryer, they turned out much better. I brushed with oil, 4 minutes on one side, then flipped them over, 6-7 minutes on the other side, also brushed very lightly with oil..my af sets at 380 automatically, but I sm sure 350 would be fine..
Thanks so much for sharing and for your amazing review!
Absolutely delicious – this is the fourth recipe I’ve tried and the one I’ll be sticking with. Gluten free tip: I used dried (and soaked) chickpeas instead of canned, and didn’t need to add any flour. Just wizzed the ingredients together, froze for 20 mins as recommended and fried. Bloody lovely, thanks Alison! xxx
Awesome! Thanks so much for sharing and the great review!
If baking, do they still need to go in the freezer first?
You can probably skip it in that case. 🙂
Do you think oat flour would work?
Hi Lesley, I haven’t tried it but I don’t think so.
Air fryer method?
Hi, I haven’t made these in the air fryer, but this guide to making anything in the air fryer from Taste of Home should help!
I did, they turned out great. 4 minutes in one side, 6-7 minutes on the other side. I lightly brushed both sides with oil–for browning..360 degrees
The flavor is amazing on these and they are easy to make. Even after draining the chickpeas, drying with paper towels and adding extra flour, they are still too soft. What do you recommend?
Hi Jane, you could try adding more flour again and then also that time in the freezer is essential to get them to firm up enough to fry.
These falafels are very good and easy to make, however the second time round we tried to make it gluten free with chickpea flour *SPOILER ALERT* it did not work. We tried frying it and it started breaking apart and was over cooked on the outside uncooked on the inside.Do not recommend chickpea flour as a gluten free substitute! Overall recipe is great and and I really recommend it!
Hi Lucy-Marley, for gluten-free you could try a gluten-free all purpose flour blend instead. So glad they worked out great the first time with regular flour though, thanks for sharing! 🙂