
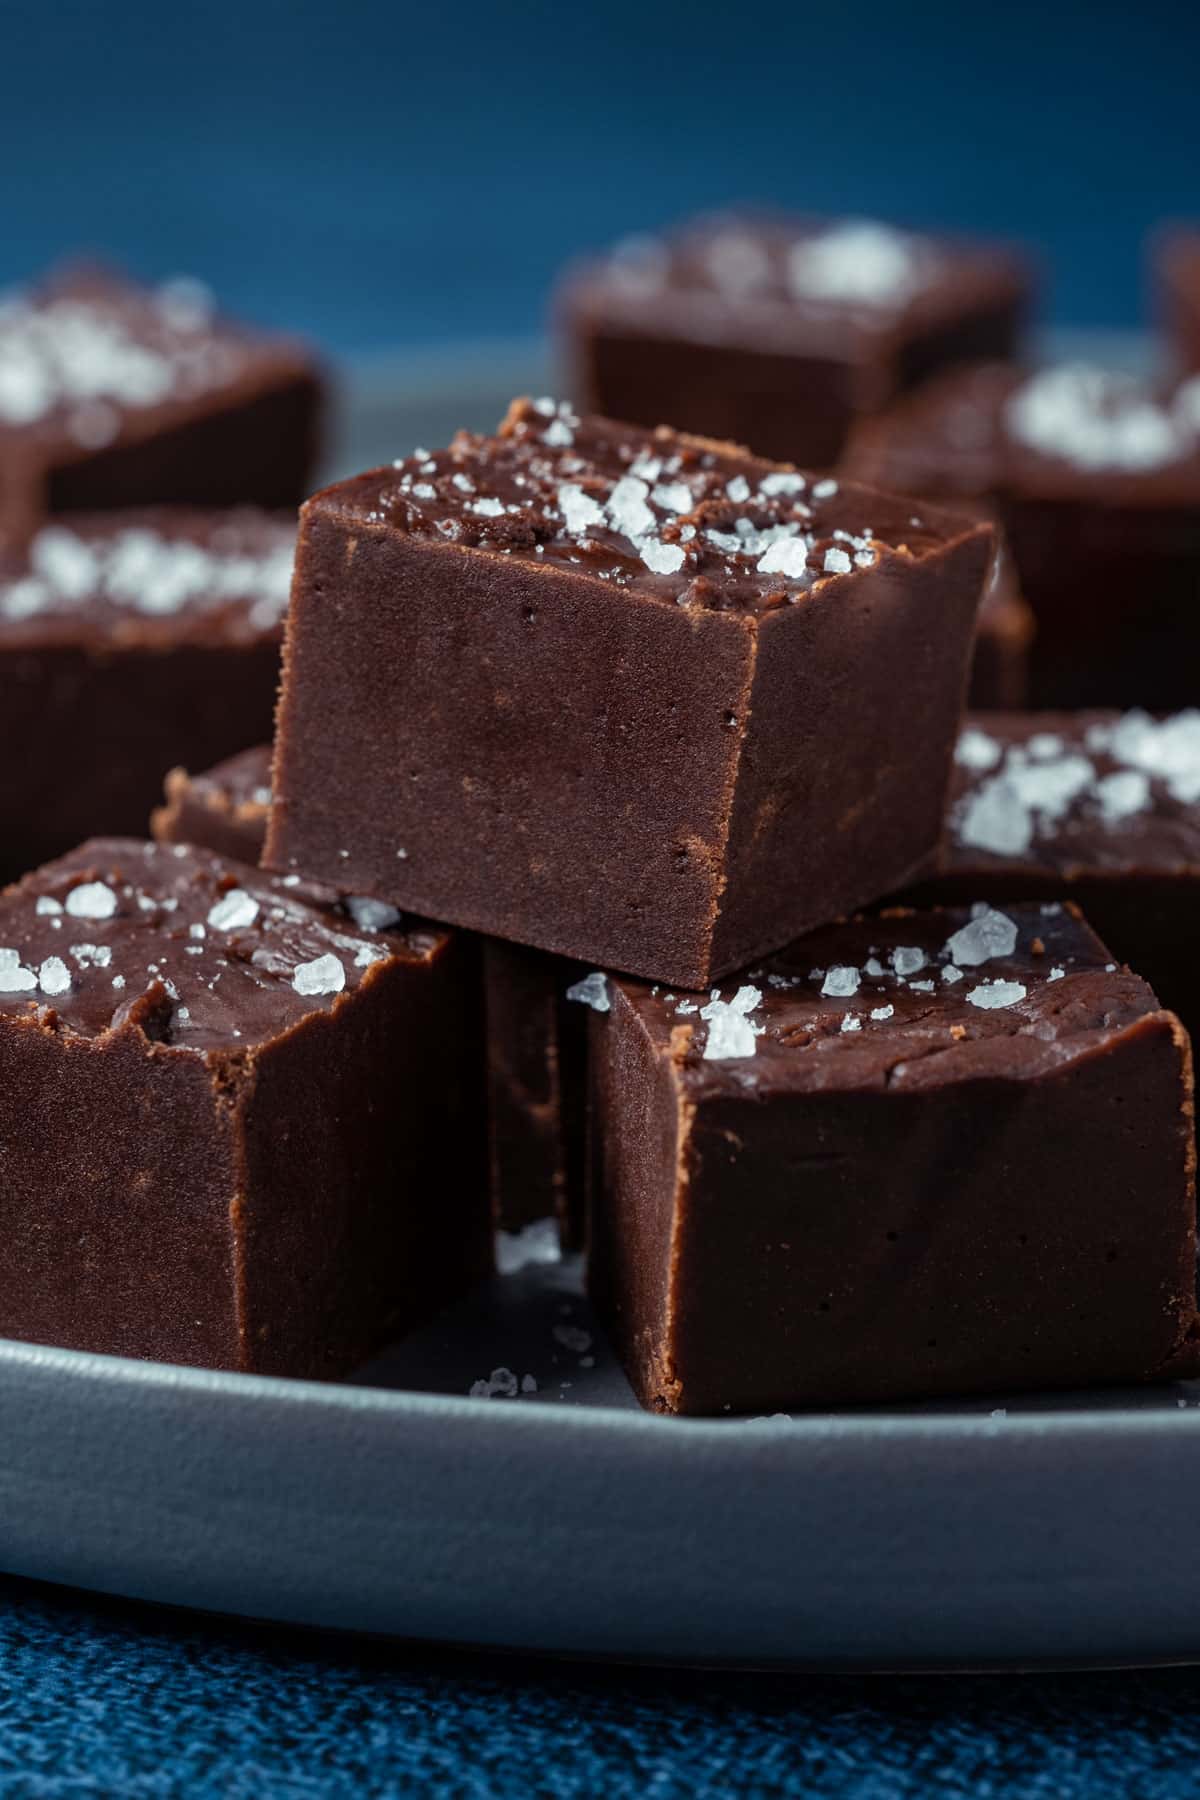
This vegan fudge is ultra rich, smooth and creamy and just melts in your mouth. It’s extremely easy to make with 6 simple ingredients.
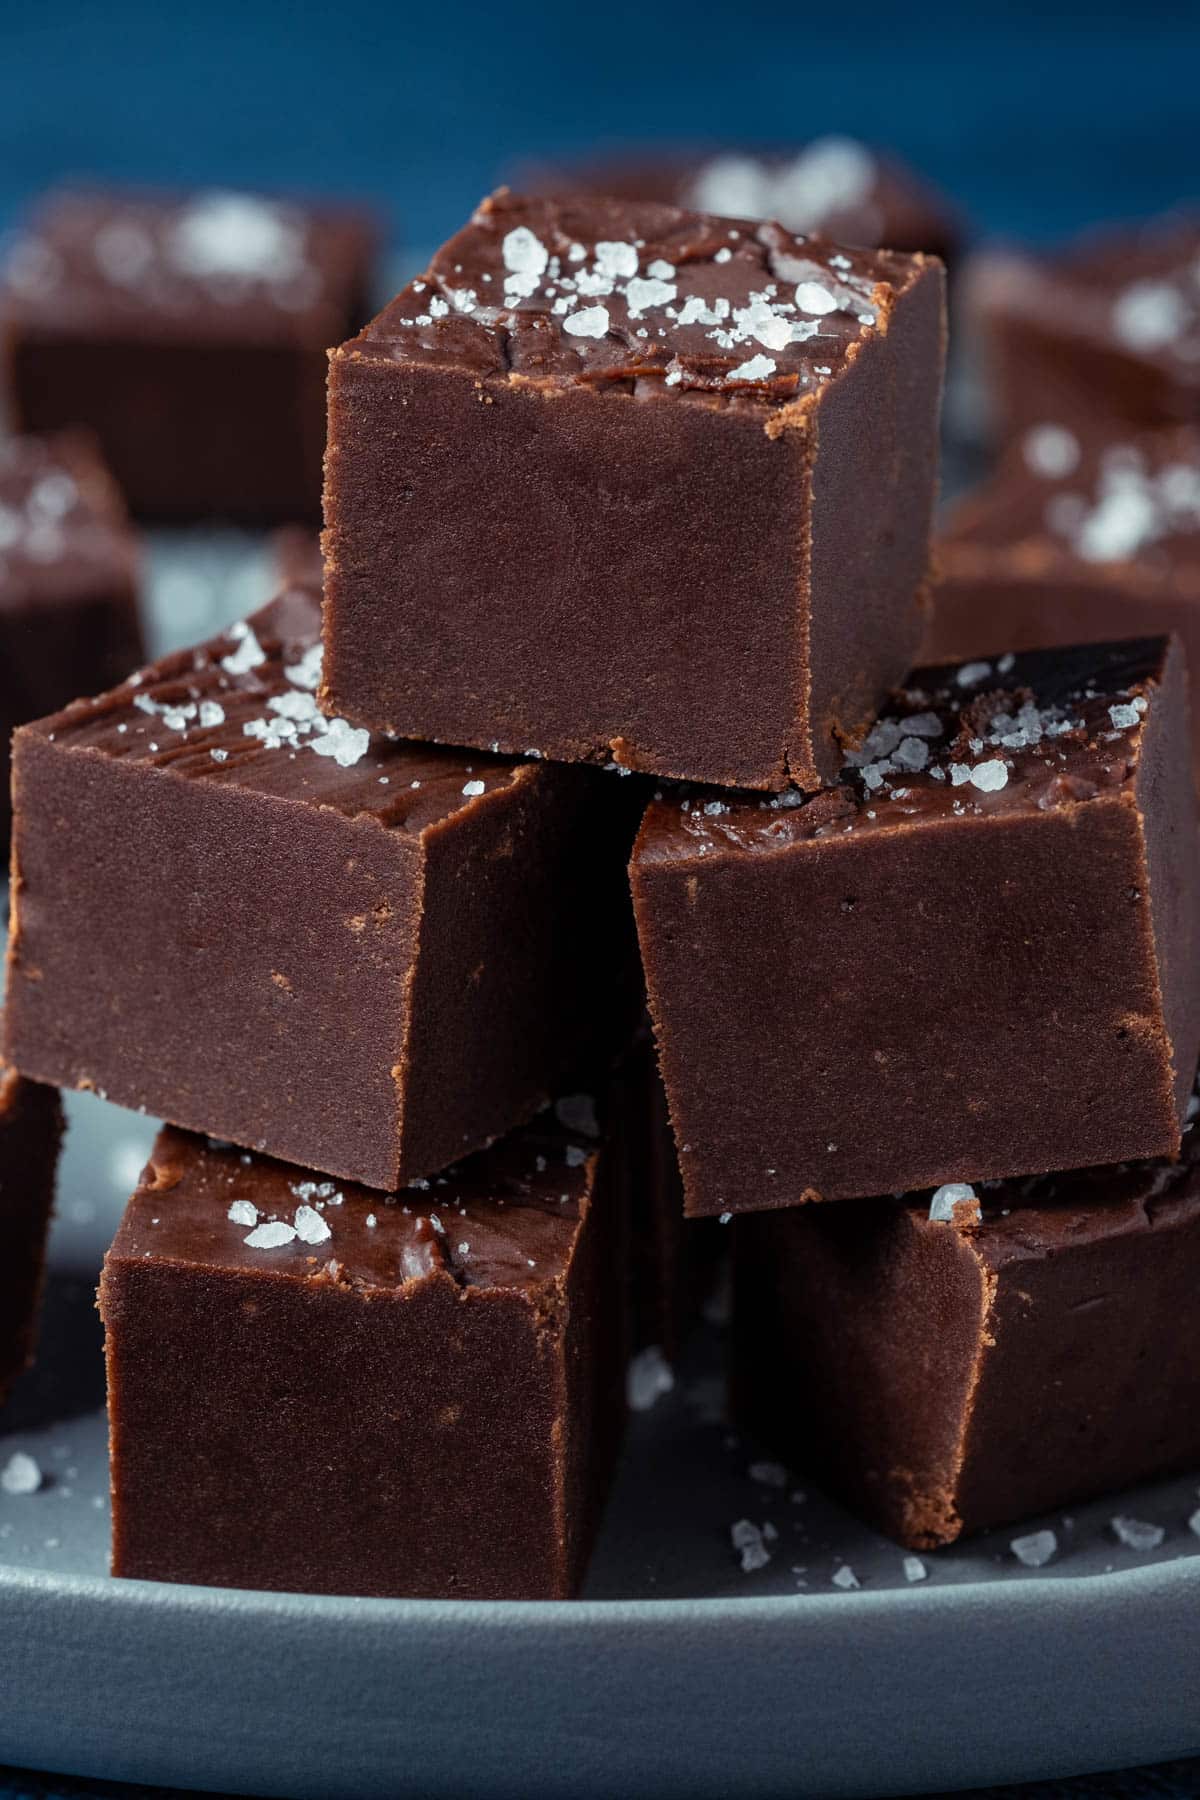
If you have a sweet tooth then absolutely nothing can beat a square (or two) of this vegan fudge.
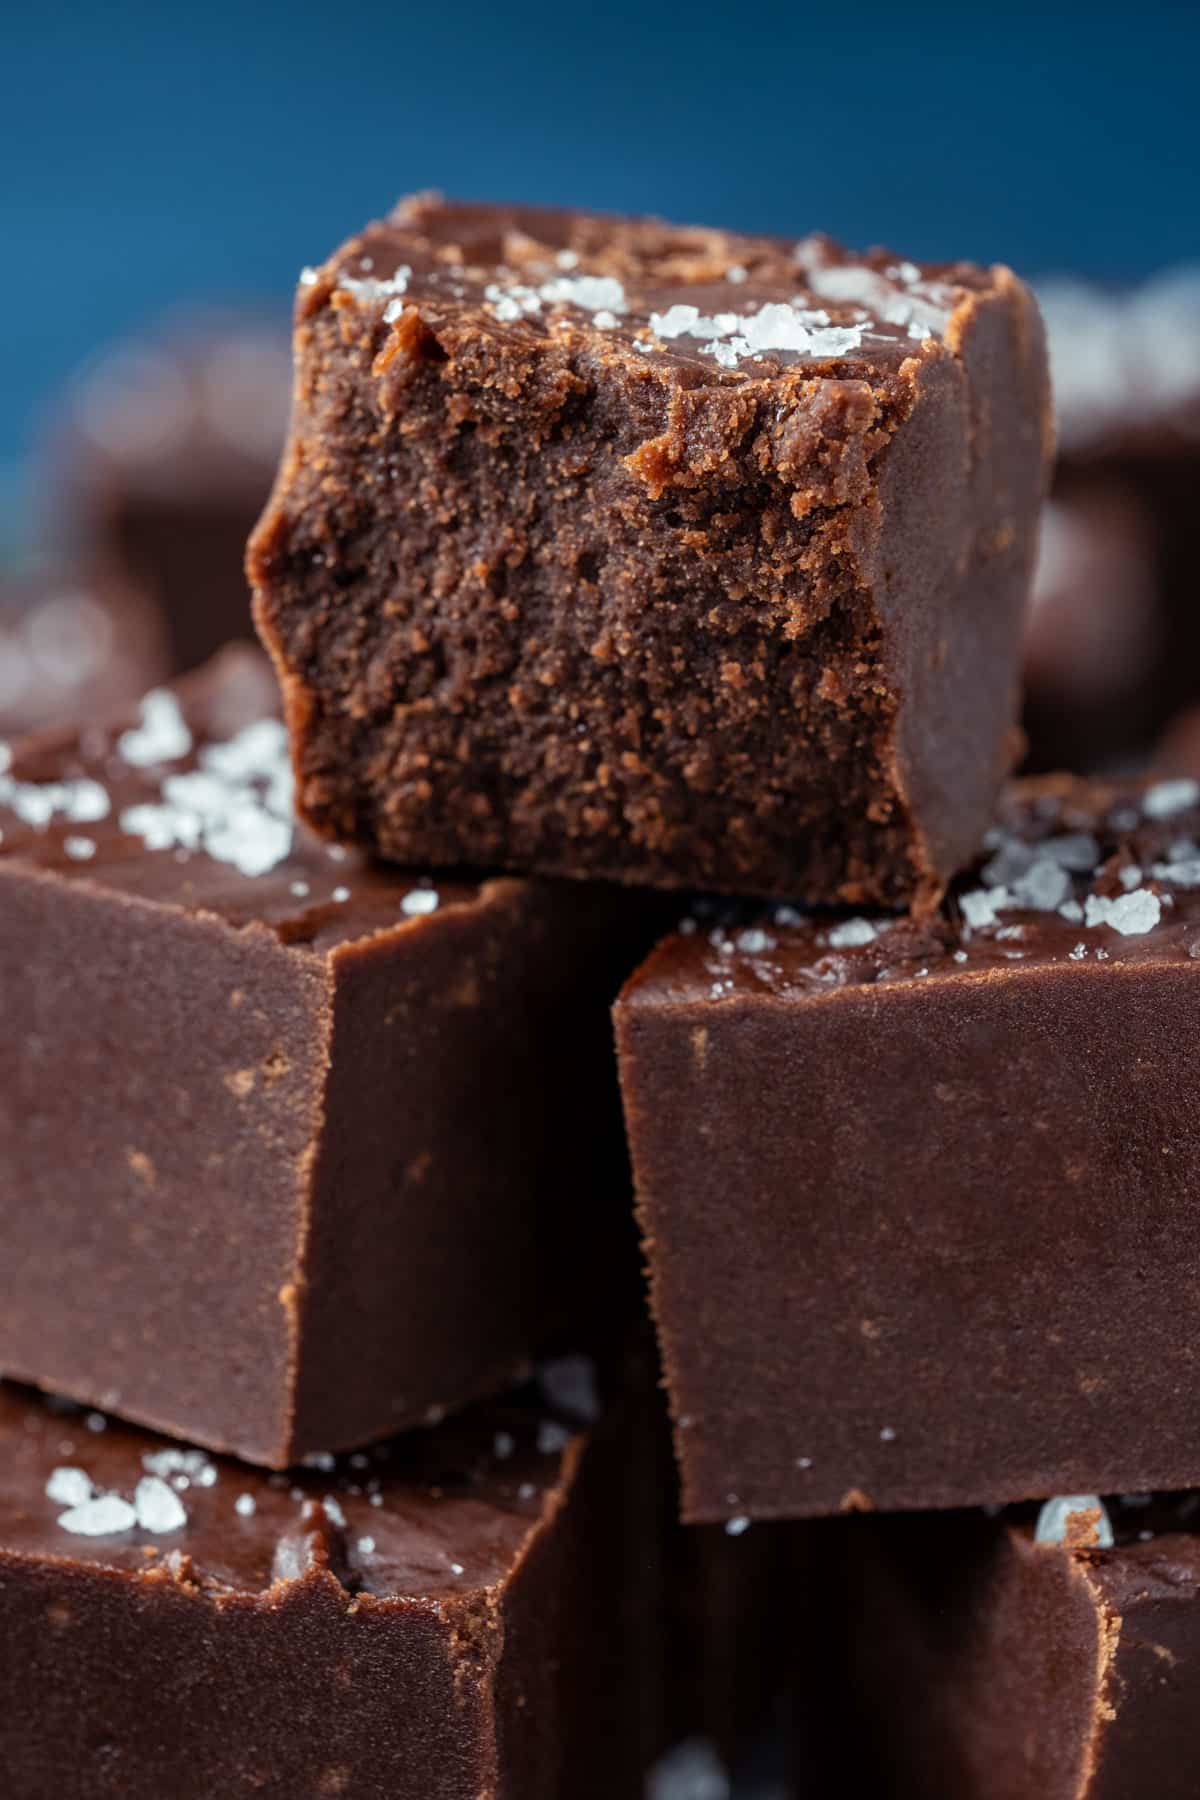
It’s the melt-in-your-mouth smooth and creamy fudge of your dreams. And it only takes 10 minutes to make!
It can also be made on the stovetop or in the microwave so it’s very versatile.
And if you’re a fudge fanatic, then you’ll also love our dairy free fudge and our vegan peanut butter fudge. Our vegan tiffin is also amazing.
Ingredients You’ll Need To Make This Fudge:
Ingredient Notes
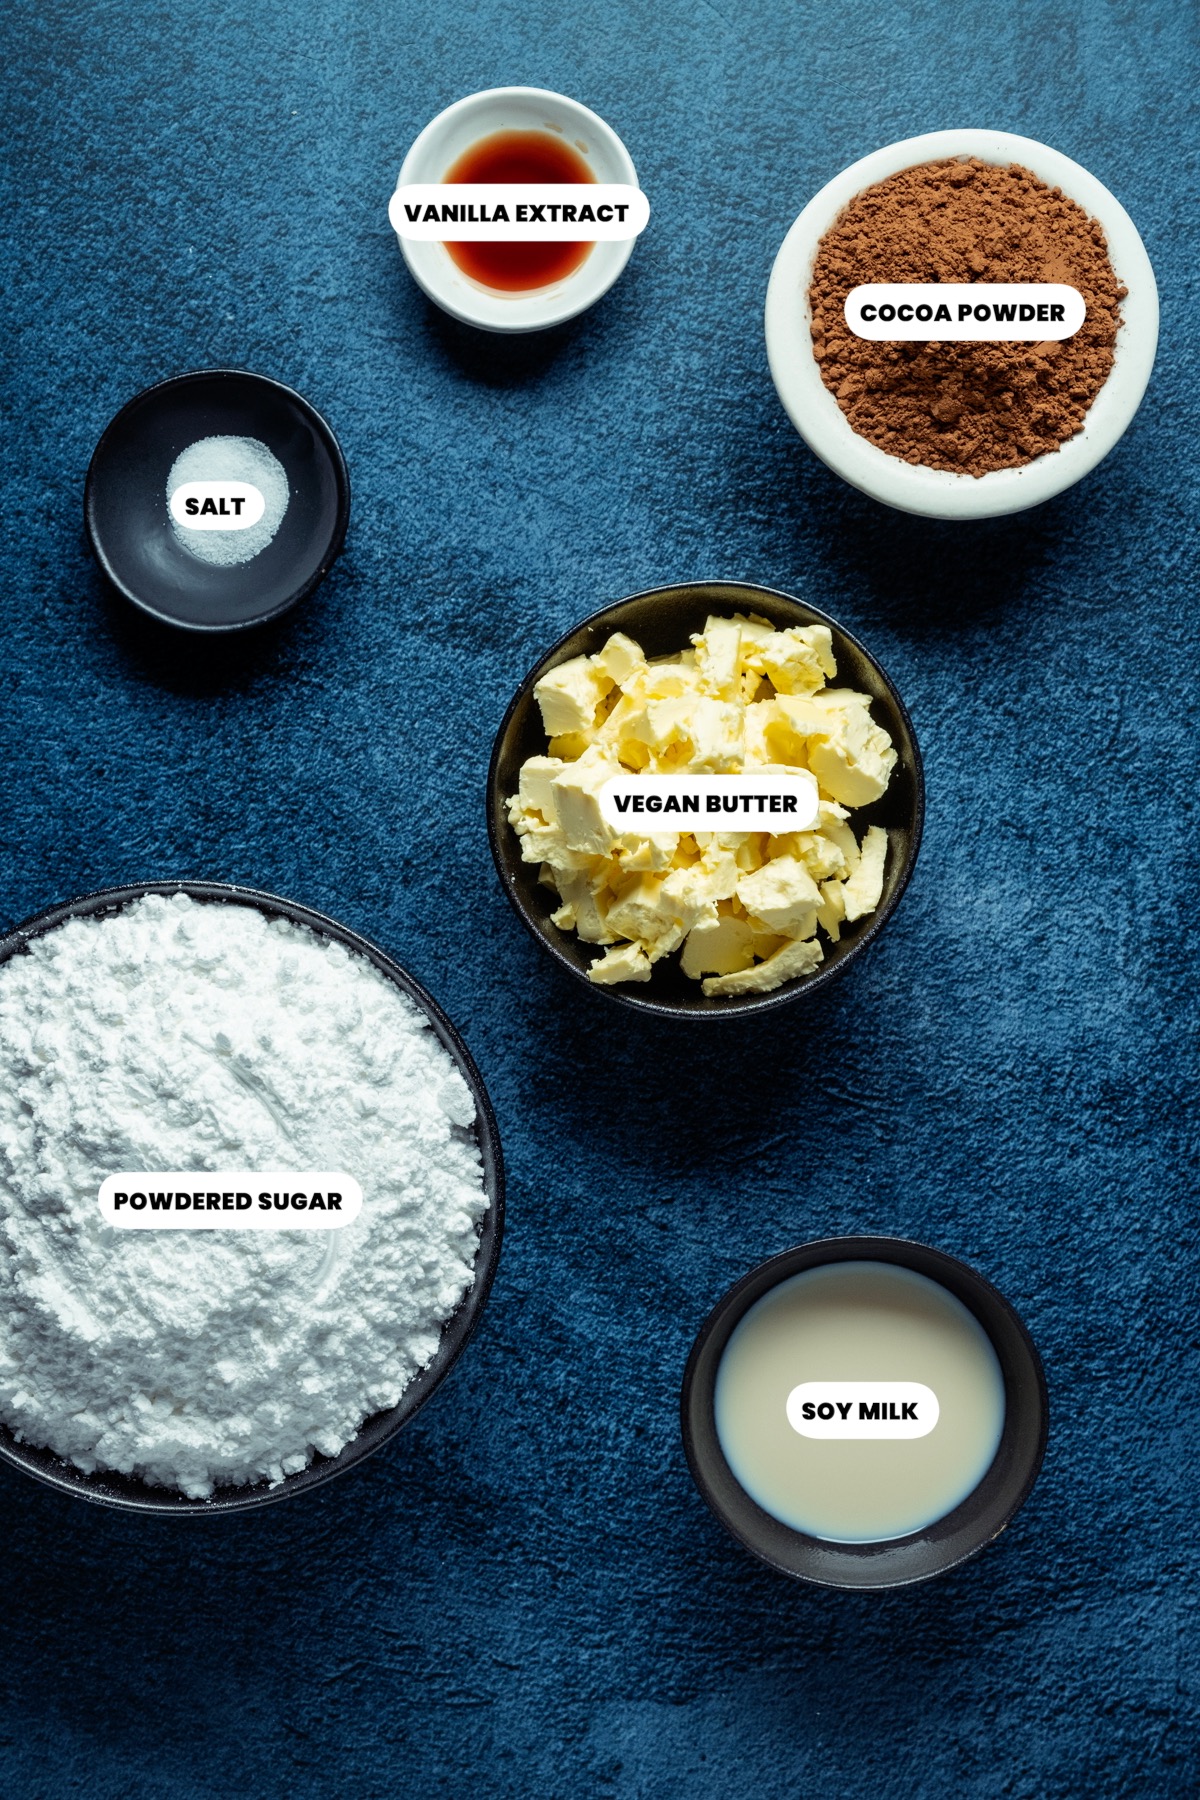
- Powdered sugar – forms the base of this recipe. It has to be powdered sugar, because it dissolves so easily into the other ingredients. Any other kind of sugar will result in a grainy fudge.
- Cocoa powder – should be natural and unsweetened.
- Salt – we use a little salt in the fudge itself, and then some coarse salt is great to sprinkle on top (optional).
- Vegan butter – vegan butter in a stick form tends to work best as it results in a firmer fudge that sets better. However, any type should work, if all you have access to is vegan butter in a tub, then just try to choose the firmest one.
- Soy milk – can be switched for any other non-dairy milk.
- Vanilla extract – is for flavor and can be switched for other flavor extracts such as peppermint extract for a peppermint fudge or orange extract for a chocolate orange fudge.
How To Make Vegan Fudge
You will find full instructions and measurements in the recipe card at the bottom of the post. This is a summary of the process to go along with the process photos.
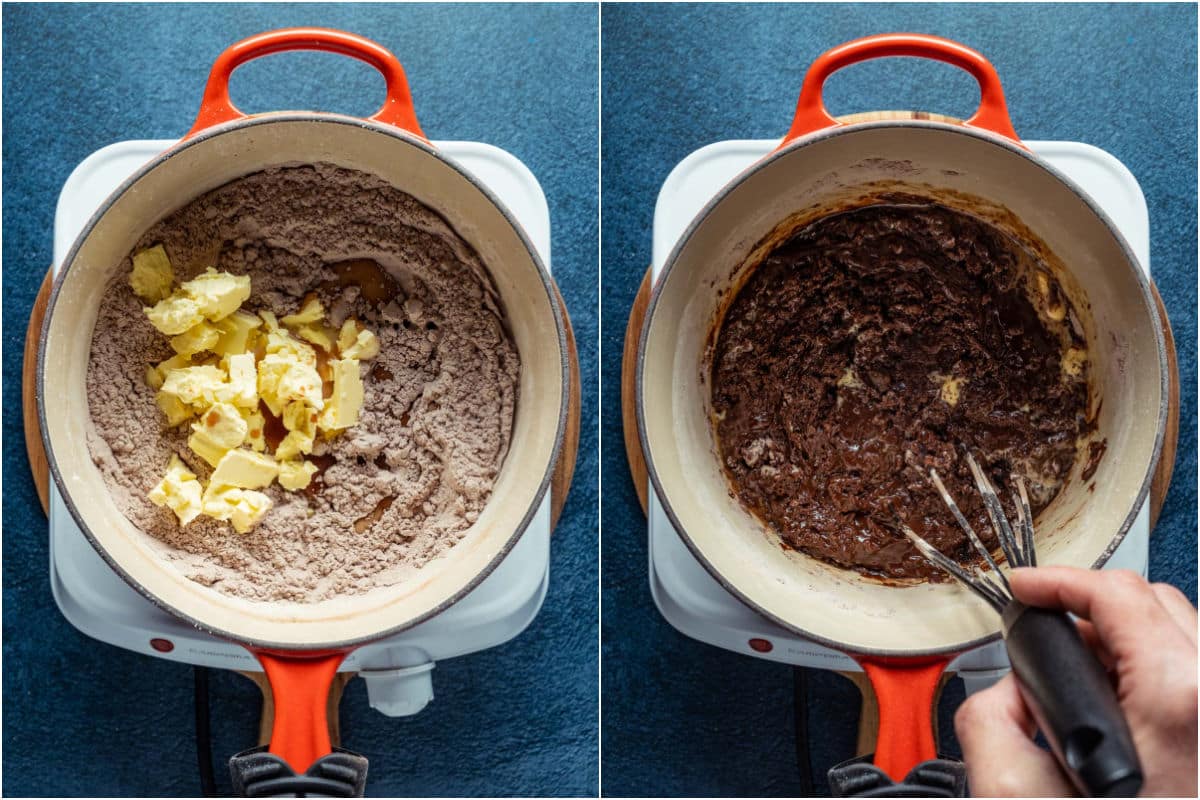
- Sift powdered sugar and cocoa powder into a medium sized heavy bottomed pot or saucepan and add the salt. Whisk together with a hand whisk.
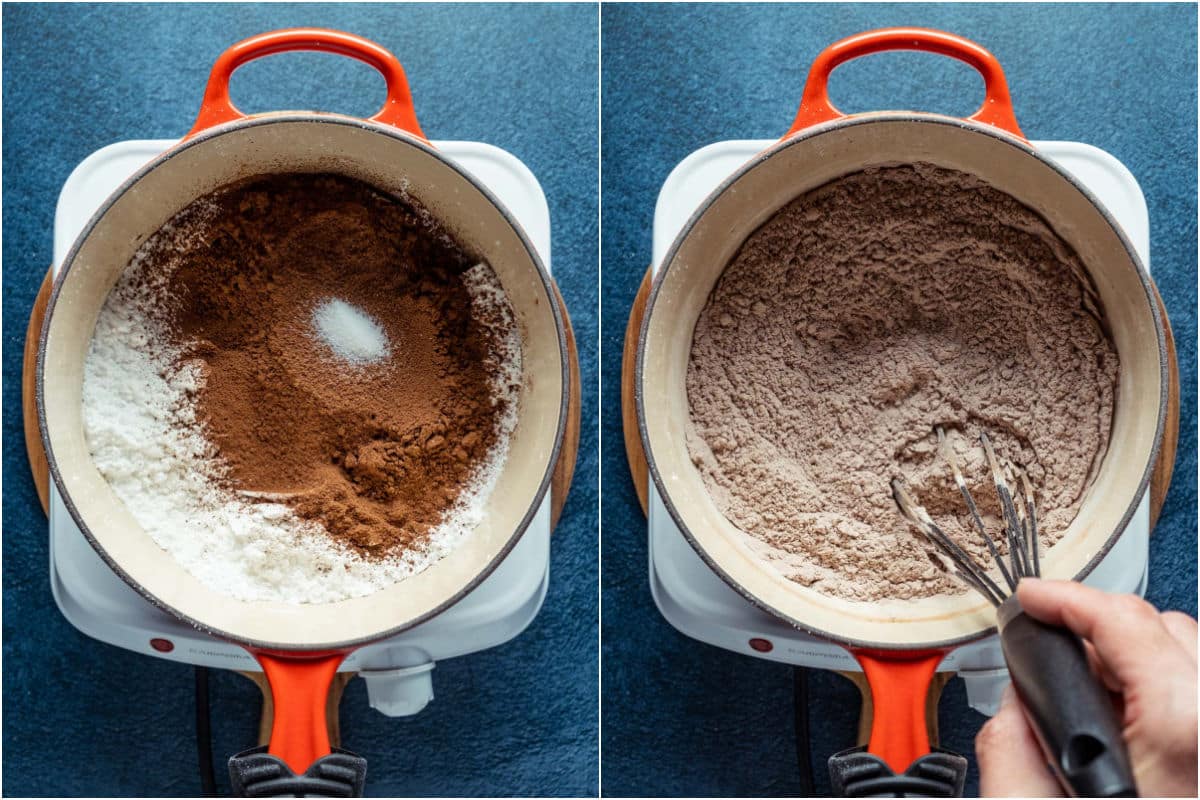
- Add vegan butter (chopped into chunks), soy milk and vanilla extract.
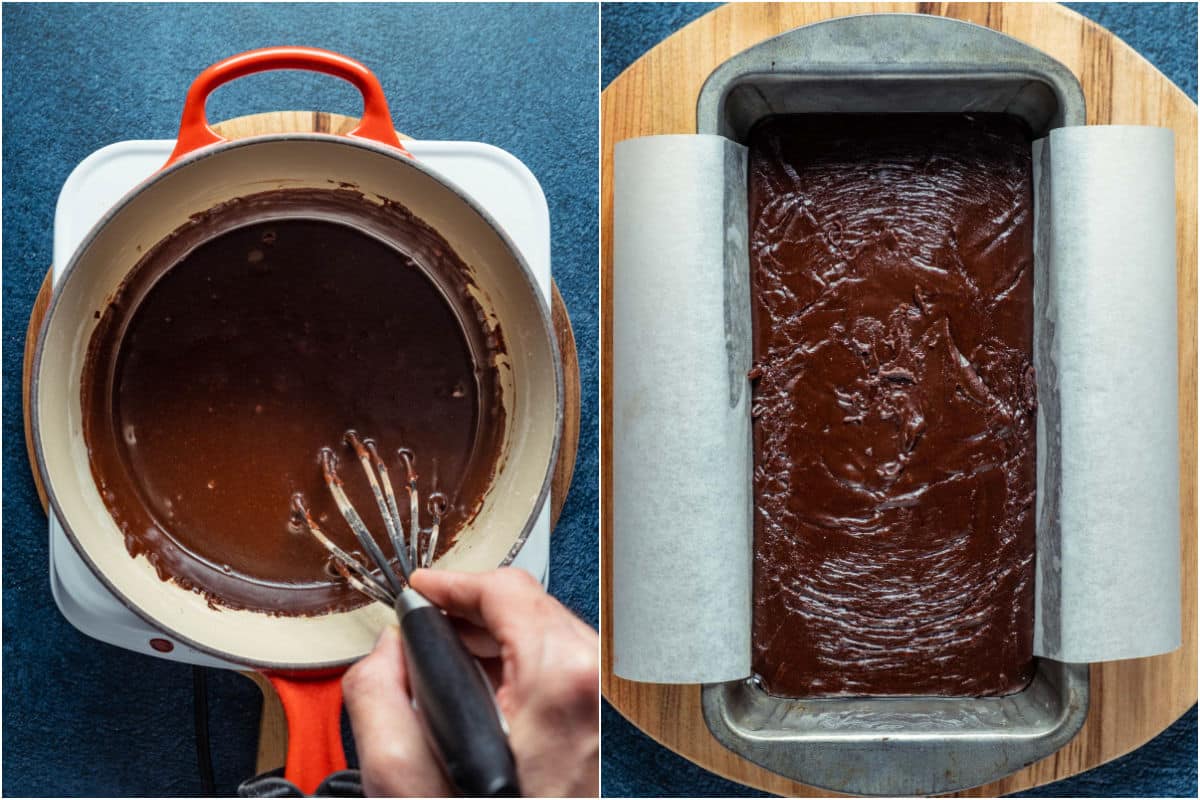
- Heat over medium heat, stirring all the while until the vegan butter starts to melt and it starts coming together.
- When it has all melted together into a smooth thick chocolate sauce then transfer it to a prepared loaf pan (sprayed with non-stick spray and lined with parchment paper so that there is overhang on either side) and smooth down.
- Work quickly as it will want to start setting really fast.
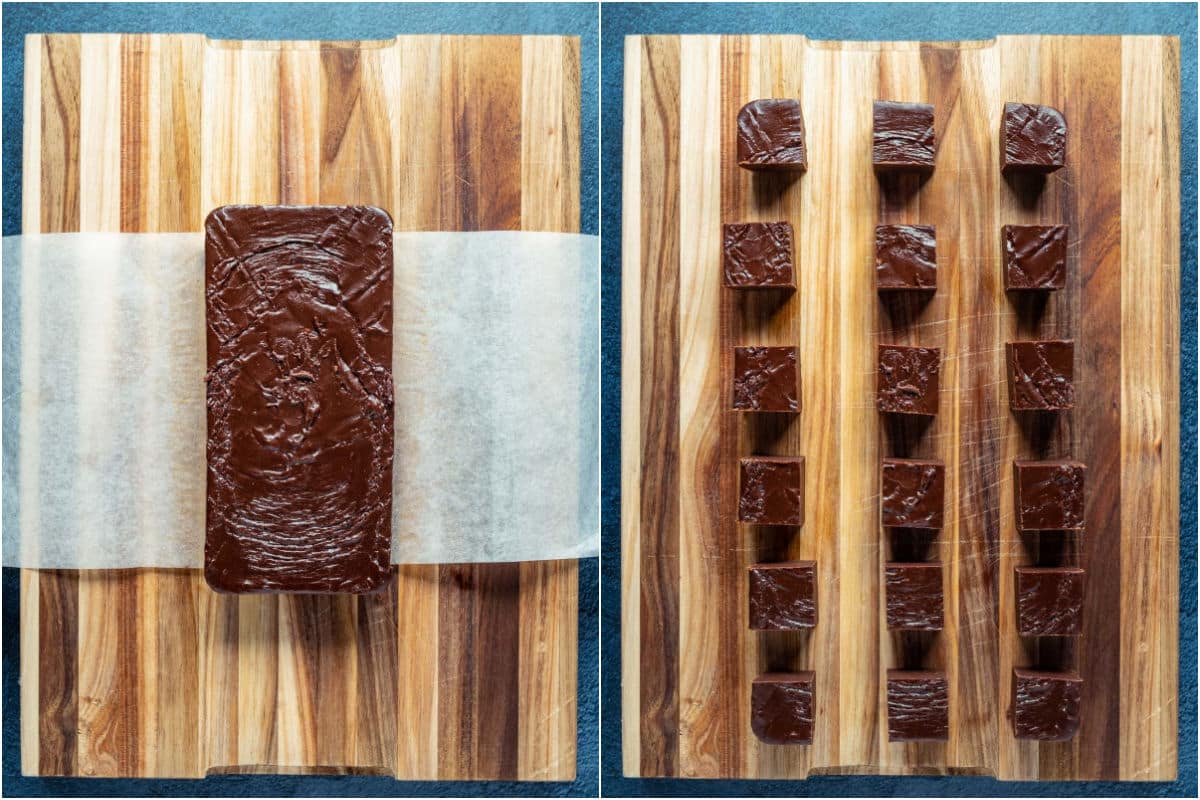
- Refrigerate until completely set (about 2 hours).
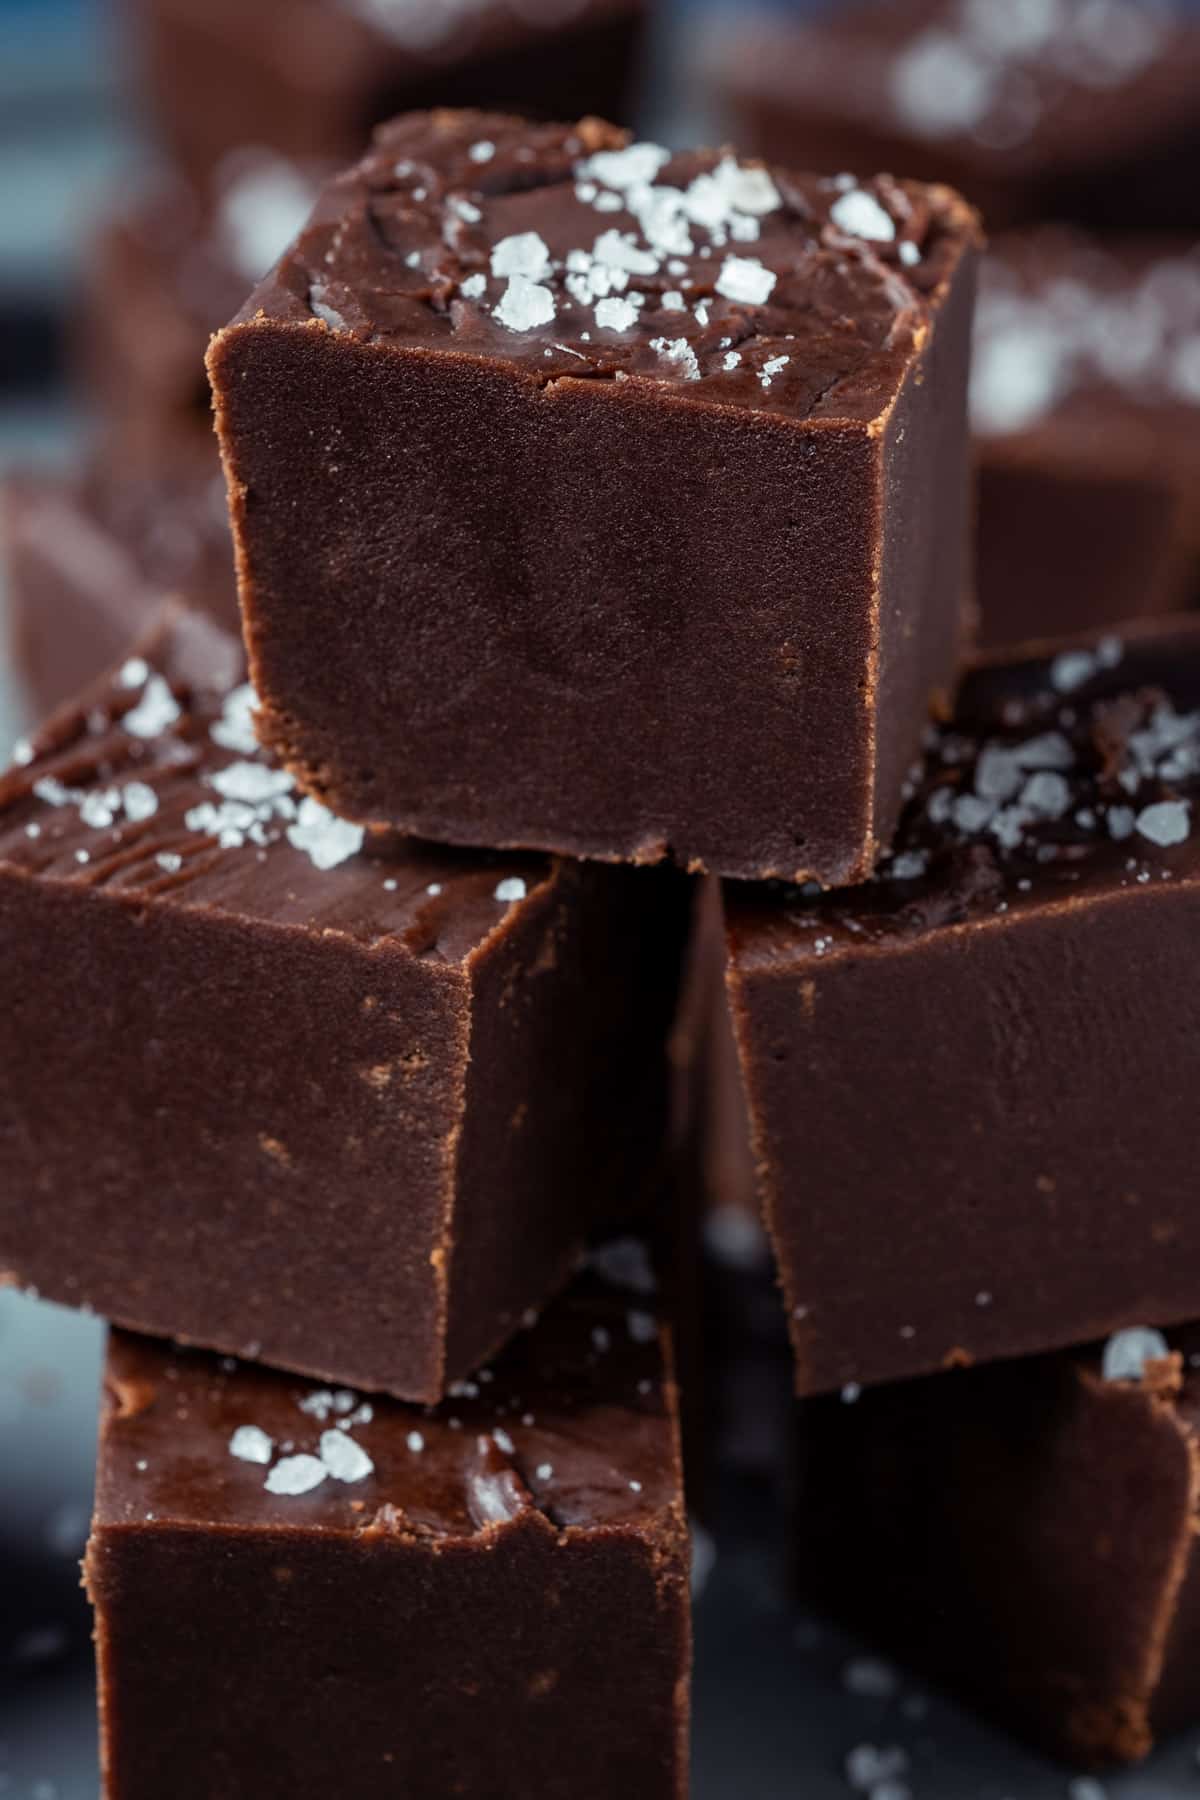
- Then lift the whole block of fudge out of the loaf pan using the parchment paper overhang and place it onto a wooden cutting board.
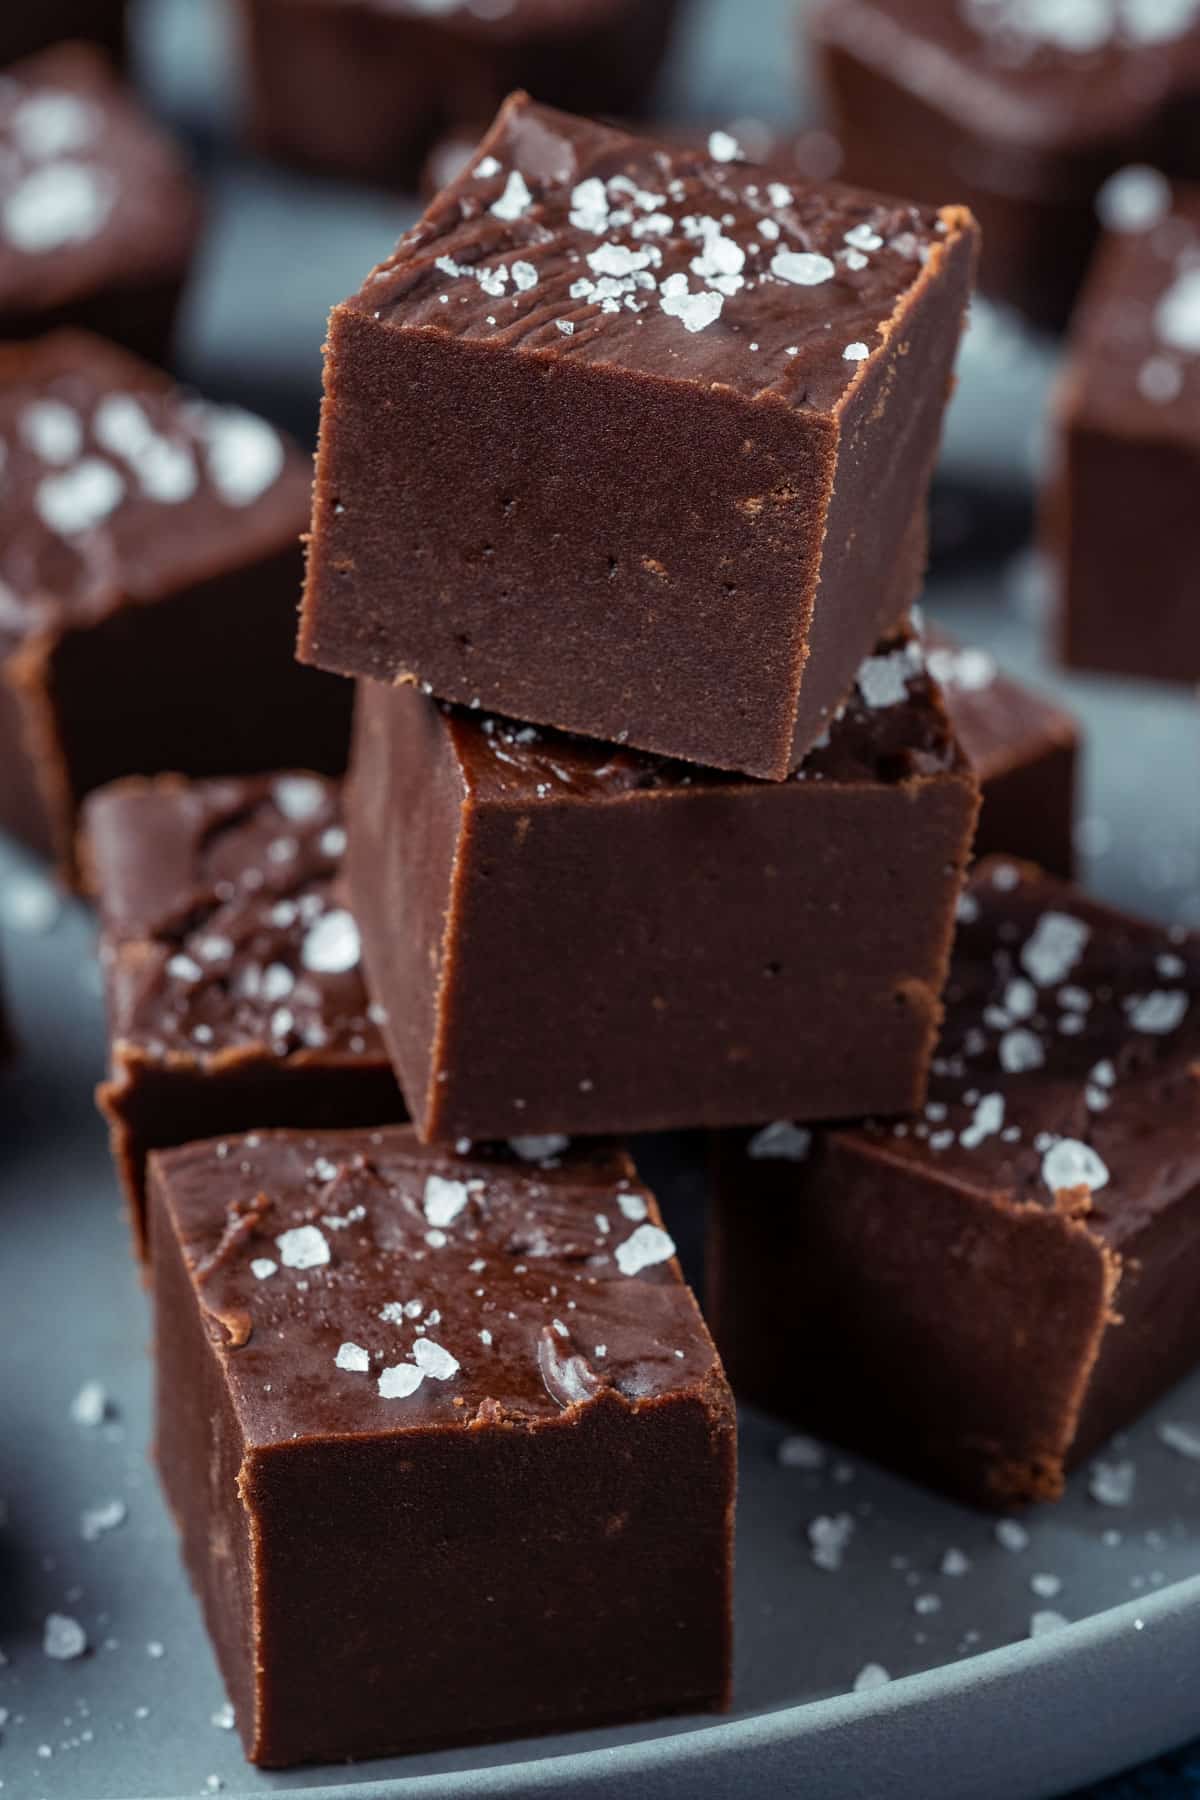
- Cut into squares.
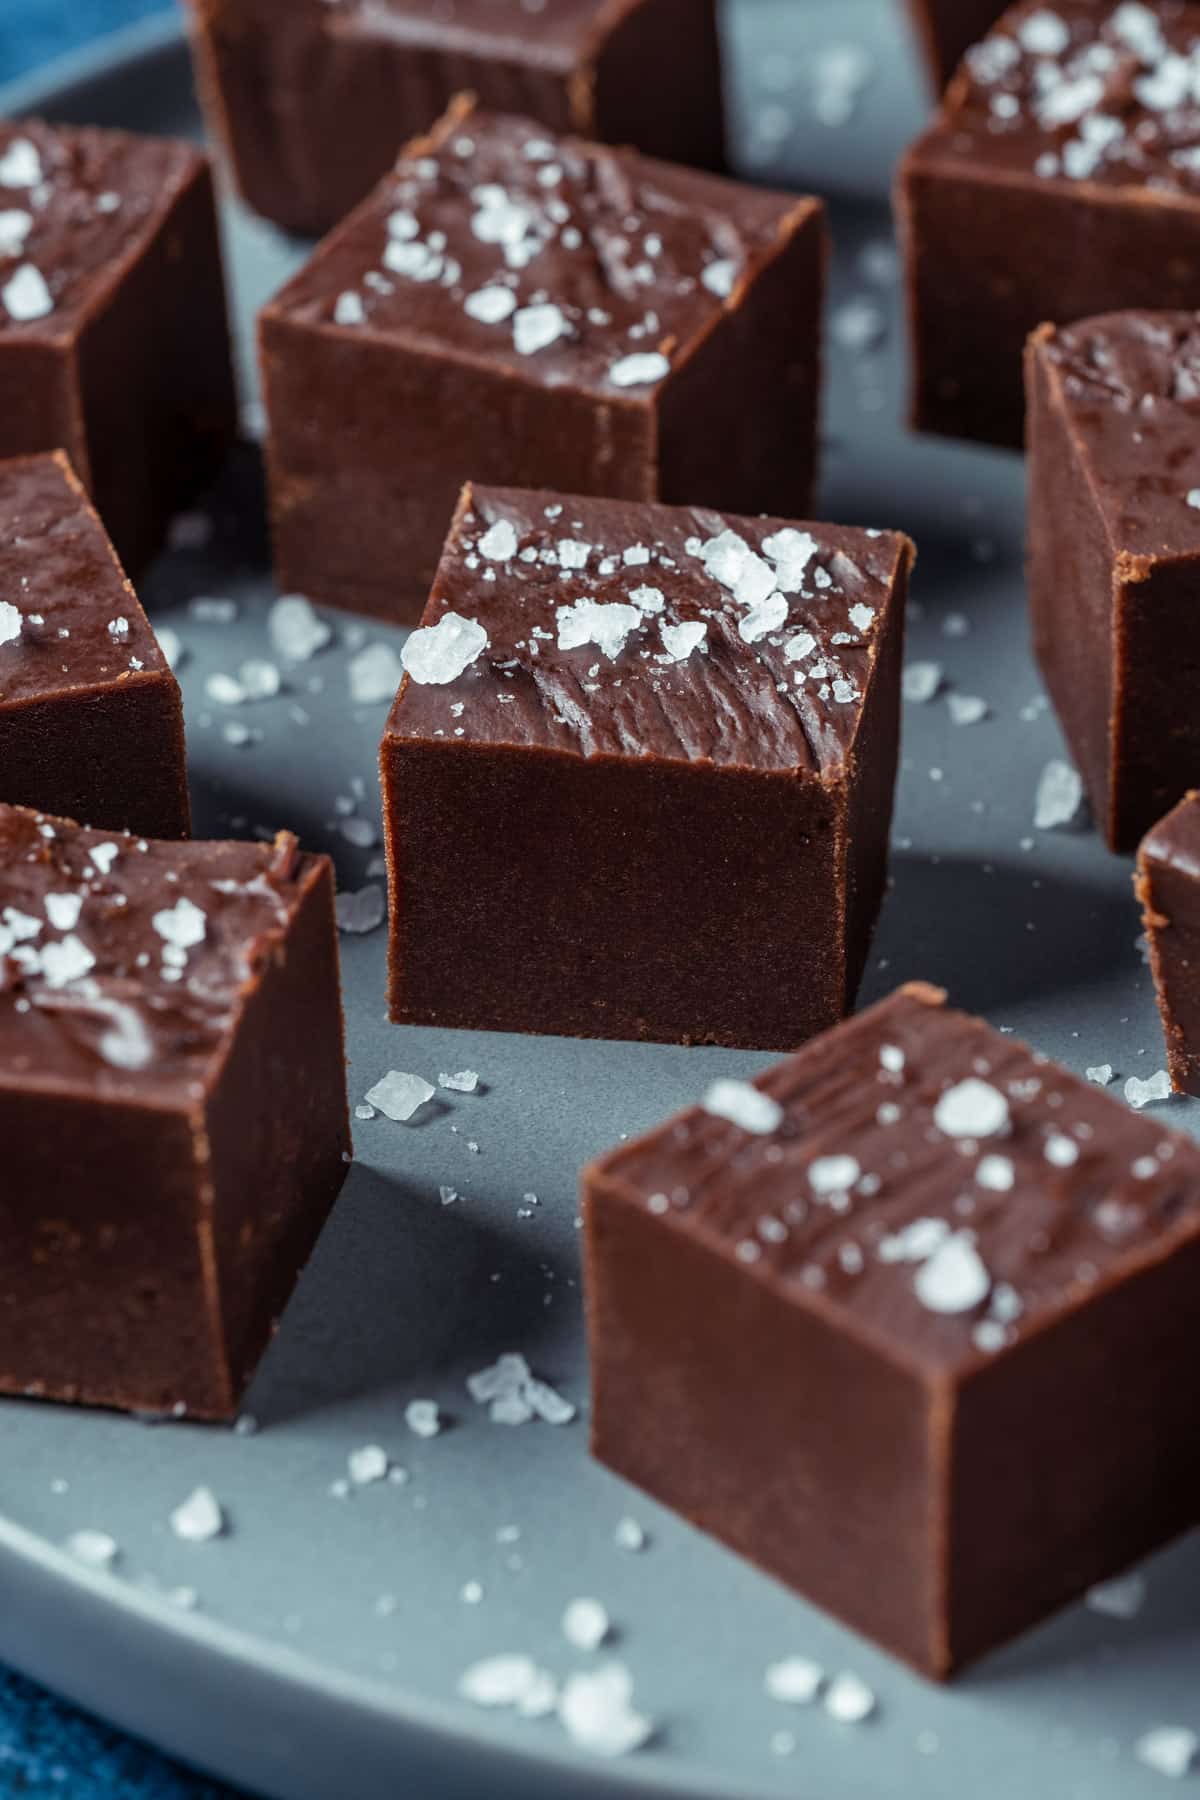
- Top with some coarse sea salt (optional) and serve.
Microwave Method
You can also make this in the microwave. For the microwave version simply sift the powdered sugar and cocoa powder into a microwave safe bowl. Add the salt and whisk together.
Add the vegan butter (chopped into chunks), soy milk and vanilla. Microwave in 30-second increments, bringing it out to stir every 30-seconds until melted and smooth.
Transfer to your prepared loaf pan (sprayed with non-stick spray and lined with parchment paper so that there is overhang on either side) and smooth down.
Refrigerate until set (approximately 2 hours) and then cut into squares and serve.
Fudge Variations
Add chopped nuts. You can add a cup of chopped nuts to the fudge. Just as it has melted in the pot (or microwave safe bowl) stir in a cup of chopped nuts and then transfer to your prepared loaf pan and smooth down as usual. Chopped walnuts, pecans, almonds or cashews could all be great. Roasted salted nuts would provide a great contrast of flavor between salty and sweet.
Add raisins or dried fruit. You can add a cup of raisins or dried cranberries or other dried fruit to this fudge.
Chocolate orange. Add 1 teaspoon of orange extract instead of the vanilla extract, for a delicious chocolate orange fudge.
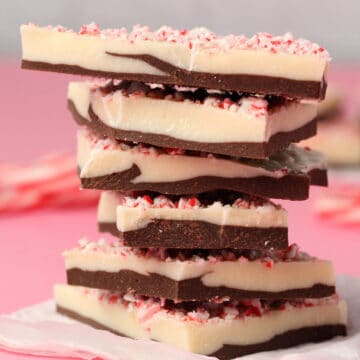
Peppermint fudge. You can add 1 teaspoon of peppermint extract (instead of the vanilla extract) and a cup of crushed candy canes. Alternatively just check out our recipe for vegan peppermint fudge.
Storing and Freezing
Keep this vegan fudge stored in an airtight container in the fridge and enjoy within one week.
It’s also freezer friendly! It doesn’t freeze solid so you can actually enjoy a piece right out of the freezer if you like. You can store it in the freezer for up to 3 months.
More Delicious Vegan Candy Recipes


Did you make this recipe? Be sure to leave a comment and rating below!

Vegan Fudge
Ingredients
- 4 cups Powdered Sugar (480g)
- ½ cup Cocoa Powder (43g) Natural, Unsweetened
- ¼ teaspoon Salt
- ½ cup Vegan Butter (112g)
- 3 Tablespoons Soy Milk or other non-dairy milk
- 1 teaspoon Vanilla Extract
Instructions
- Spray an 8×4 or 9×5 loaf pan with non-stick spray and line it with parchment paper so that there is overhang on either side. Set aside.
- Sift powdered sugar and cocoa powder into a medium sized heavy bottomed pot or saucepan and add the salt. Whisk together with a hand whisk.
- Add vegan butter (chopped into chunks), soy milk and vanilla extract.
- Heat over medium heat, stirring all the while until the vegan butter starts to melt and it starts coming together.
- When it has all melted together into a smooth thick chocolate sauce then transfer it to your prepared loaf pan and smooth down. Work quickly as it will want to start setting really fast.
- Refrigerate until completely set (about 2 hours).
- Then lift the whole block of fudge out of the loaf pan using the parchment paper overhang and place it onto a wooden cutting board.
- Cut into squares. Top with some coarse sea salt (optional) and serve.
Notes
- Microwave version: To make this in the microwave sift the powdered sugar and cocoa powder into a microwave safe bowl. Add the salt and whisk together. Add the vegan butter (chopped into chunks), soy milk and vanilla. Microwave in 30-second increments, bringing it out to stir every 30-seconds until melted and smooth. Transfer to your prepared loaf pan (sprayed with non-stick spray and lined with parchment paper so that there is overhang on either side) and smooth down. Refrigerate until set, cut into squares and serve.
- Vegan butter – vegan butter in a stick form tends to work best as it results in a firmer fudge that sets better. However, any type should work, if all you have access to is vegan butter in a tub, then just try to choose the firmest one.
- Add chopped nuts. You can add a cup of chopped nuts to the fudge. Just as it has melted in the pot (or microwave safe bowl) stir in a cup of chopped nuts and then transfer to your prepared loaf pan and smooth down as usual. Chopped walnuts, pecans, almonds or cashews could all be great. Roasted salted nuts would provide a great contrast of flavor between salty and sweet.
- Add raisins or dried fruit. You can add a cup of raisins or dried cranberries or other dried fruit to this fudge.
- Chocolate orange. Add 1 teaspoon of orange extract instead of the vanilla extract, for a delicious chocolate orange fudge.
- Peppermint fudge. You can add 1 teaspoon of peppermint extract (instead of the vanilla extract) and a cup of crushed candy canes.
- Loaf pan. You can use a 9×5 loaf pan or an 8×4 loaf pan. We used an 8×4 and the fudge is very thick as you can see. If you use a 9×5 loaf pan, the fudge will just be slightly thinner.
- Storing and freezing: Keep this vegan fudge stored in an airtight container in the fridge and enjoy within one week. It’s also freezer friendly for up to 3 months. It doesn’t freeze solid so you can actually enjoy a piece right out of the freezer if you like.
Can I replace the cocoa powder with other spices?
I don’t think so.
you could try carob. very similar to cocoa.
Delicious fudge and so easy to make! Added the raisins 💕
Awesome! Thanks for sharing and the great review Lyn!
Gorgeous! It hit the spot…