
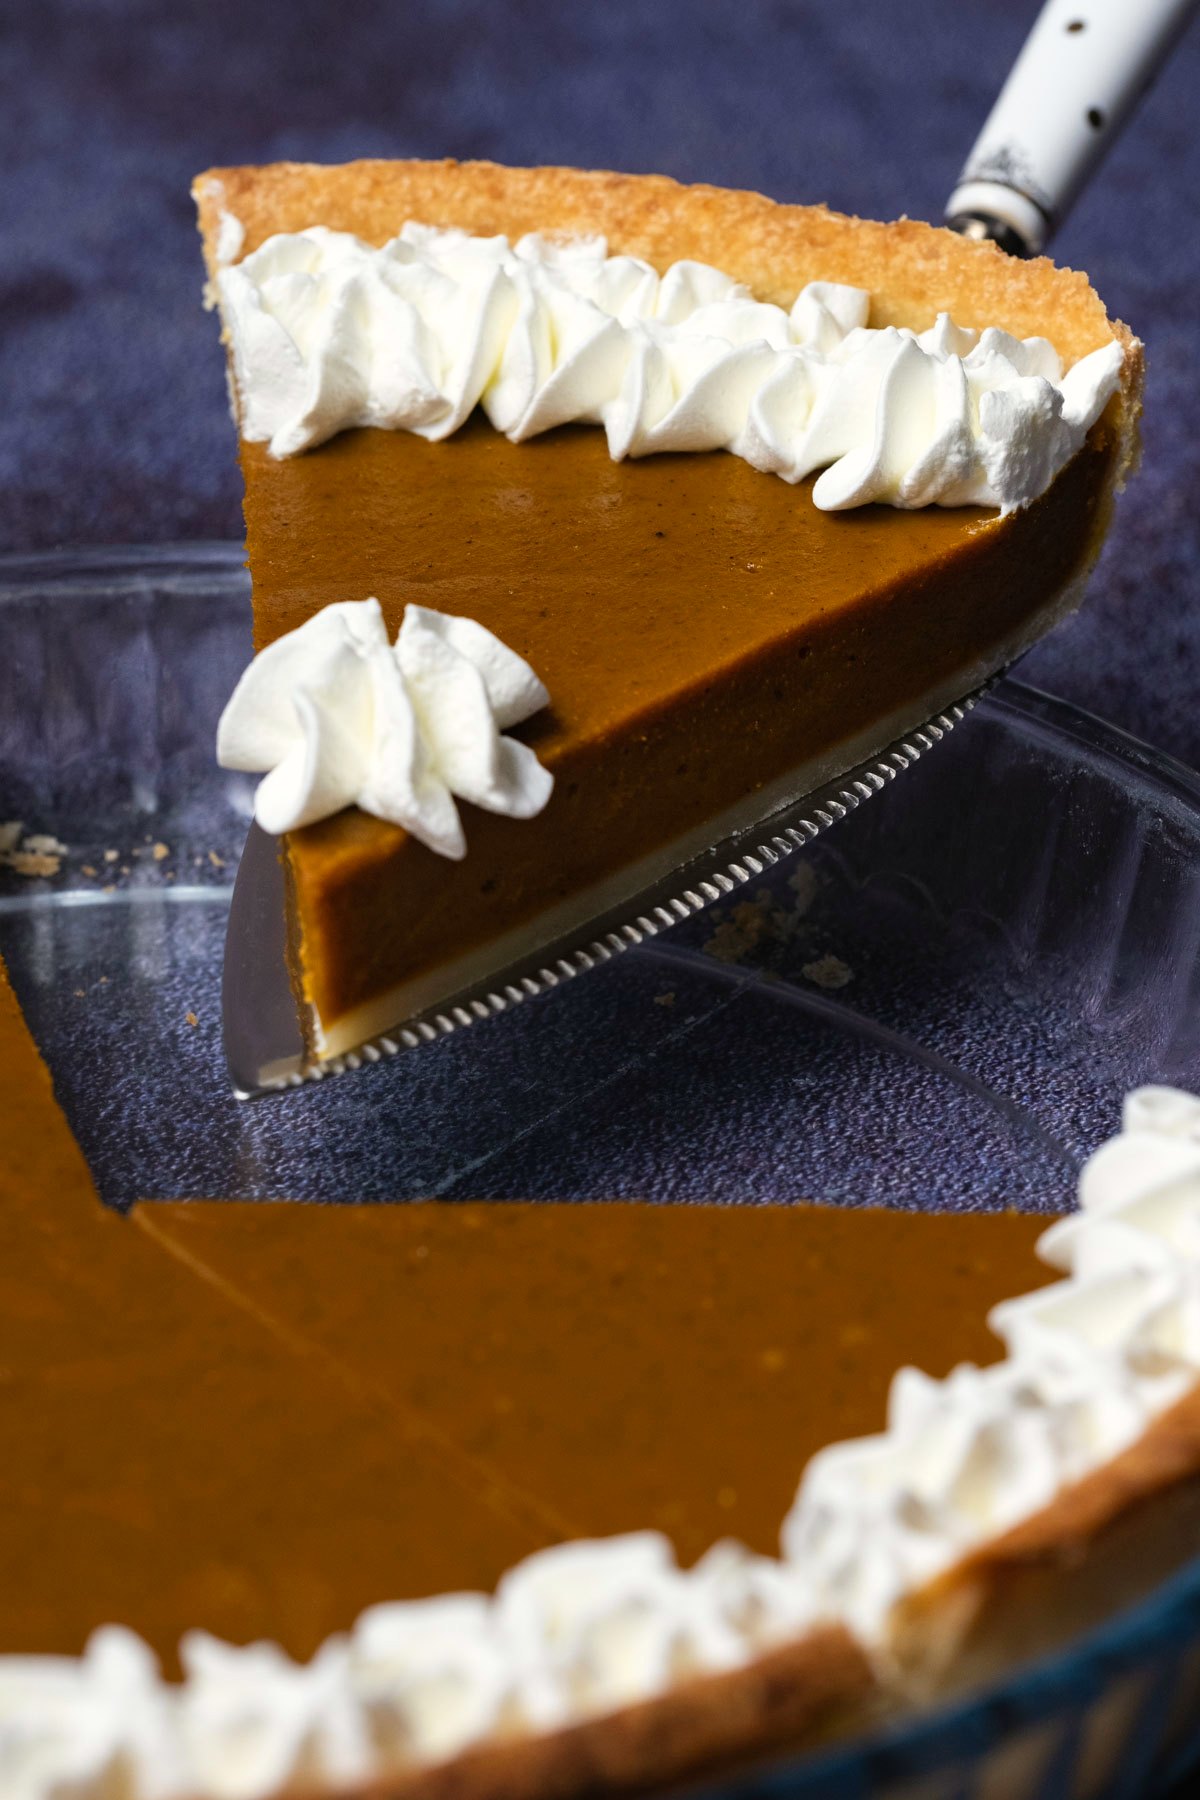
This is the best vegan pumpkin pie ever and the only recipe you’ll ever need! It’s rich, creamy, deliciously spiced and perfect for the holidays.

This vegan pumpkin pie is seriously delicious. It’s perfectly sweet, loaded with fall spices and flavors and absolutely NO ONE would be able to guess that it’s vegan.
It’s also the easiest pie you’ll ever make, especially if you use a store-bought pie crust. It’s as simple as adding your ingredients to a blender, blending it, pouring it out into your pie crust, baking it, cooling it and voilà!
Of course if you want to make your pie crust from scratch then we’ve got you covered with that too.
This pie is heaps of fun to make, comes out perfectly every time and is the perfect Thanksgiving pie.
And if you love some delicious vegan holiday pies, then check out our vegan sweet potato pie and our vegan apple pie too.
How To Make Vegan Pumpkin Pie
You will find full instructions and measurements in the recipe card at the bottom of the post. This is a summary of the process to go along with the process photos.
The Crust:
- Add all purpose flour, sugar and salt to the food processor and pulse to combine.
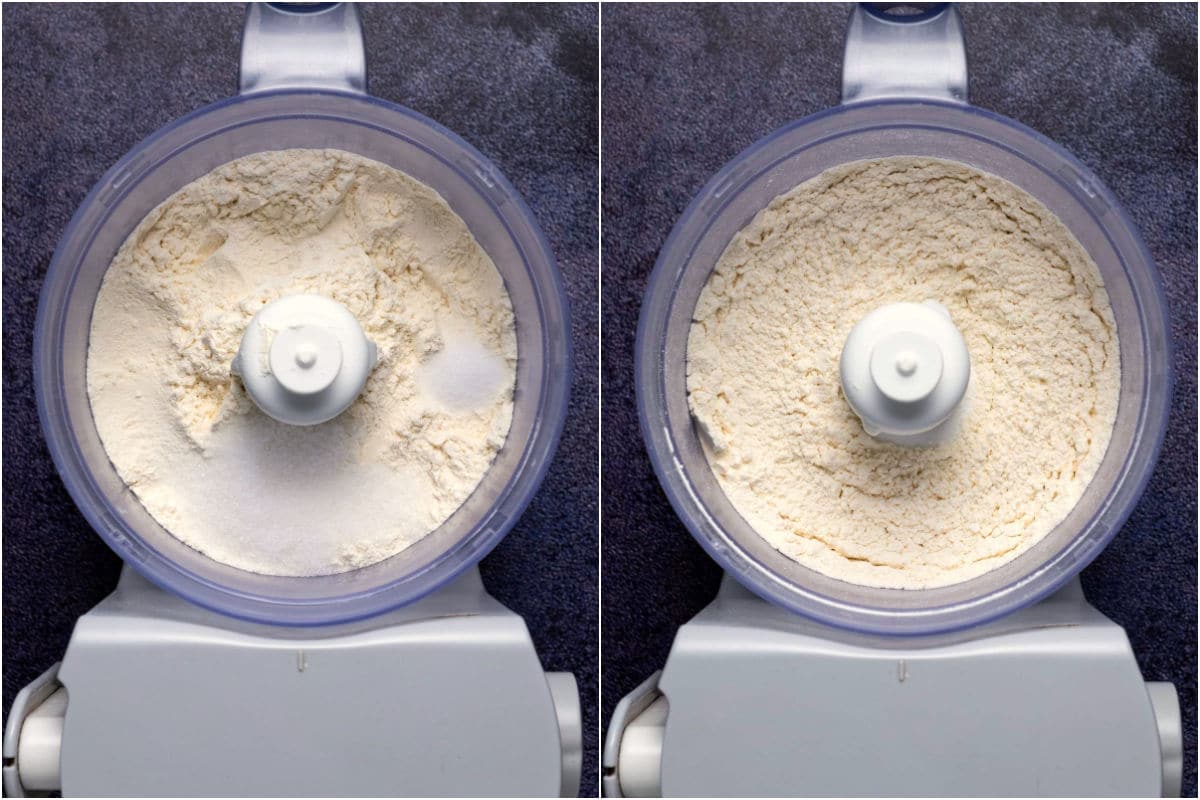
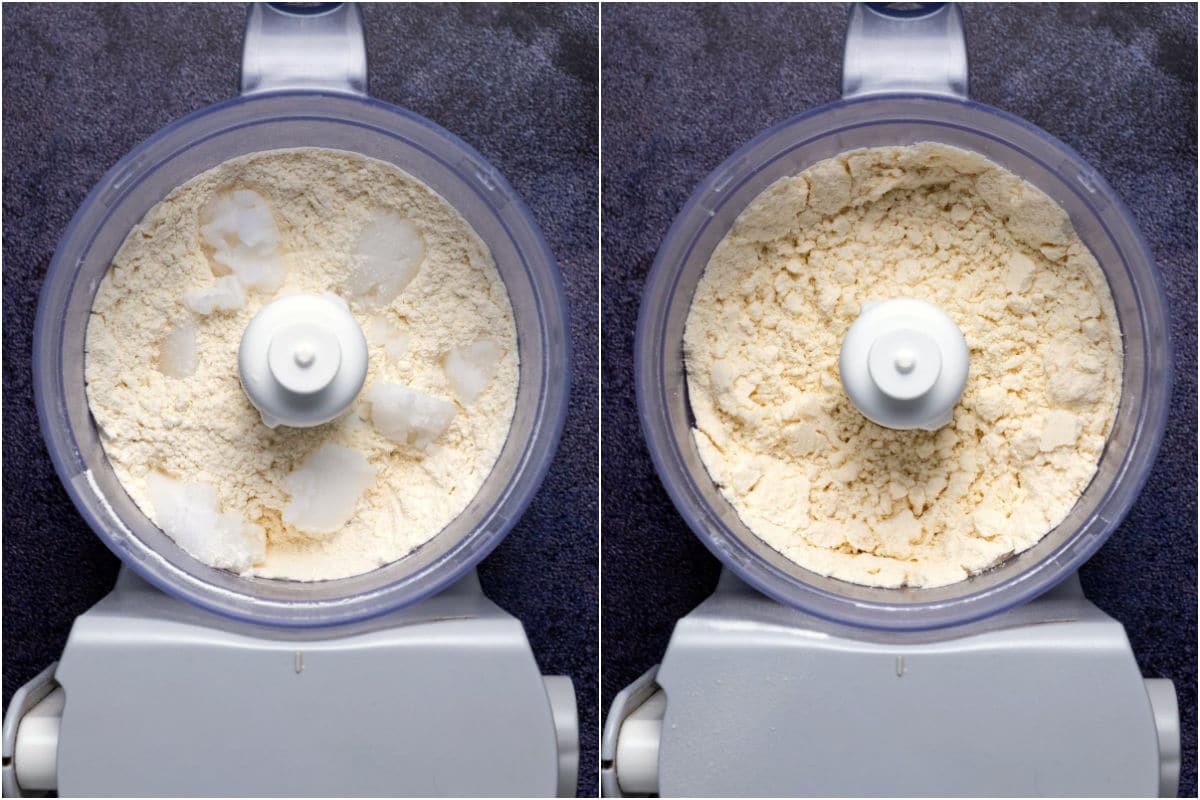
- Now add coconut oil (must be solid, not melted) and pulse until the mixture is crumbly.
- Add ice water and pulse it to combine. It should look like a dough now and if you break off a piece and roll it in your hands it should easily roll into a ball.
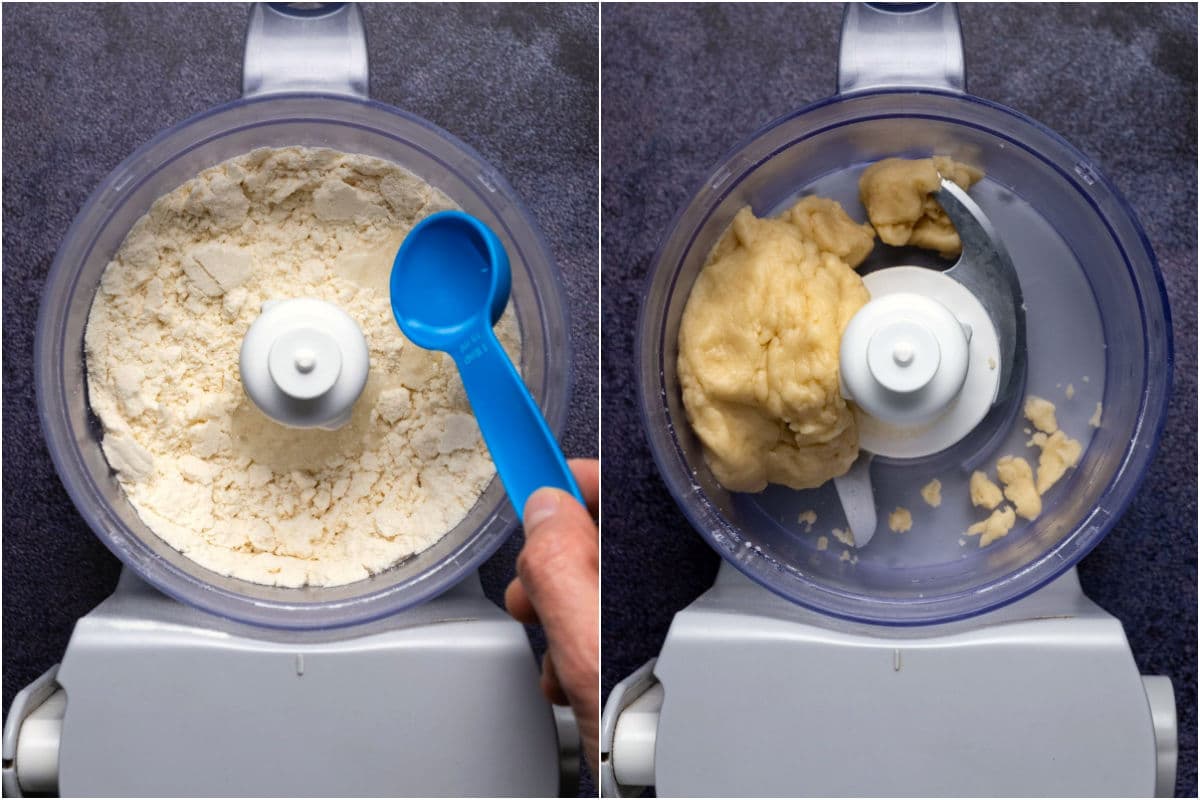
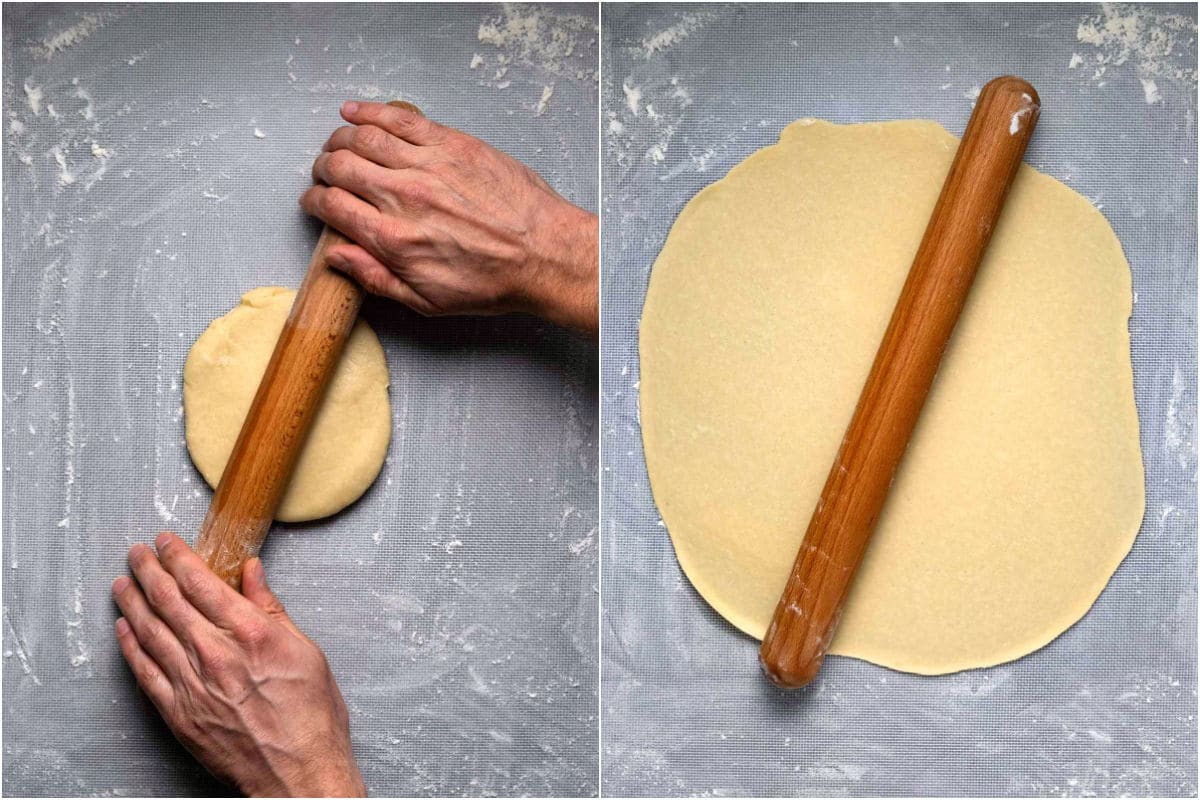
- Remove the dough from the food processor, transfer to a floured surface and roll the dough into a big round ball.
- Using a rolling pin roll out the dough from side to side into a large circle that is wider than your 9-inch pie dish.
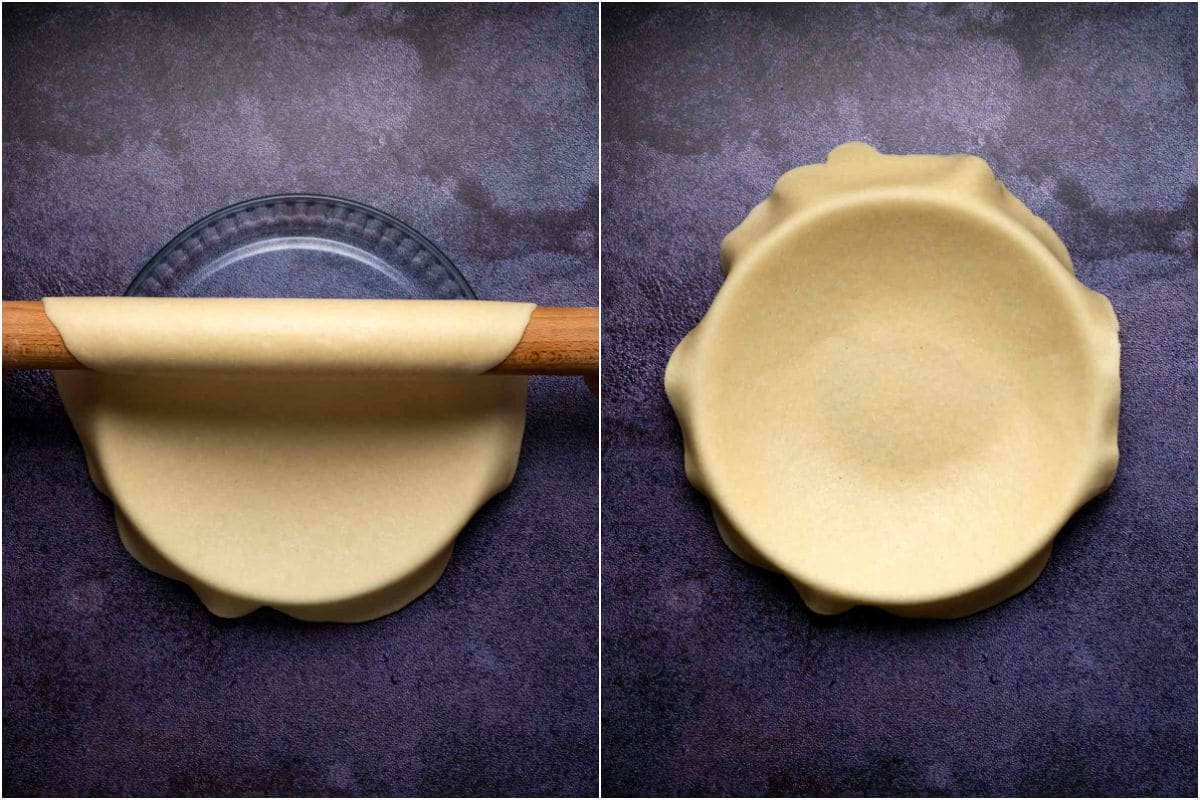
- Spray your pie dish with non-stick spray and then roll up the crust in your rolling pin (or just pick it up carefully) and carefully unroll it over the top of your pie dish. Carefully tuck the crust in along the edges of your pie dish.
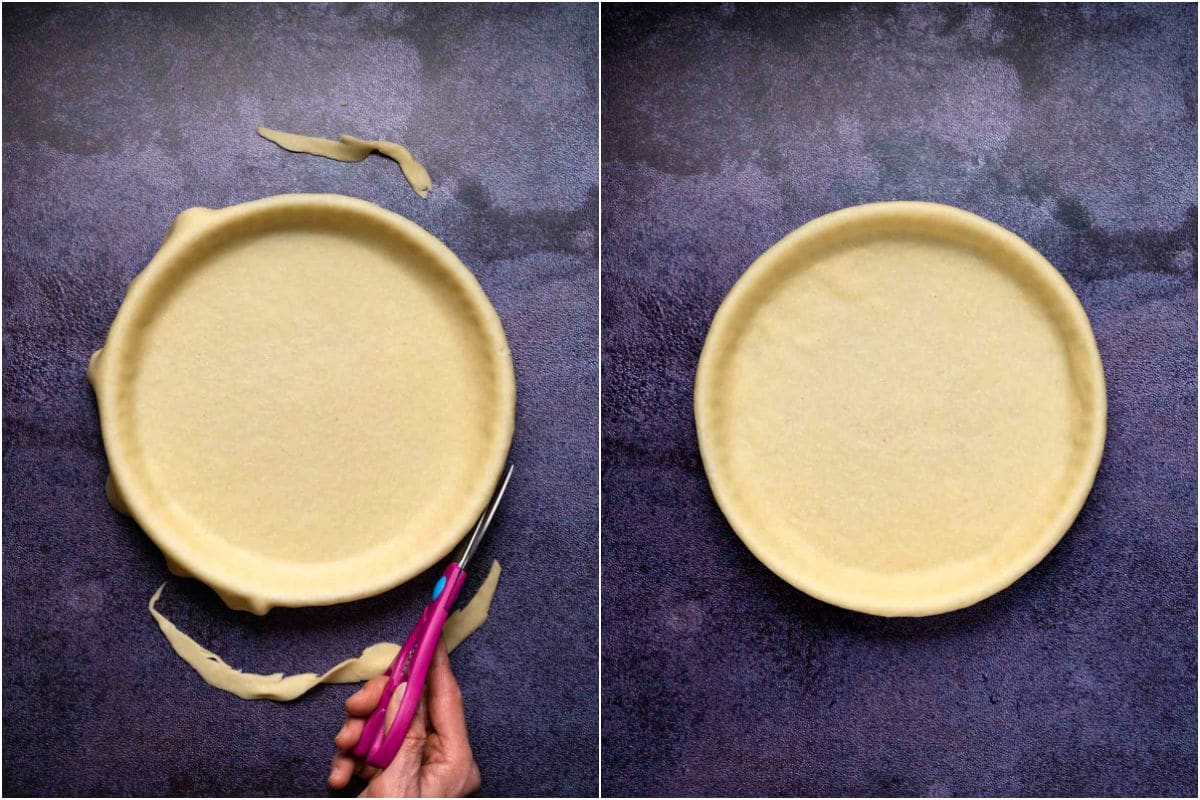
- Take a scissors and trim off any excess dough but make sure that there is a little overhang over the edges of the dish.
- Place your pie crust into the fridge while you prepare your pie filling.
The Filling:
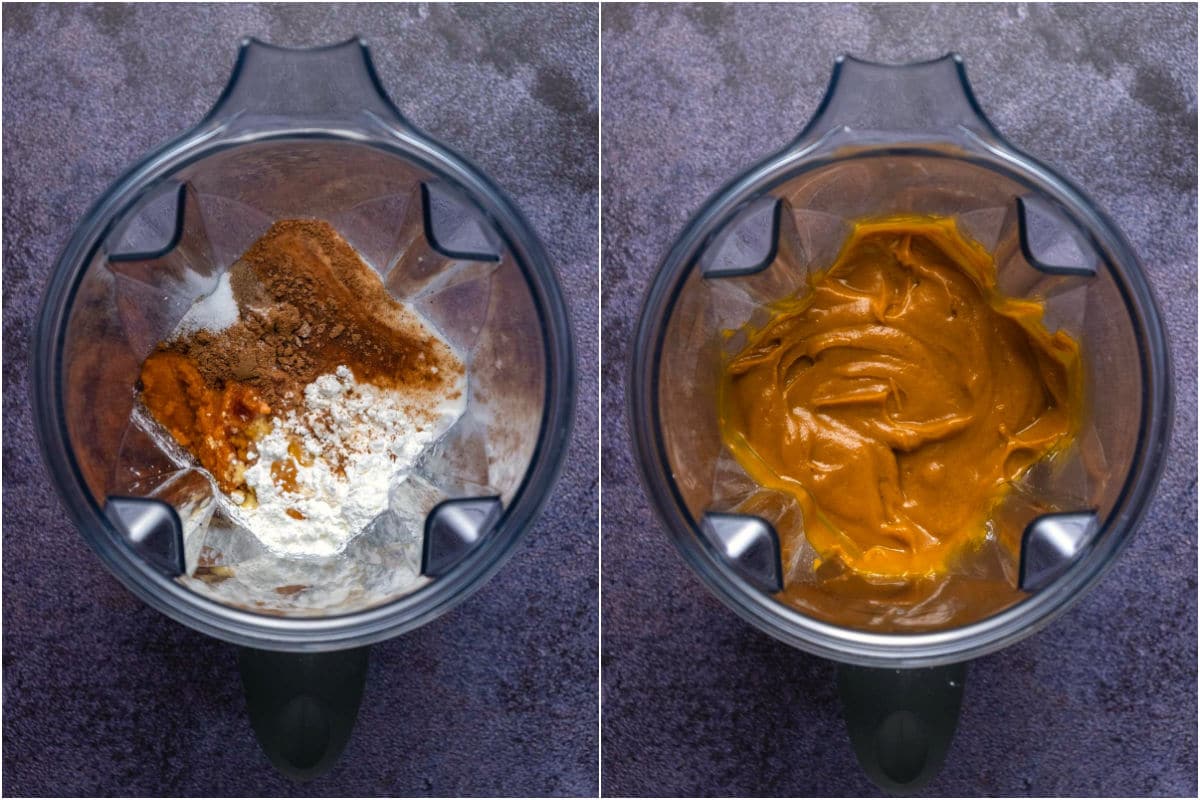
- Add canned pumpkin, coconut milk, brown sugar, maple syrup, cornstarch, pumpkin pie spice, vanilla extract and salt to your blender and blend until smooth. If you don’t have a blender, then just add all ingredients to a mixing bowl and use a hand whisk to whisk it until smooth.
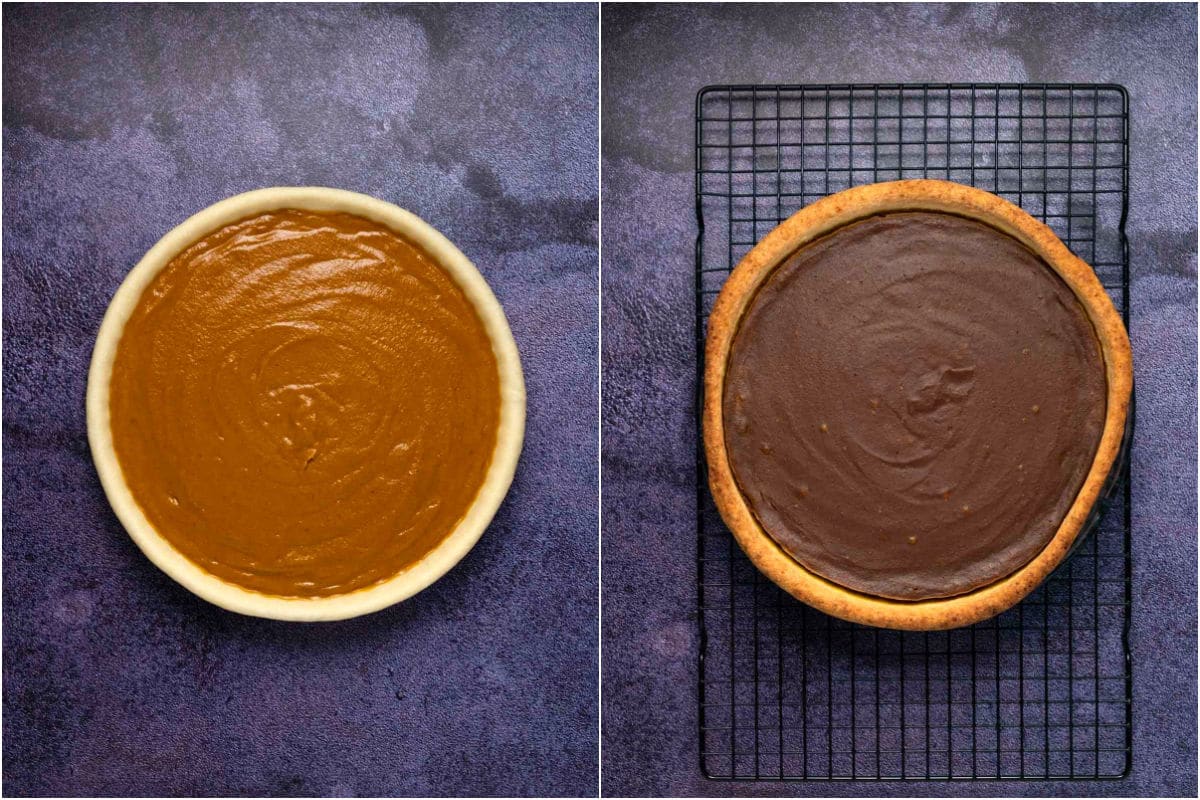
- Pour this out over your pie crust and smooth down with the back of a spoon.
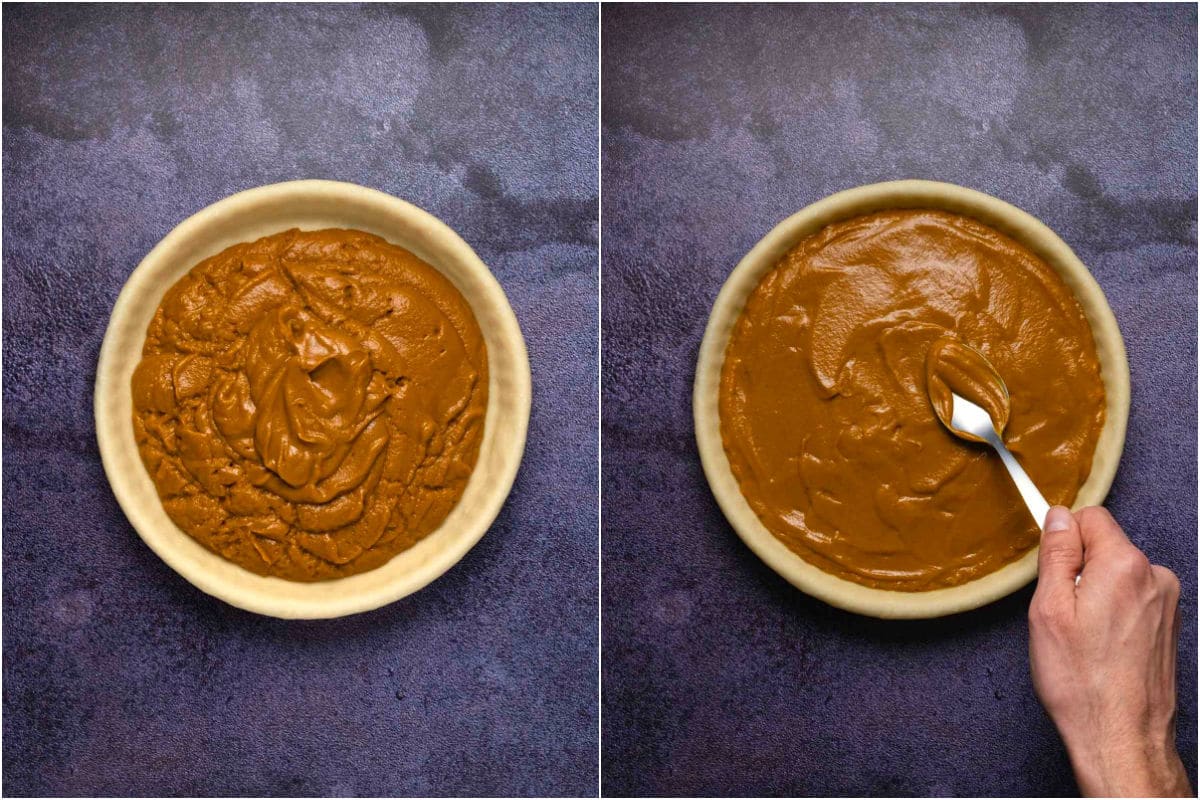
- Place into the oven to bake for 60 minutes at 350°F.
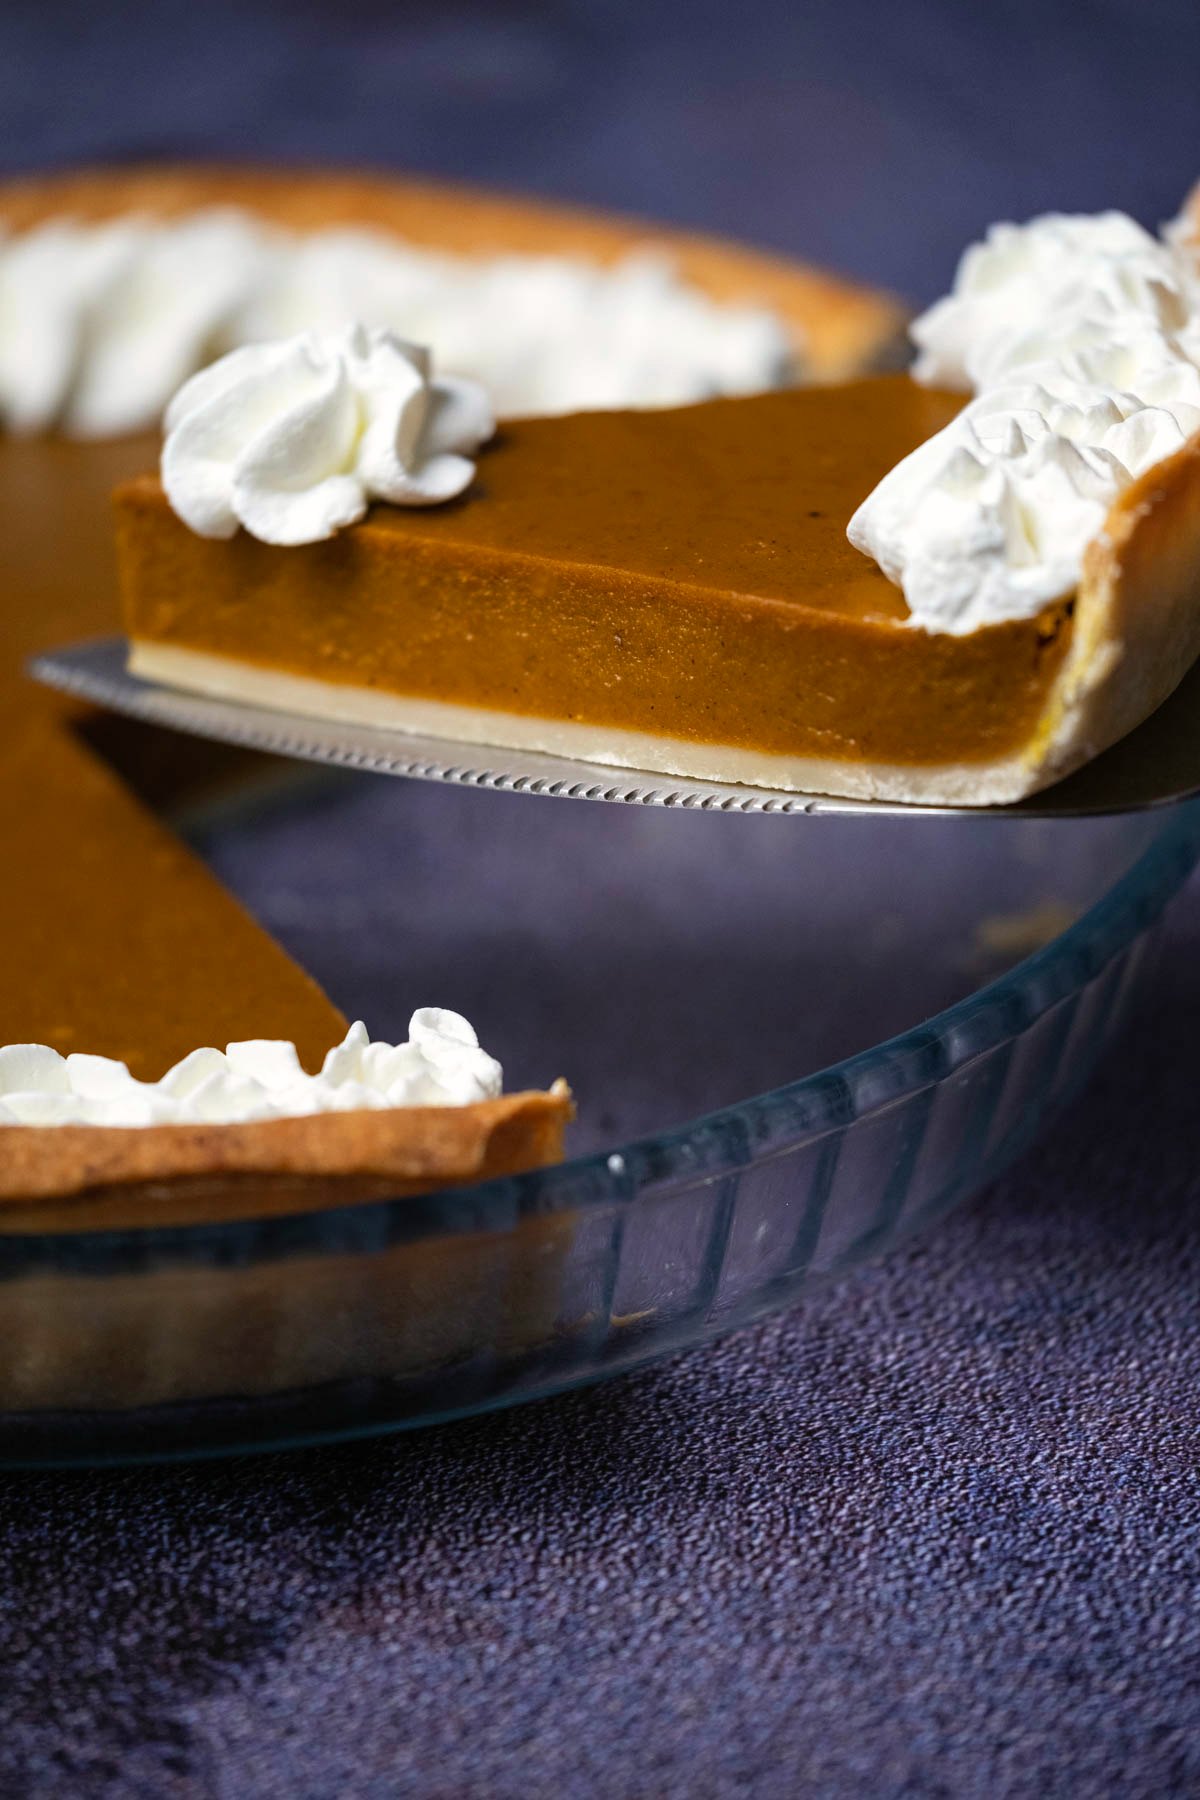
- Allow to cool on the counter until it reaches room temperature and then place into the fridge for at least 4 hours or overnight until set.
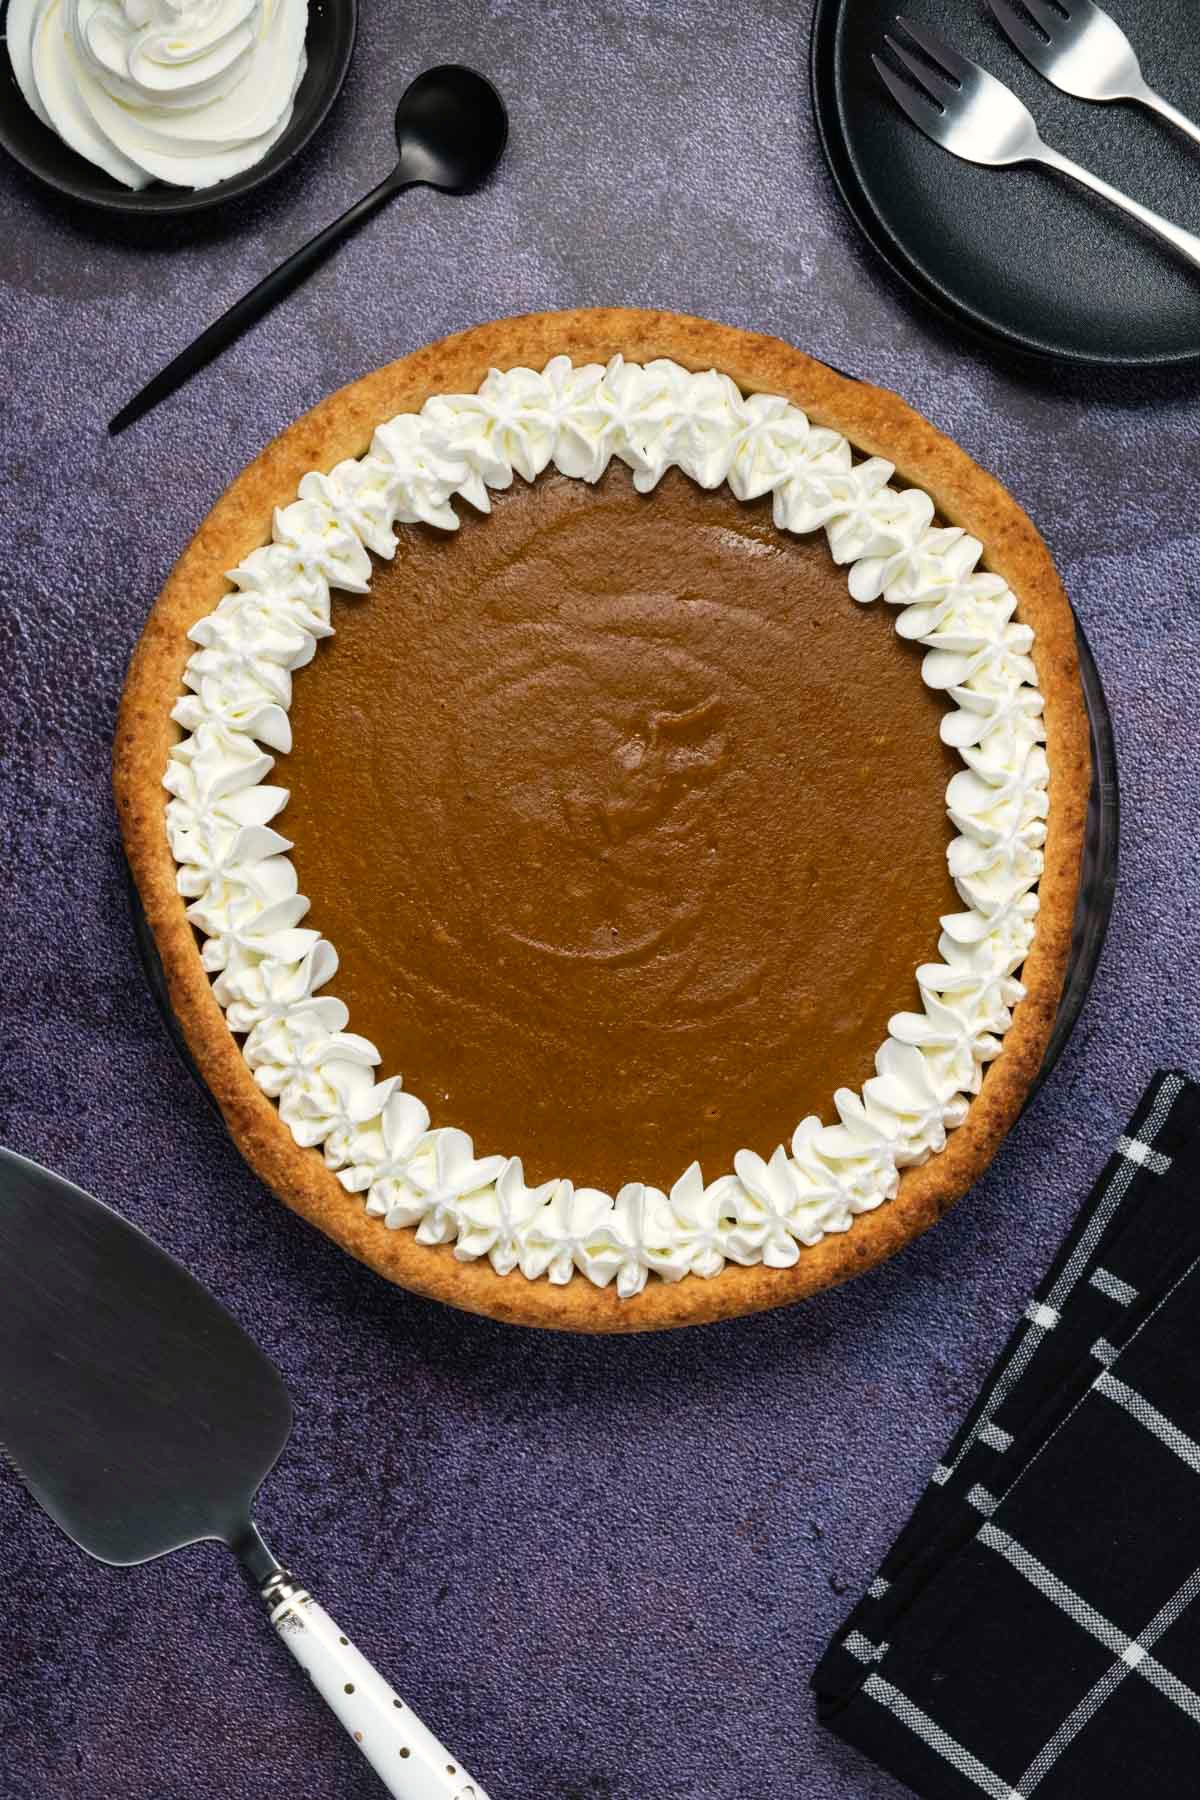
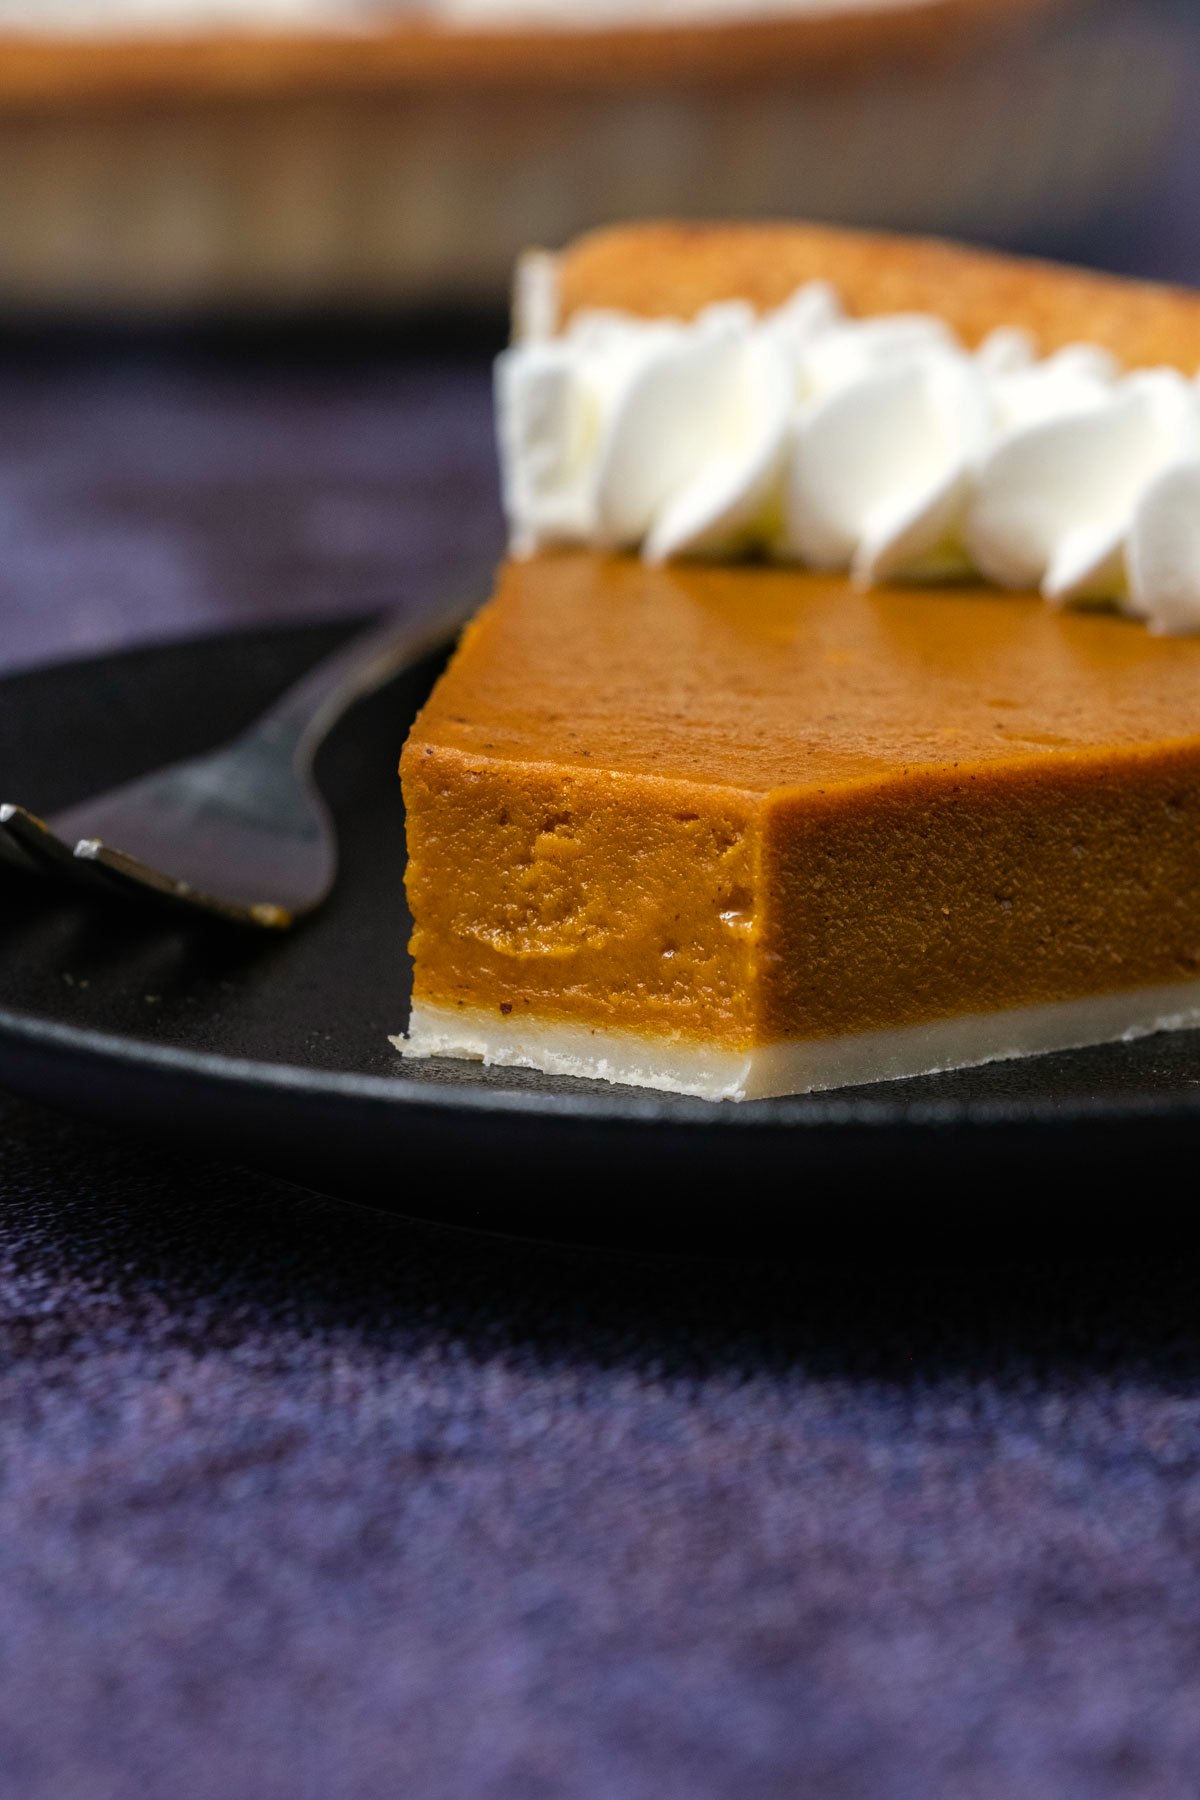
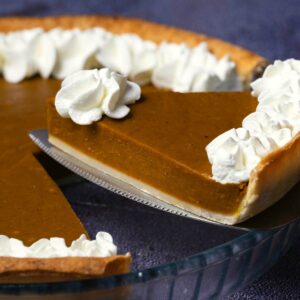
- Serve with vegan whipped cream.
Recipe Tips
THE PIE CRUST: The pie crust is made with coconut oil. The recipe is from our vegan pie crust recipe and works wonderfully as an easy, homemade option.
If you prefer a buttery crust: Check out the crust from our vegan apple pie that is made with vegan butter. If you’re using that pie crust then you can halve the recipe as the apple pie crust makes a double crust (top and bottom).
Alternatively, if you want to save time in this recipe, you can use a store-bought unbaked 9-inch pie crust.
TENTING WITH FOIL: We find it useful to tent the pie with foil after 40 minutes of baking and then place it back into the oven to bake for the final 20 minutes. This prevents the pie from over-browning. Sometimes the full 60 minutes baking time can result in some uneven browning on top of the pie and over-browning of the crust. If you have a pie crust shield then you can use that instead which will prevent the crust from over-browning. However, you may still have some uneven browning on top of your pie.
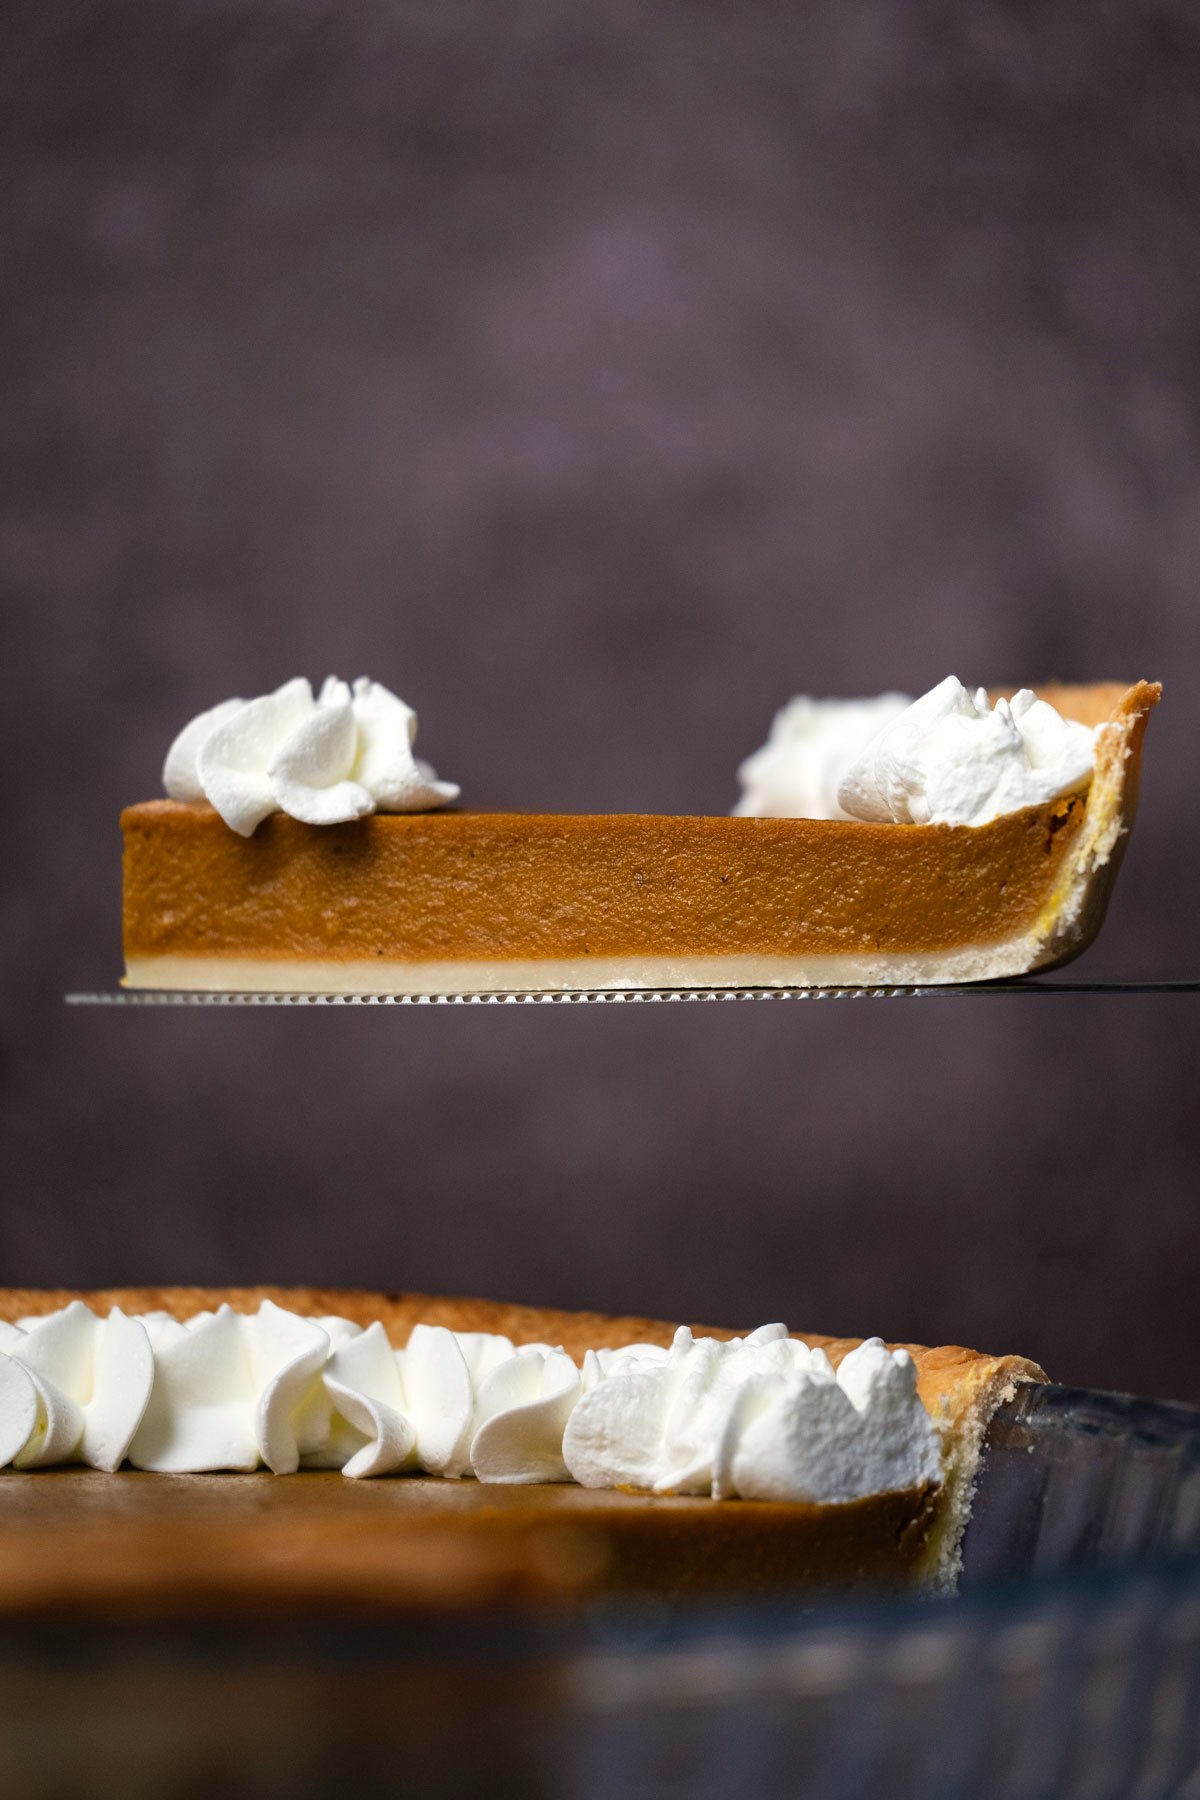
BROWNING: In these photos, we tented the pie with foil at the 40 minute mark. You can see that the browning is nice and even on top. Nonetheless, the pie when it first comes out of the oven is very dark in color, but it lightens as it cools.
In our video we didn’t tent the pie with foil and you’ll notice there is some uneven browning on top of the pie when it comes out of the oven. However, it also lightens up as it cools.
TIP: The best thing is to tent the pie with foil after 40 minutes of baking (or use a pie crust shield), or your pie crust may be over-browned.
How To Tent With Foil
Tenting with foil is to loosely cover the pie with foil in a tent like shape so that it doesn’t press down on the pie from the top. It prevents the pie and the crust from over-browning while allowing it to bake for the full 60 minutes, so that it bakes through and sets perfectly.
Ingredient Tips and Substitutions
Pumpkin Purée: The easiest option is to use canned pumpkin purée. It must be plain pumpkin purée and not pumpkin pie filling.
You can also use fresh homemade pumpkin purée. We have tested it with this recipe and it works perfectly. It’s just important that you make sure your pumpkin purée isn’t too wet. It must be similar in consistency to what you would get in a can. The best way to do this is to place peeled and chopped pumpkin onto a parchment lined baking tray. Bake at 350°F for 30 minutes (no oil or spices) until soft and cooked. Let it cool and then add to the food processor and process into a purée. Let the purée stand in a strainer over a bowl and let any excess water drain off before using.
Coconut Milk: This must be canned, full fat, unsweetened coconut milk. It needs to be thick and creamy so that your pie will be the right consistency. There is no coconut flavor in the end result. If you switch this for a thinner non-dairy milk such as almond milk then your pie may be too thin and won’t set properly.
Brown Sugar: You can also use coconut sugar if you like. The sugar can also be slightly reduced if you prefer.
Maple Syrup: You can switch this with a different kind of syrup if you like. Or you can just replace it with extra brown sugar.
Cornstarch: This helps the pie to set so it is a crucial ingredient. You can possibly also use tapioca starch but you may need to use double the amount. Arrowroot (in the same quantity as cornstarch) will likely also work.
Pumpkin pie spice: I used my super awesome homemade pumpkin pie spice in this pie. You can also make your own or use a store-bought option, it will be the same either way.
Pumpkin Pie Q&A
How long should I let my pumpkin pie cool?
Let it cool on the counter until it reaches room temperature. Then transfer to the fridge for at least 4 hours or overnight.
Can I use fresh pumpkin purée instead of canned?
Yes you can! You just need to make sure that your freshly made pumpkin purée isn’t too wet. It should be the same consistency as what you will find in a can. To achieve this, let your homemade pumpkin purée stand in a strainer so any excess water can drain off.
Can I make it gluten-free?
The filling for this pie is already gluten-free, so to make an entirely gluten-free pie you’ll just need to use a gluten-free pie crust. You can either purchase an already made gluten-free unbaked pie crust, or you can make your own. This recipe from Detoxinista looks awesome.

Make Ahead, Storing and Freezing
Make Ahead: This is a perfect pie to make ahead of time. It needs a few hours to chill and set in the fridge anyway and overnight is even better. So if you make the whole pie the day before, then you can simply store it in the fridge. When you’re ready, add vegan whipped cream and serve.
Storing: Keep your pie stored in the fridge (covered) where it will keep for up to a week.
Freezing: It is also freezer friendly for up to 3 months. Let it cool completely and chill/firm up in the fridge as usual. Then wrap it in several layers of plastic wrap, followed by foil to prevent any freezer burn and freeze. Thaw overnight in the fridge.
More Vegan Pumpkin Recipes
- Vegan Pumpkin Cake
- Vegan Pumpkin Muffins
- Vegan Pumpkin Bread
- Vegan Pumpkin Pancakes
- Vegan Pumpkin Cookies
- Vegan Pumpkin Cheesecake
Did you make this recipe? Be sure to leave a comment and rating below!
Vegan Pumpkin Pie
Ingredients
For the Pie Crust:
- 1 cup + 2 Tablespoons All Purpose Flour (145g)
- 1 Tablespoon White Granulated Sugar
- ½ teaspoon Salt
- ¼ cup Coconut Oil (55g) Solid
- 4 Tablespoons Ice Water
For the Filling:
- 15 ounce Can Pumpkin Purée (425g) not pumpkin pie filling*
- ¾ cup Coconut Milk (180ml) Canned, Full Fat, Unsweetened
- ¾ cup Light Brown Sugar (150g)
- ¼ cup Maple Syrup (60ml)
- ¼ cup Cornstarch (32g)
- 3 teaspoons Pumpkin Pie Spice
- 1 teaspoon Vanilla Extract
- ½ teaspoon Salt
For Serving:
Instructions
- Prepare the crust: Add all purpose flour, sugar and salt to the food processor and pulse to combine.
- Add the coconut oil (must be solid, not melted) and pulse until the mixture is crumbly.
- Add ice water and pulse it to combine. It should look like a dough now and if you break off a piece and roll it in your hands it should easily roll into a ball.
- Remove the dough from the food processor, transfer to a floured surface and roll the dough into a big round ball.
- Using a rolling pin roll out the dough from side to side into a large circle that is wider than your 9-inch pie dish.
- Spray your pie dish with non-stick spray and then roll up the crust in your rolling pin (or just pick it up carefully) and carefully unroll it over the top of your pie dish. Carefully tuck the crust in along the edges of your pie dish.
- Take a scissors and trim off any excess dough but make sure that there is a little overhang over the edges of the dish. Place your pie crust into the fridge while you prepare your pie filling.
- Prepare your filling: Add canned pumpkin, coconut milk, brown sugar, maple syrup, cornstarch, pumpkin pie spice, vanilla extract and salt to your blender and blend until smooth. If you don't have a blender, then just add all ingredients to a mixing bowl and use a hand whisk to whisk it until smooth.
- Pour this out over your pie crust and smooth down with the back of a spoon.
- Place into the oven to bake for 60 minutes at 350°F. To prevent over-browning, bring it out after 40 minutes, tent it with foil and then return to the oven for the remaining 20 minutes (*see notes).
- When you remove the pie from the oven, it will still be quite wobbly in the center, this is completely fine, it will firm up when cooling. Your pie may also be quite dark in color when first removed from the oven, it lightens up a lot when cool.
- Allow to cool on the counter and then place into the refrigerator to set completely, around 4 hours at least or overnight if possible until completely chilled and set. Serve with vegan whipped cream.
Video
Notes
- Pie Crust: You can use a store-bought 9-inch unbaked pie crust instead of making a crust from scratch if you want to save time on this recipe. It must be an unbaked crust though to work well in this recipe.
- Pumpkin Purée: The easiest option is to use canned pumpkin purée. It must be plain pumpkin purée and not pumpkin pie filling. You can also use fresh homemade pumpkin purée. We have tested it with this recipe and it works perfectly. It’s just important that you make sure your pumpkin purée isn’t too wet. It must be similar in consistency to what you would get in a can. The best way to do this is to place peeled and chopped pumpkin onto a parchment lined baking tray and bake at 350°F for 30 minutes (no oil or spices) until soft and cooked. Let it cool and then add to the food processor and process into a purée. Let the purée stand in a strainer over a bowl and let any excess water drain off before using. You will need 1 and ¾ cups homemade pumpkin purée.
- Coconut Milk: This must be canned, full fat, unsweetened coconut milk. It needs to be rich and creamy so that your pie will be the right consistency. There is no coconut flavor in the end result. If you switch this for a thinner non-dairy milk such as almond milk then your pie may be too thin and won’t set properly.
- Brown Sugar: You can also use coconut sugar if you like. The sugar can also be slightly reduced if you prefer.
- Maple Syrup: You can switch this with a different kind of syrup if you like, or replace it with a ¼ cup extra brown sugar, or omit it altogether for a less sweet version.
- Cornstarch: This helps the pie to set so it is a crucial ingredient. You can possibly also use tapioca starch but you may need to use double the amount. Arrowroot (in the same quantity as cornstarch) will likely also work.
- Pumpkin pie spice: You can make your own homemade pumpkin pie spice or use a store-bought option, it will be the same either way.
- Tent with foil: Tent the pie with foil after 40 minutes of baking and then place it back into the oven to bake for the final 20 minutes. This prevents the pie from over-browning. Sometimes the full 60 minutes baking time can result in some uneven browning on top of the pie and over-browning of the crust. If you have a pie crust shield then you can use that instead which will prevent the crust from over-browning. However, you may still have some uneven browning on top of your pie.
- Make Ahead: This is a perfect pie to make ahead of time as it needs a few hours to chill and set in the fridge anyway and overnight is even better. So if you make the whole pie the day before, then you can simply store it in the fridge and when you’re ready, add vegan whipped cream and serve.
- Storing and Freezing: Keep your pie stored in the fridge (covered) where it will keep for up to a week. It is also freezer friendly for up to 3 months. Let it cool completely and chill/firm up in the fridge as usual. Then wrap it in several layers of plastic wrap, followed by foil to prevent any freezer burn and freeze. Thaw overnight in the fridge.
- This recipe was first published in November 2016. We have given it a makeover with some new photos and lots of extra tips and tricks. The recipe itself is unchanged.
Was looking for a new pumpkin pie recipe for the holidays and figured I’d give yours a try since we are IN LOVE with your lemon pie for summertime. I made this pie yesterday and it’s easily the best pumpkin pie I’ve ever tasted. This opinion was seconded by my husband who asked for it for breakfast this morning. I will not confirm or deny that I allowed that. 🙂 Thank you!!!!
Yay! That’s the best compliment, thank you so much Jennifer! And for breakfast? Perfect! 😂
Whoa! I wasn’t expecting the filling to be that smooth! This is so much better than store bought vegan pumpkin pie. I used pre made crust, and it turned out great. I really appreciate that the filling can be made in the blender. 10/10
Thank you so much Stephanie!
Thank you so much for posting this.I ended up baking two and got the pastry a little too thick on my first bake but the second was perfect, forgot to check my baking cupboard before I started and it turns out I didn’t have all of the spices (whoops) so I went for 1 tsp cinammon and a 1/2 tsp mixed spice which tasted great. I was a little worried about the liquidity of my puree (canned pumpkin being pretty difficult to find here in the UK) and it certainly didn’t look like your photos but it came out beautifully and the pies went down an absolute storm.
So happy to hear it worked out perfectly! Thanks so much for the great review and rating! 🙂
I want to try your recipe this year. Therefore I have a question: for the Coconut cream, do I refrigerate the can coconut milk the night before and just use the white harden part on top?
Hi Lisa, no this recipe uses coconut milk, and you don’t need to separate the cream from the water. If you’re talking about the whipped cream that you can (optionally) serve this pie with, then yes, you would separate the cream from the water. You can find out more in our post about vegan whipped cream.
Amazing. Cheated with Pillsbury pie crust but the filling was perfect and a first for my milk/egg allergic daughter. Thank you!
Yay! So happy to hear it was good!
This was my first vegan pumpkin pie and it came together nicely. I used a granola press-in crust. The consistency was perfect. However, the spice level, for me, was overpowering (cloves taste like toothpaste to me). Recipes I have used in the past had half the amount of pumpkin pie spice plus one tsp of cinnamon. I’ll be baking another and trying the spice quantity from my former recipe. Hopefully does the trick and will be perfect for me.
Hi Claudia, so glad the consistency was good! We find the spice level to be perfect, but I do think there can be some variation in pumpkin pie spice blends. Definitely tweak it to your taste and hopefully it will be perfect next time.
First time I tried making any pie and it was a hit with everyone. Thanks so much!
Awesome! Thanks so much for sharing Suzane!
I don’t have a food processor to mix the pie crust ingredients. Can I just stir it?
Hi Diana, yes you can make it by hand, but you’ll need to get in there with your hands to form it into a dough.
Amazing pumpkin pie, better than any other I have tried before.
Wonderful! Thank you so much Debbi!
Love this recipe and made it last two years! I was hoping to double the recipe this year and make it in an 11 inch pan instead of 9 – any idea how much longer I would need to bake it for?
Hi Sarah, so happy you love the recipe! I think the baking time will be the same since it will stay about the same thickness.
How do you know when the pie is done? I did the knife test after 60 minutes of baking and the knife did not come out clean, but the filling was beginning to pull away from the crust along the edges. Do not know what to do. Help!
Hi Laura, the knife test wouldn’t work here as the pie firms up when cooling. It’s still jiggly in the center straight from the oven. So if it’s baked for 60 minutes then you’re good!
Can I use canned 100% pure pumpkin? I made this last year for thanksgiving and it was awesome but I can’t remember if I used this filling 🙂
Hi Audra, yes that’s right! You just don’t want to use canned pumpkin pie filling. But pure pumpkin is exactly right.
Yummy and delicious
Thanks Serena!
Fabulous, perfect and beautifully fluffy and delicious!!
I ground and mixed the All Spice and Pumpkin Spice myself. I roasted and puréed a butternut Squash. I WAS short 100g brown sugar, which I left out (Went with 100g palm sugar and 100g Xylitol). I substituted 1/3 of the Flour with Gluten Free Flour Mix. My mix was a bit sticky and seemed to need more liquid, but I kept it as is.
The baked result was perfect and rose just over double.
Thank you Alison!
So glad it was a success Dawid! Thanks for the awesome review!
Amazing recipe! Came out perfect!
Fantastic! Thank you!
Made 3 times, loved it!
So I was wondering what if I swapped out the pumpkins for bananas… would it work? A baked banana pie? Wouldn’t that be fab?! And less sugar as banana are sweet ????♀️
So glad you liked it Aneesha! I have no idea what it would be like with bananas, but let us know if you try it! 🙂
I tried with 4 ripe bananas and half the sugar 2teaspoons cinnamon and 1teaspoon pumpkin spice – turned out fab, held together well and tasted great!
Awesome! Thanks so much for updating us! 🙂
Made this the first time and it was delicious!
The next time I only had arrowroot powder and the pie came out super gummy, so I don’t recommend subbing arrowroot for cornstarch lol.
Thanks for sharing that Ashley! Good to know. 🙂