
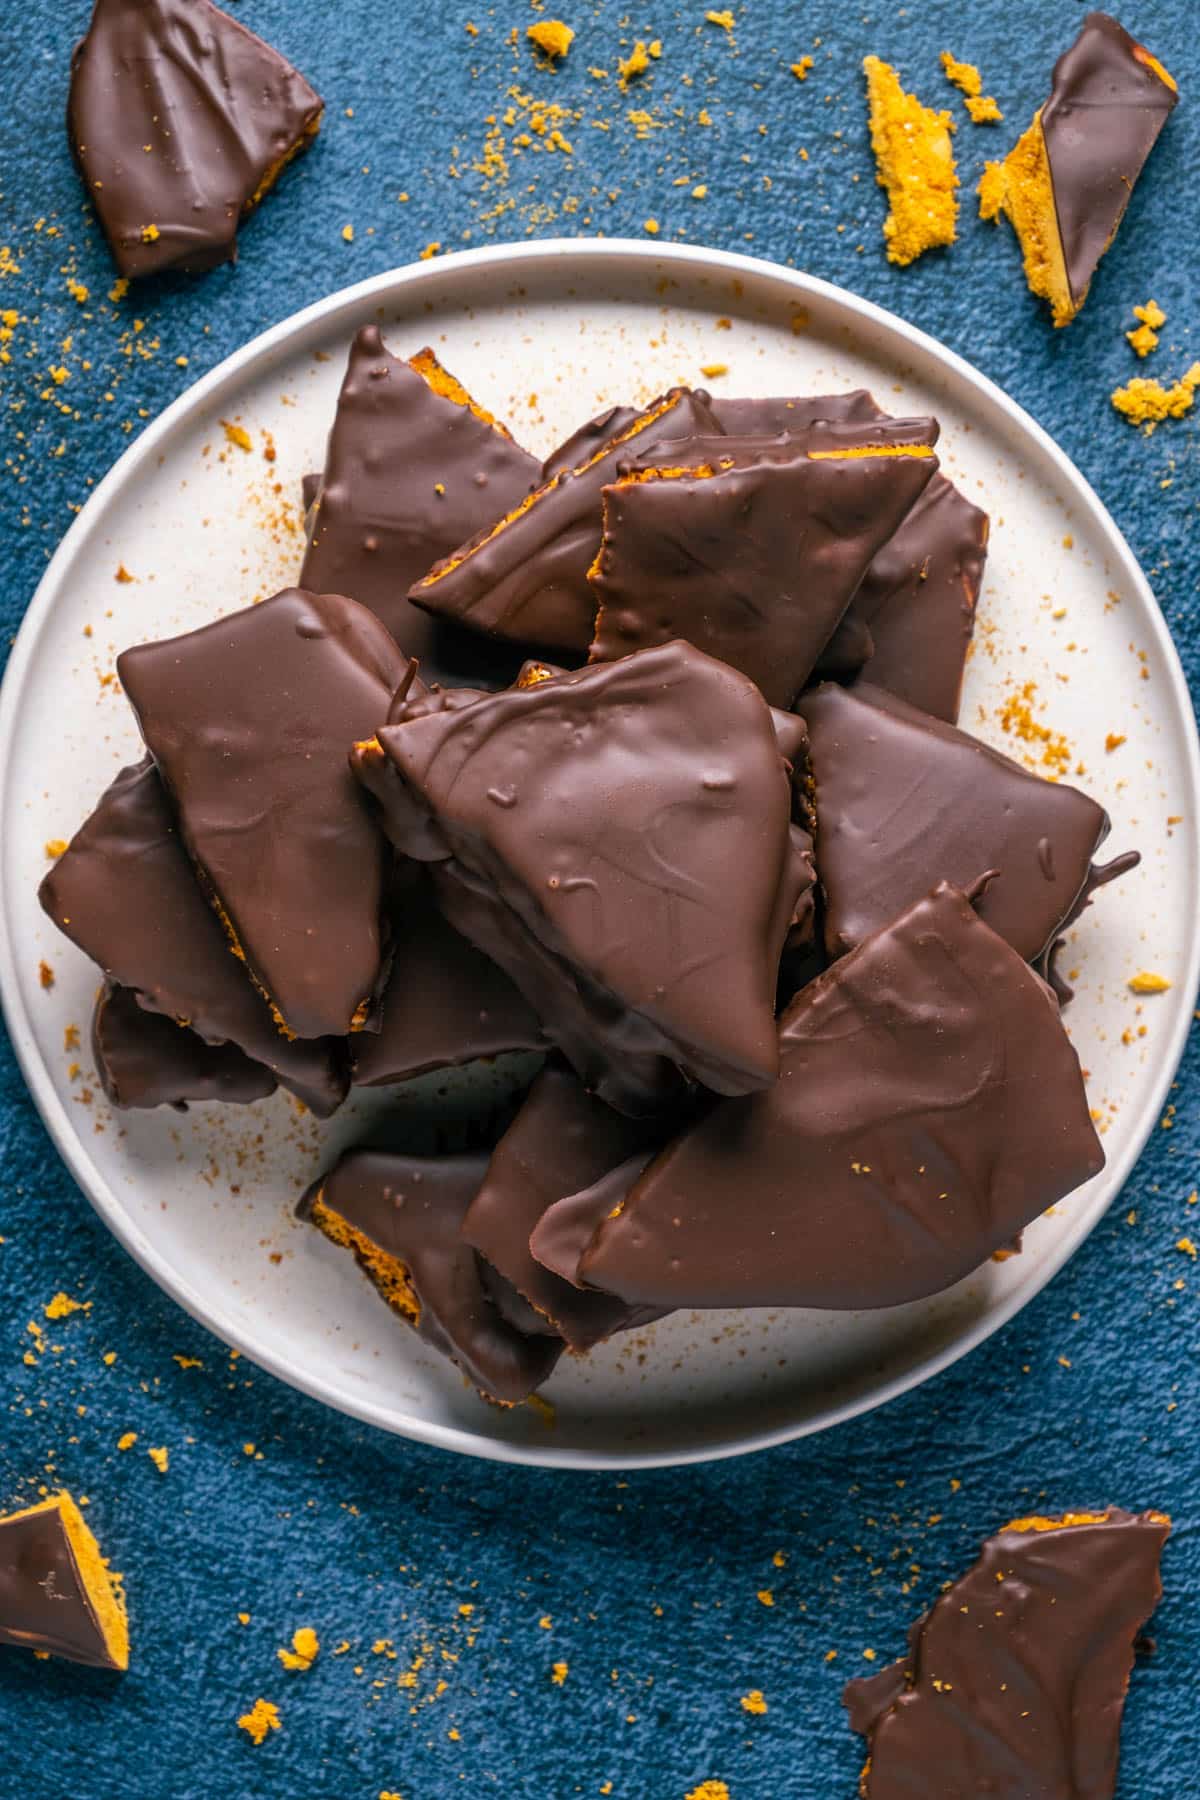
Vegan honeycomb, sponge candy, cinder toffee or whatever you call it. This chocolate covered treat is easy and so much fun to make.
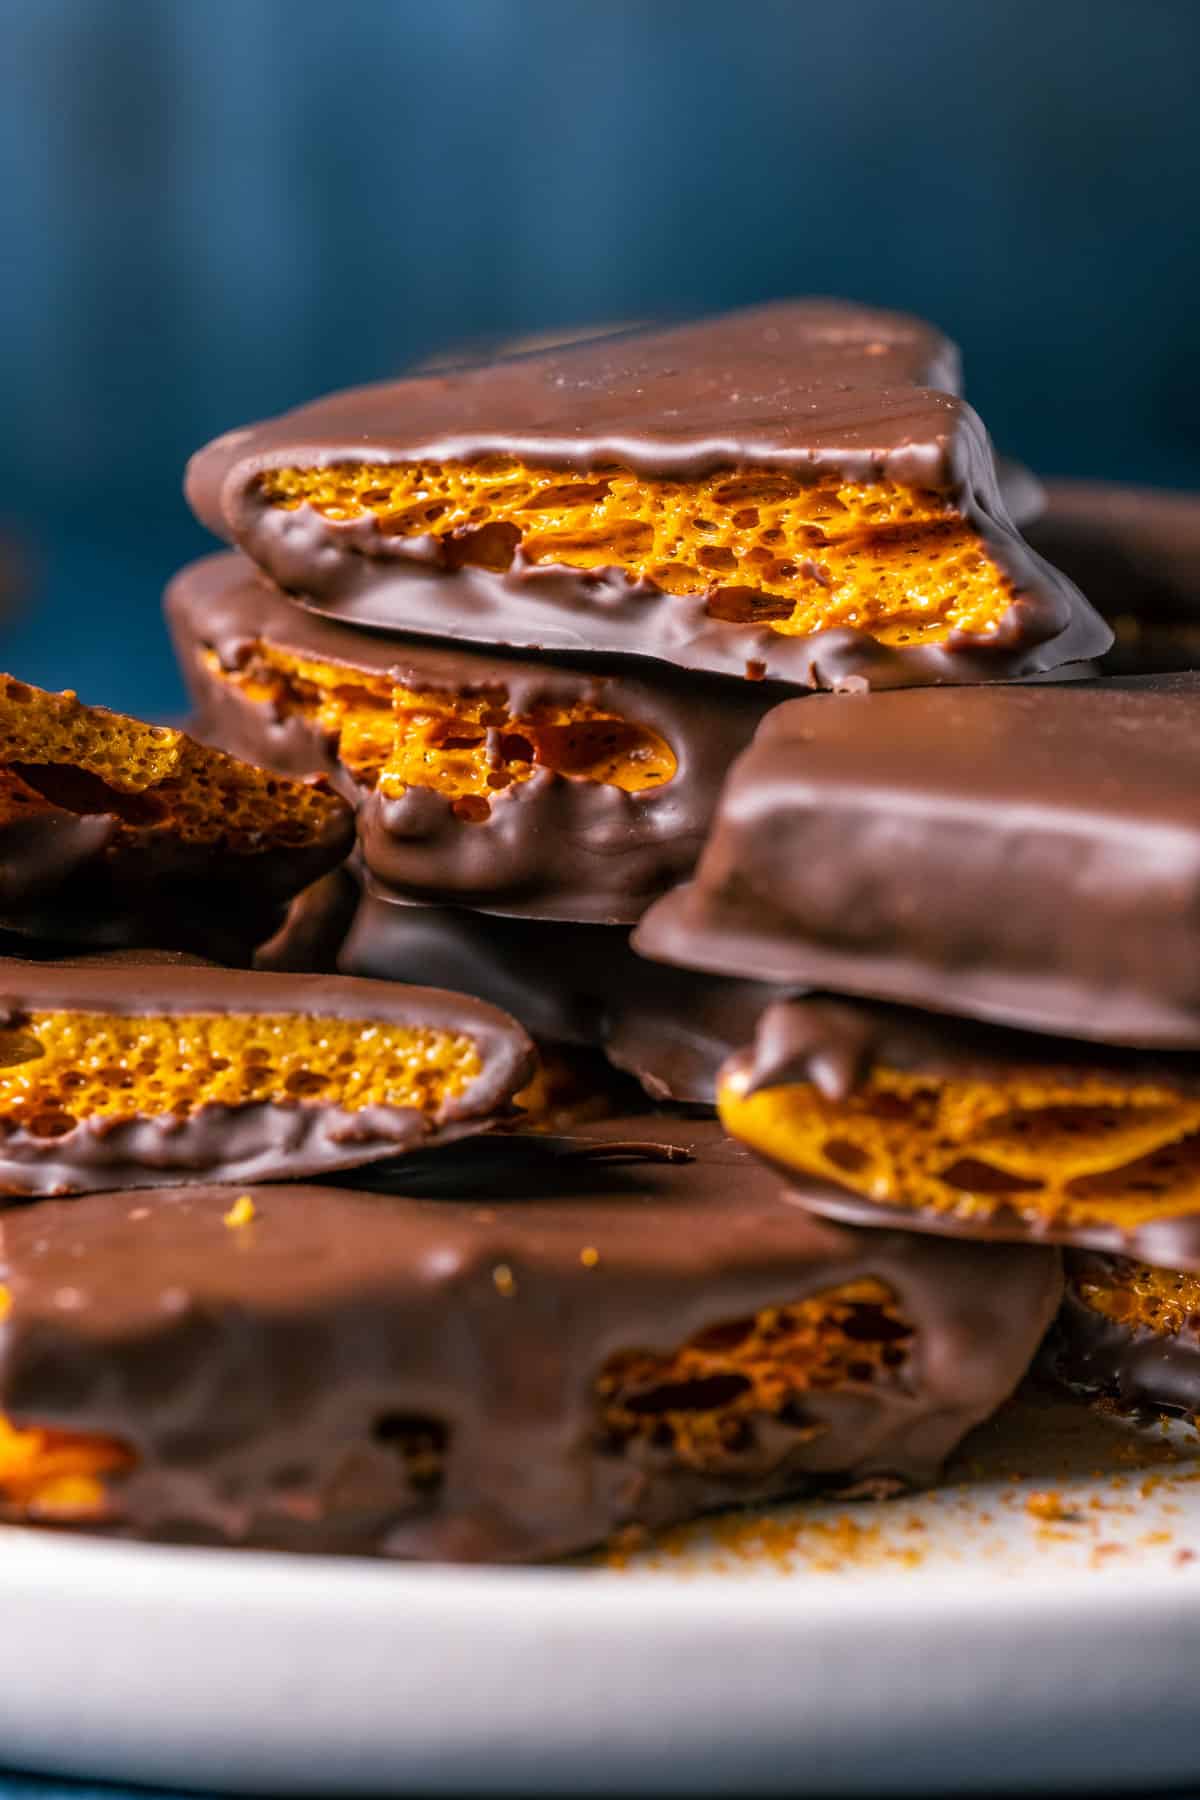
So as you can see, honeycomb goes by a few names. In South Africa (and the UK) we have a candy bar called Cadbury Crunchie consisting of a honeycomb center covered in chocolate, and that was always a personal favorite.
So I was delighted to find out that the honeycomb center is a cinch to duplicate. And honeycomb is vegan.
So all you need to do is smother it in vegan chocolate and you have a fabulous vegan treat.
It’s absolutely melt in the mouth delicious and it stores super well too, so you can have treats for weeks ahead!
And if you love making your own candy, try our vegan toffee and vegan peanut brittle.
Ingredients You’ll Need:
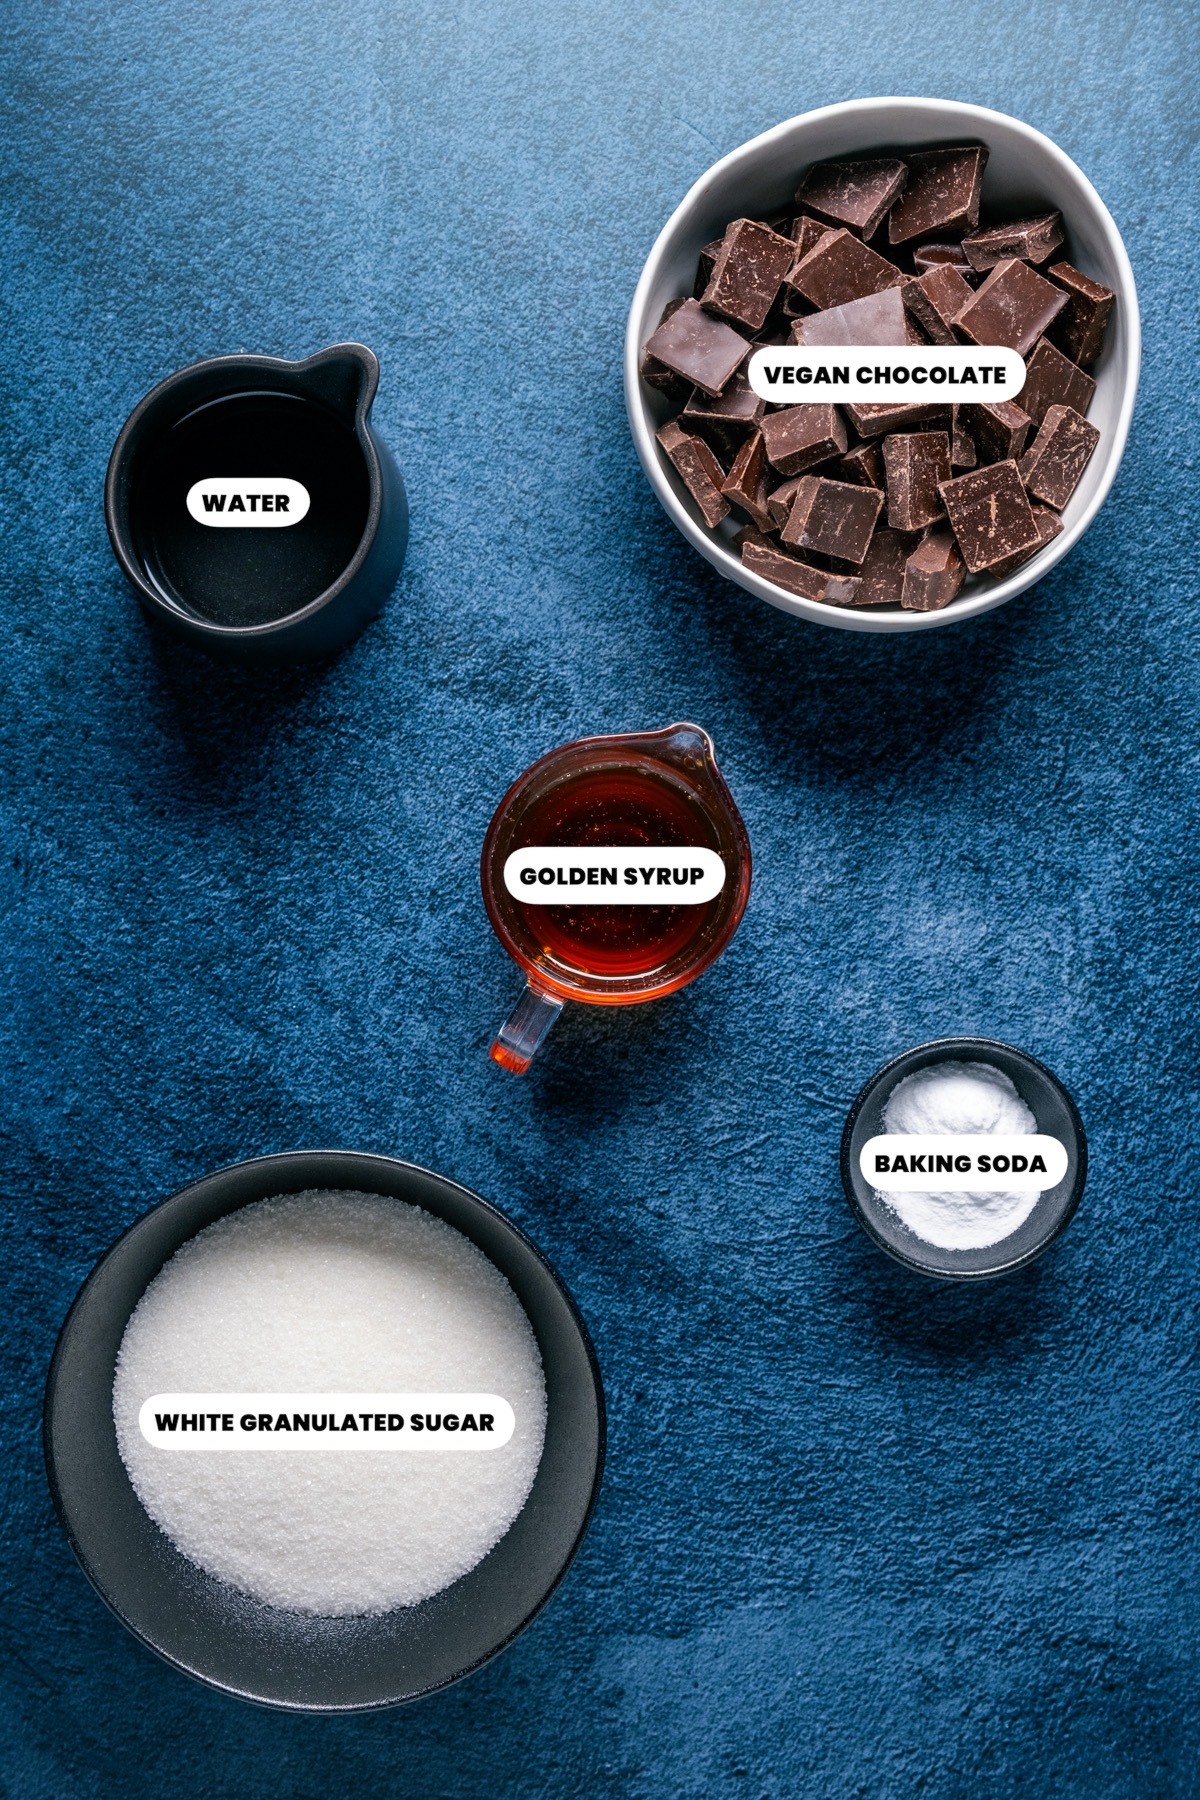
Ingredient Notes
- Golden syrup – we love Golden syrup for it’s caramel flavor, but corn syrup or dark corn syrup are also great to use. I have not tested maple syrup but I think this should also work fine.
- Vegan chocolate – we used a high quality vegan chocolate to melt down, but vegan chocolate chips also work great.
How To Make Vegan Honeycomb
You will find full instructions and measurements in the recipe card at the bottom of the post. This is a summary of the process to go along with the process photos.
- Line a baking sheet with parchment paper and set it down next to the stove.
- Place the baking soda in a bowl next to the stove so that it can be thrown in all at once when the time is right.
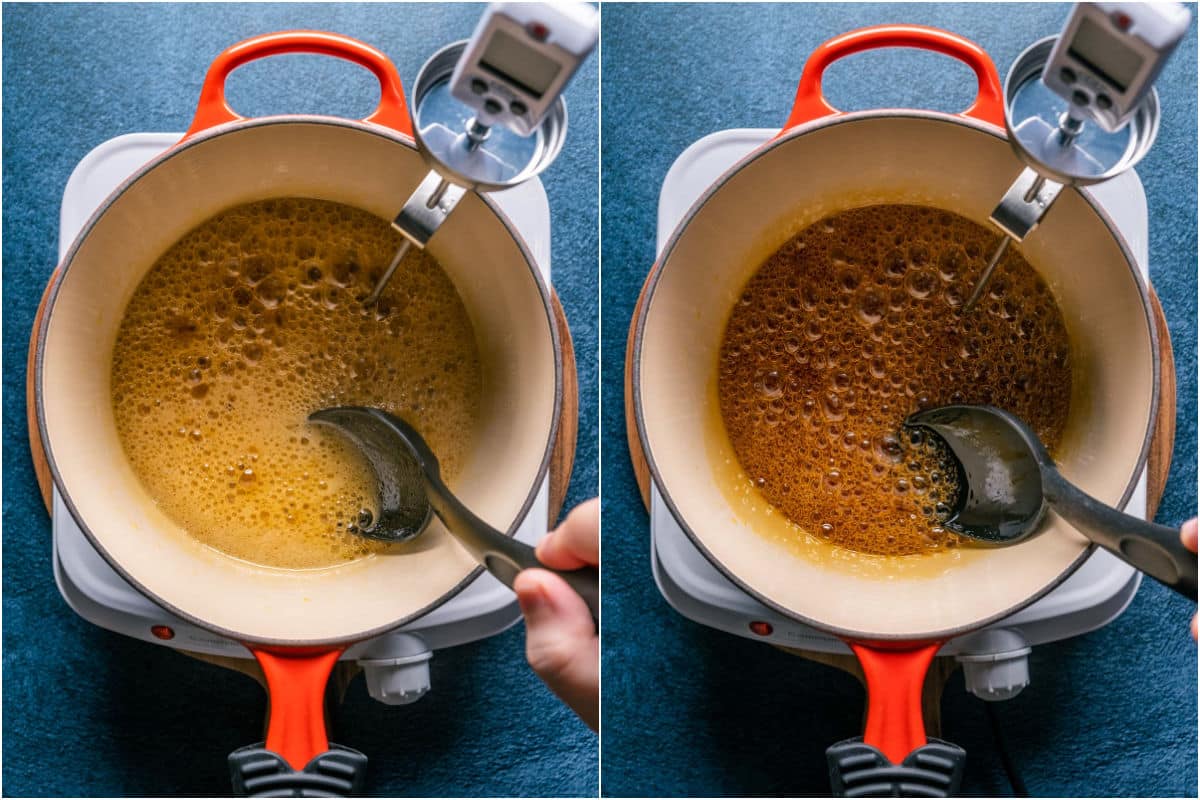
- Add golden syrup, white granulated sugar and water to a medium sized, heavy bottomed saucepan and turn the heat to medium.
- Stirring all the while, allow the sugar to melt and begin bubbling away.
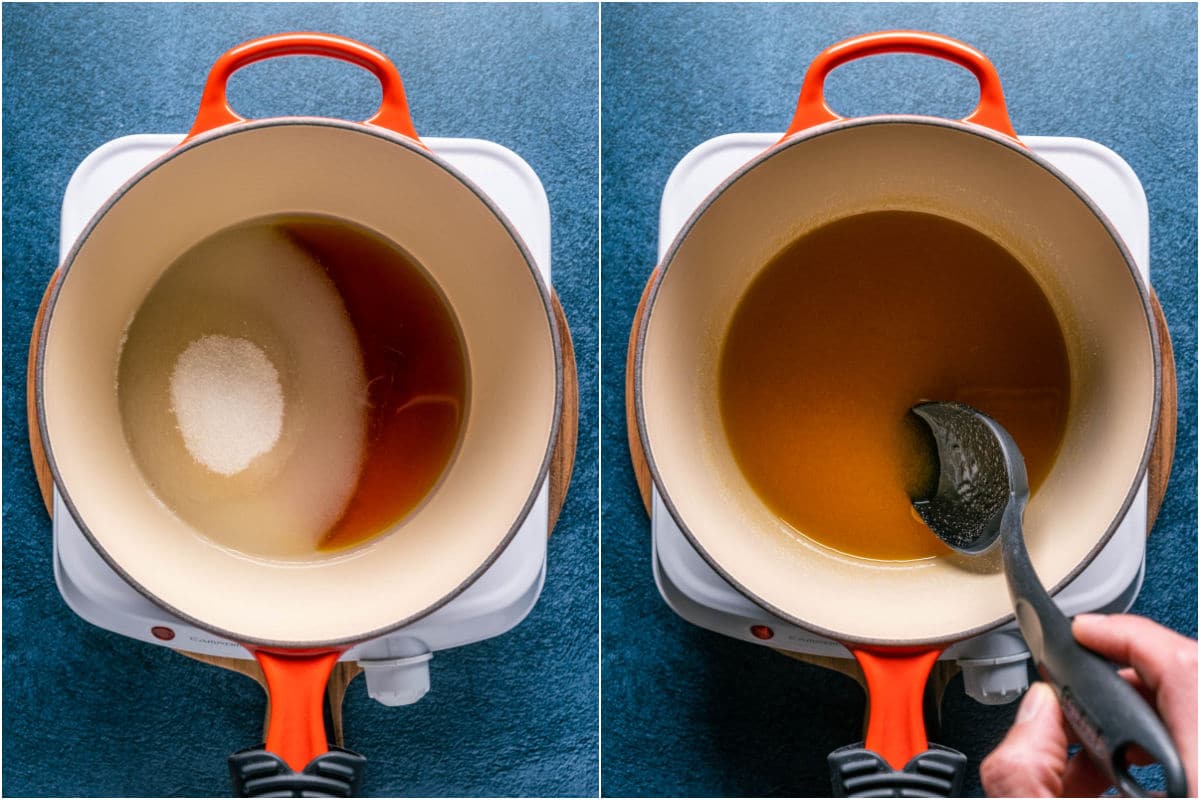
- Once the mixture begins to boil, attach your candy thermometer and keep stirring vigorously all the while until the mix reaches 300°F (149°C), then immediately move the pot off the heat.
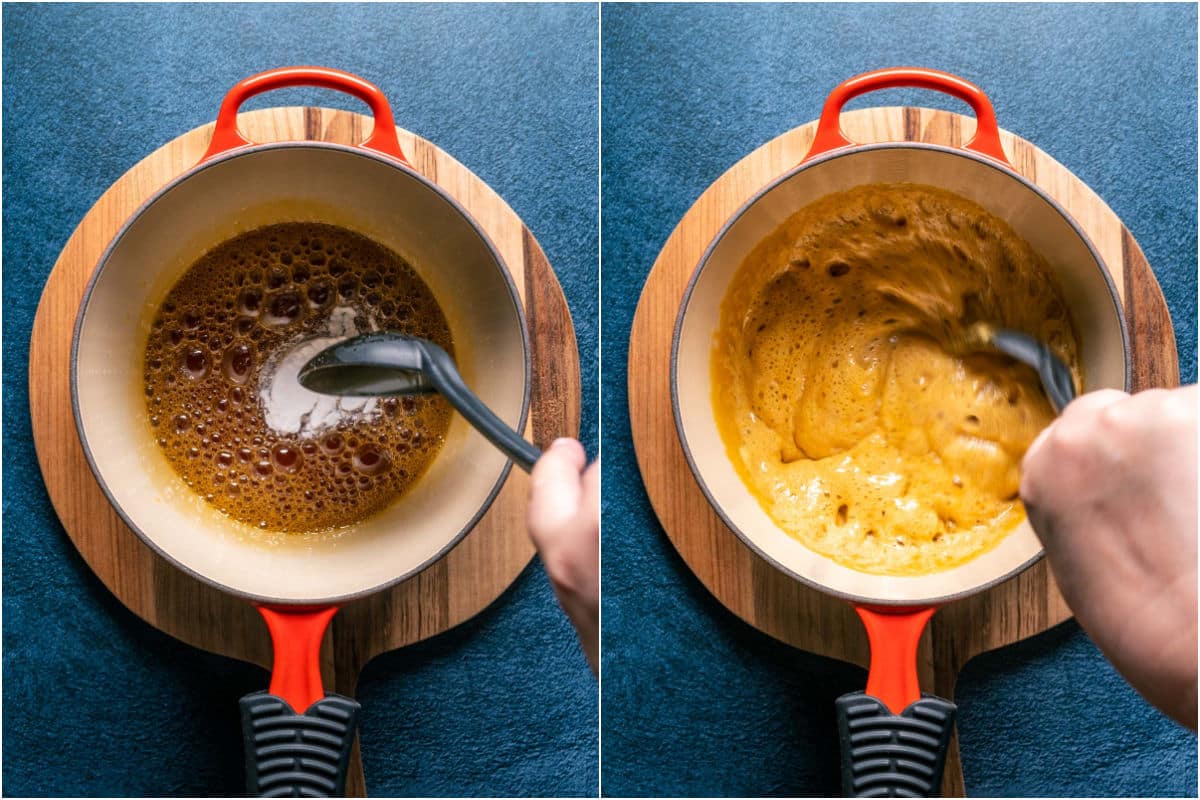
- Throw all the baking soda in immediately and stir it in. Be wary as the mix will double or triple in size, so make sure to stir it in with a long handled spoon. Stir it in completely but don’t overmix or your mixture will start to deflate.
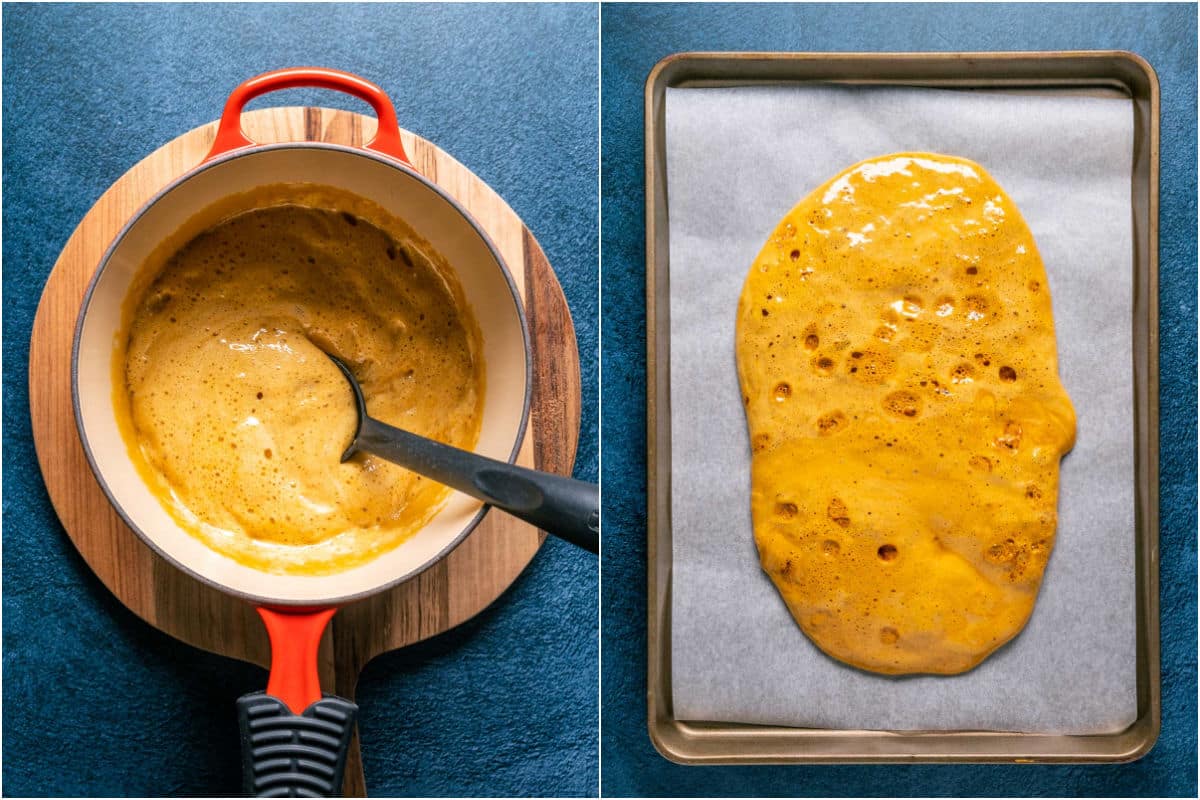
- Pour the mix out onto the parchment lined baking sheet and leave it be. Don’t try to smooth it out, once it’s poured just leave it to take the shape it wants to take.
- Leave it to cool down and set. This will take at least an hour.
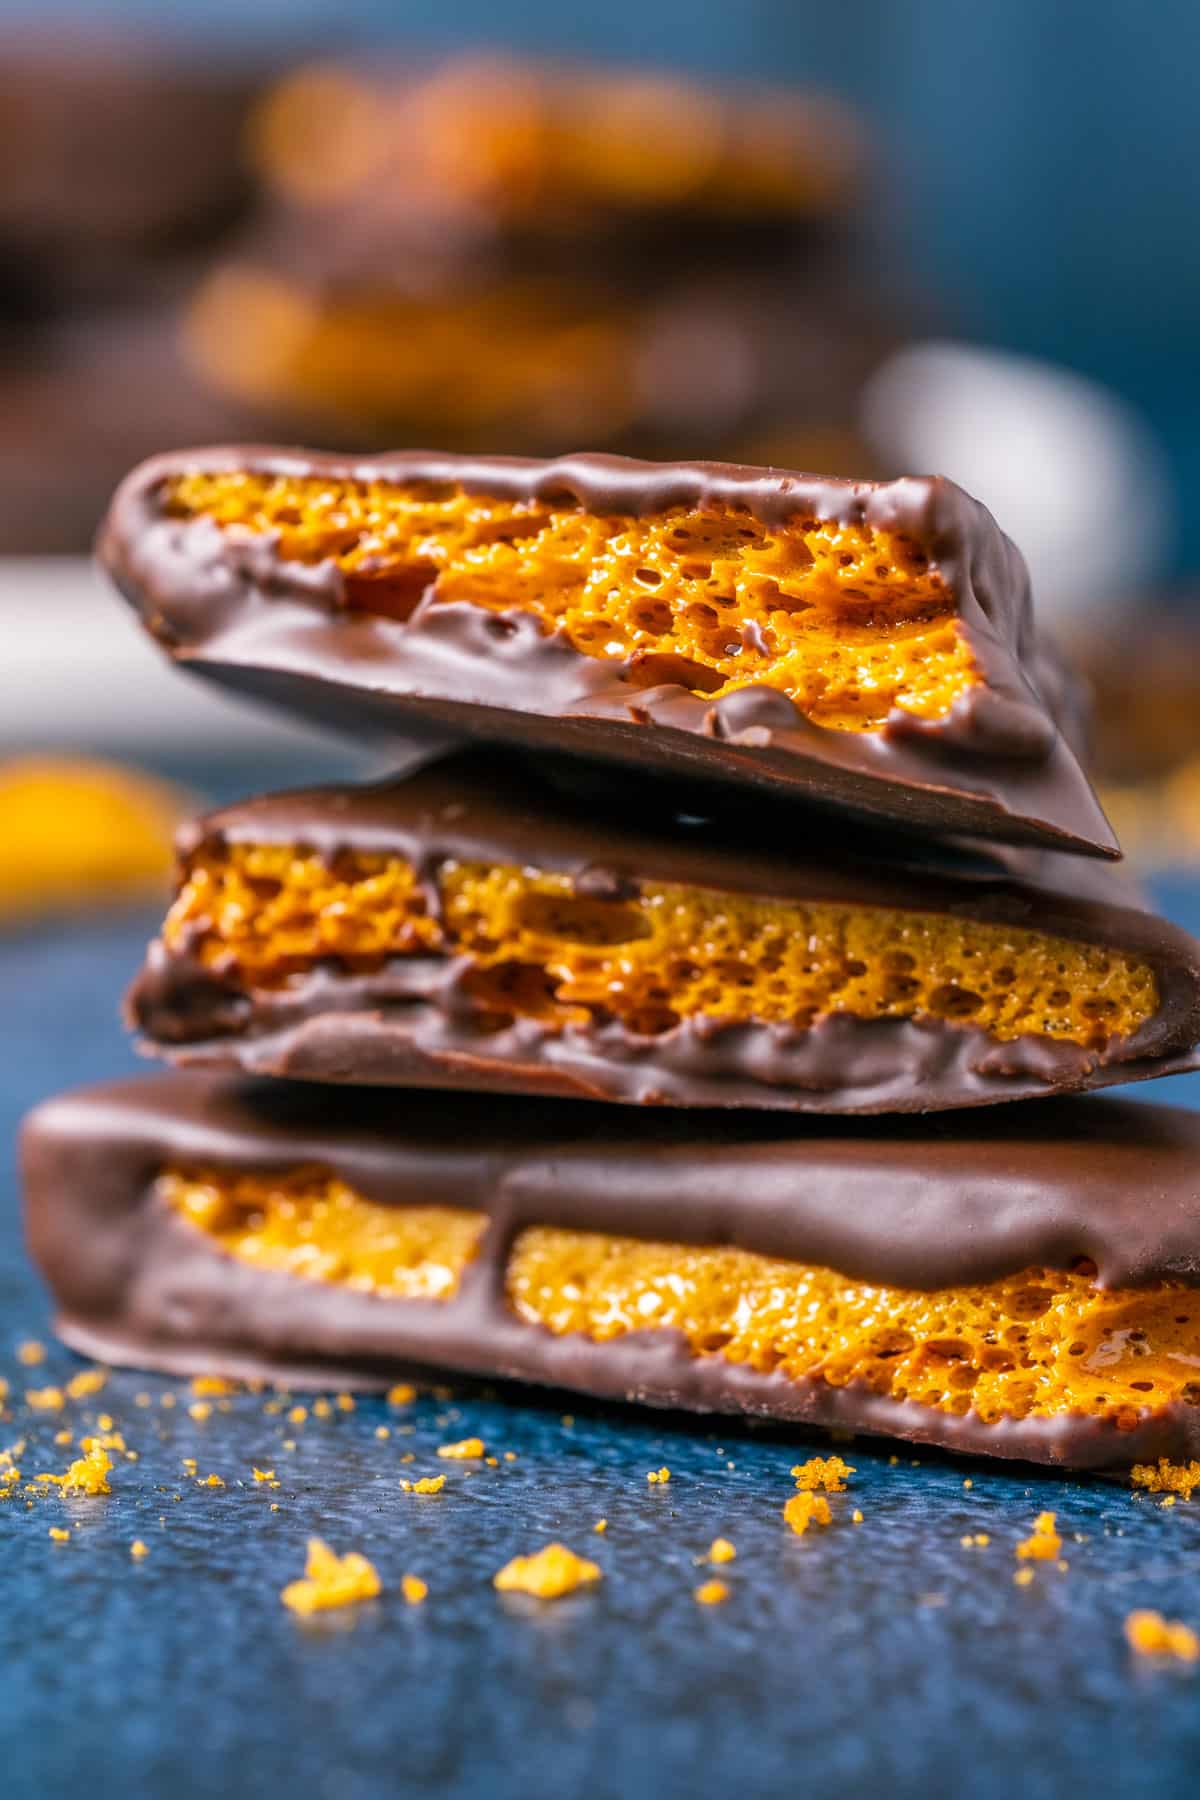
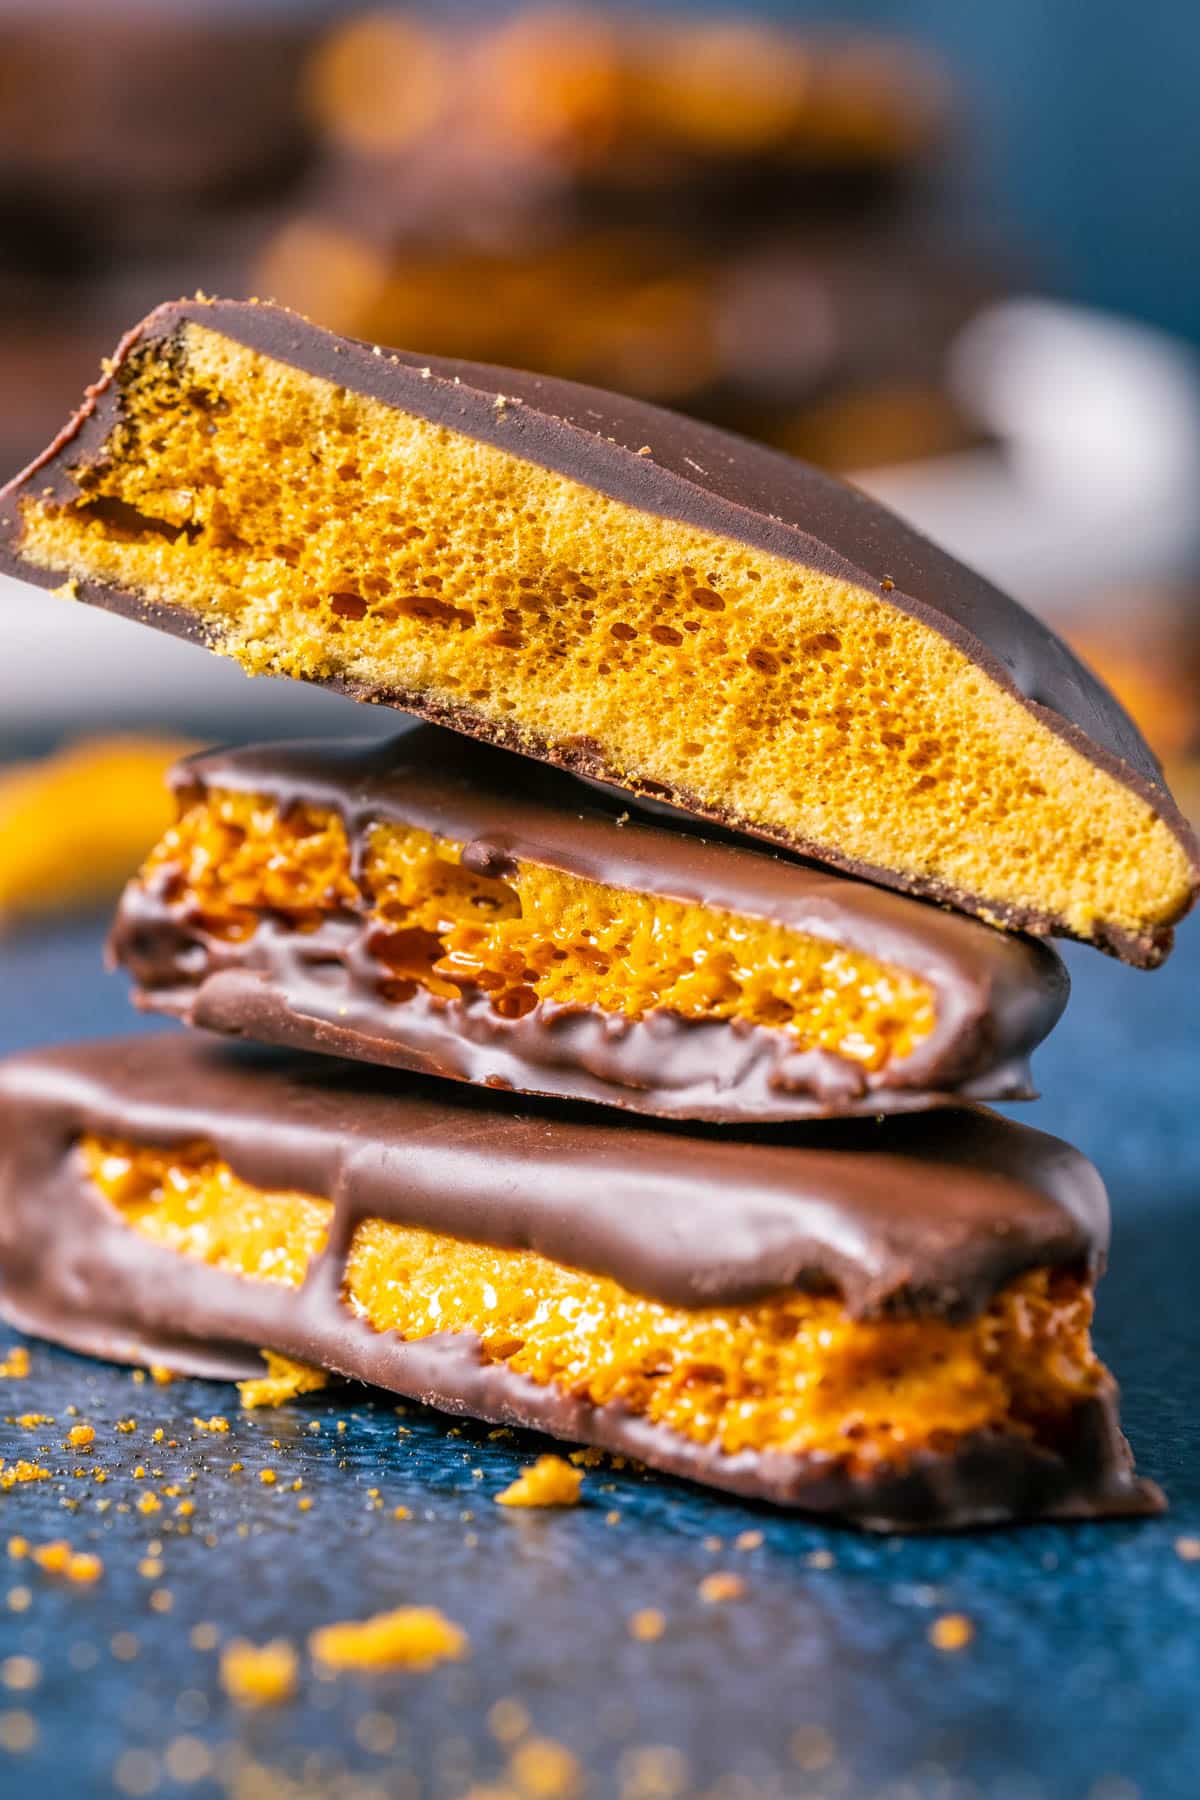
- When it’s completely set, break it into pieces.
- Add vegan chocolate and coconut oil to a microwave safe bowl and melt it by microwaving it in 30-second intervals in the microwave, bringing it out to stir every 30-seconds until melted.
- Roll the honeycomb pieces in the melted chocolate and then place them back onto the parchment lined baking sheet.
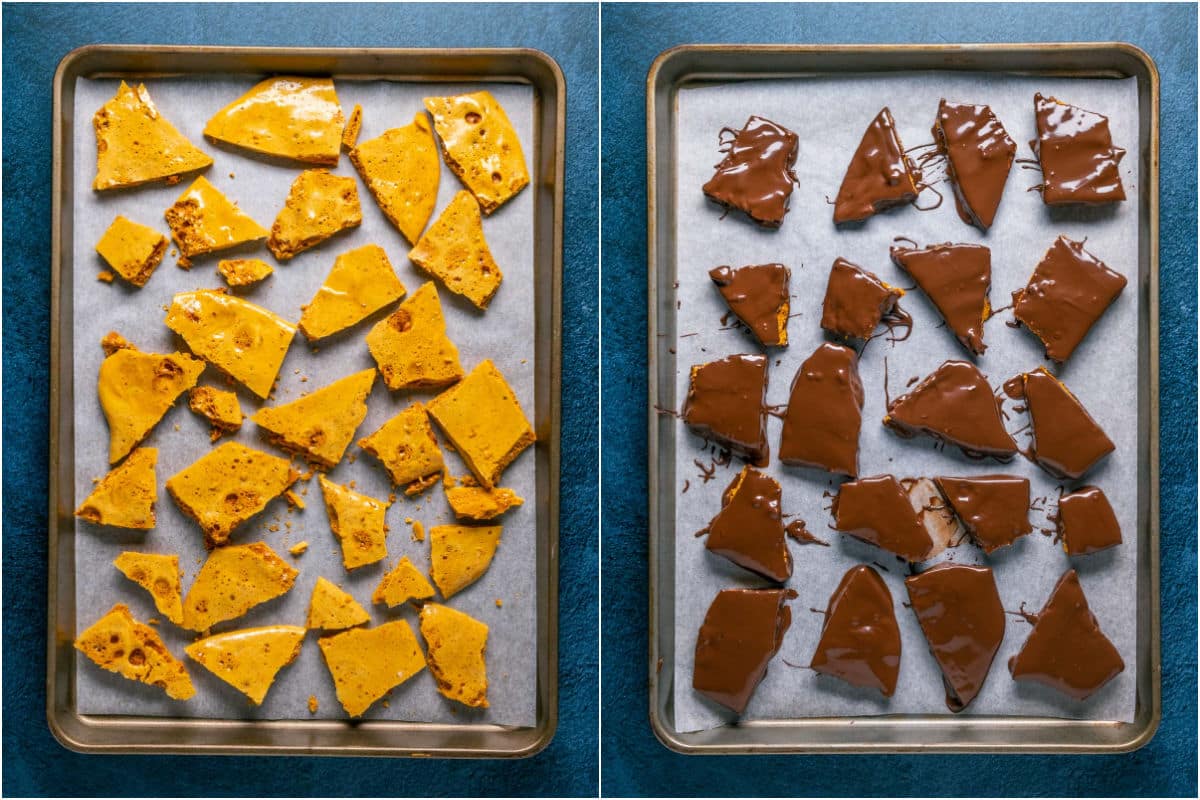
- Place the tray into the fridge for the chocolate to set and then your vegan honeycomb is ready to serve!
Baker’s Tips
Candy thermometer. A candy thermometer is essential for making this recipe, as you need to gauge the exact moment when it reaches 300°F (149°C) and you can remove the pot from the stove and whisk in the baking soda.
Make it in a heavy bottomed, medium sized saucepan that is quite deep. If it’s not heavy bottomed then it may burn before the sugar mix reaches the correct temp. If the pot is too big then it may also burn before it reaches the correct temp. And then….when you add the baking soda which is the magic ingredient that turns this melted sugar into honeycomb, the whole mix foams up and triples in size. So the saucepan needs to be fairly deep.
Have everything ready before you start. Have your baking soda ready to go. Have a parchment lined baking sheet ready to go. Have your candy thermometer ready to go, as well as a side plate to put the candy thermometer onto when you remove it from the saucepan. Everything must be ready before you even start with this recipe. It may sound daunting, but really, this is just because of the speed with which everything happens when you make honeycomb.
Be careful! You also have to be a little careful when making this (well, when making anything that involves high heat levels really), because…. boiling sugar.
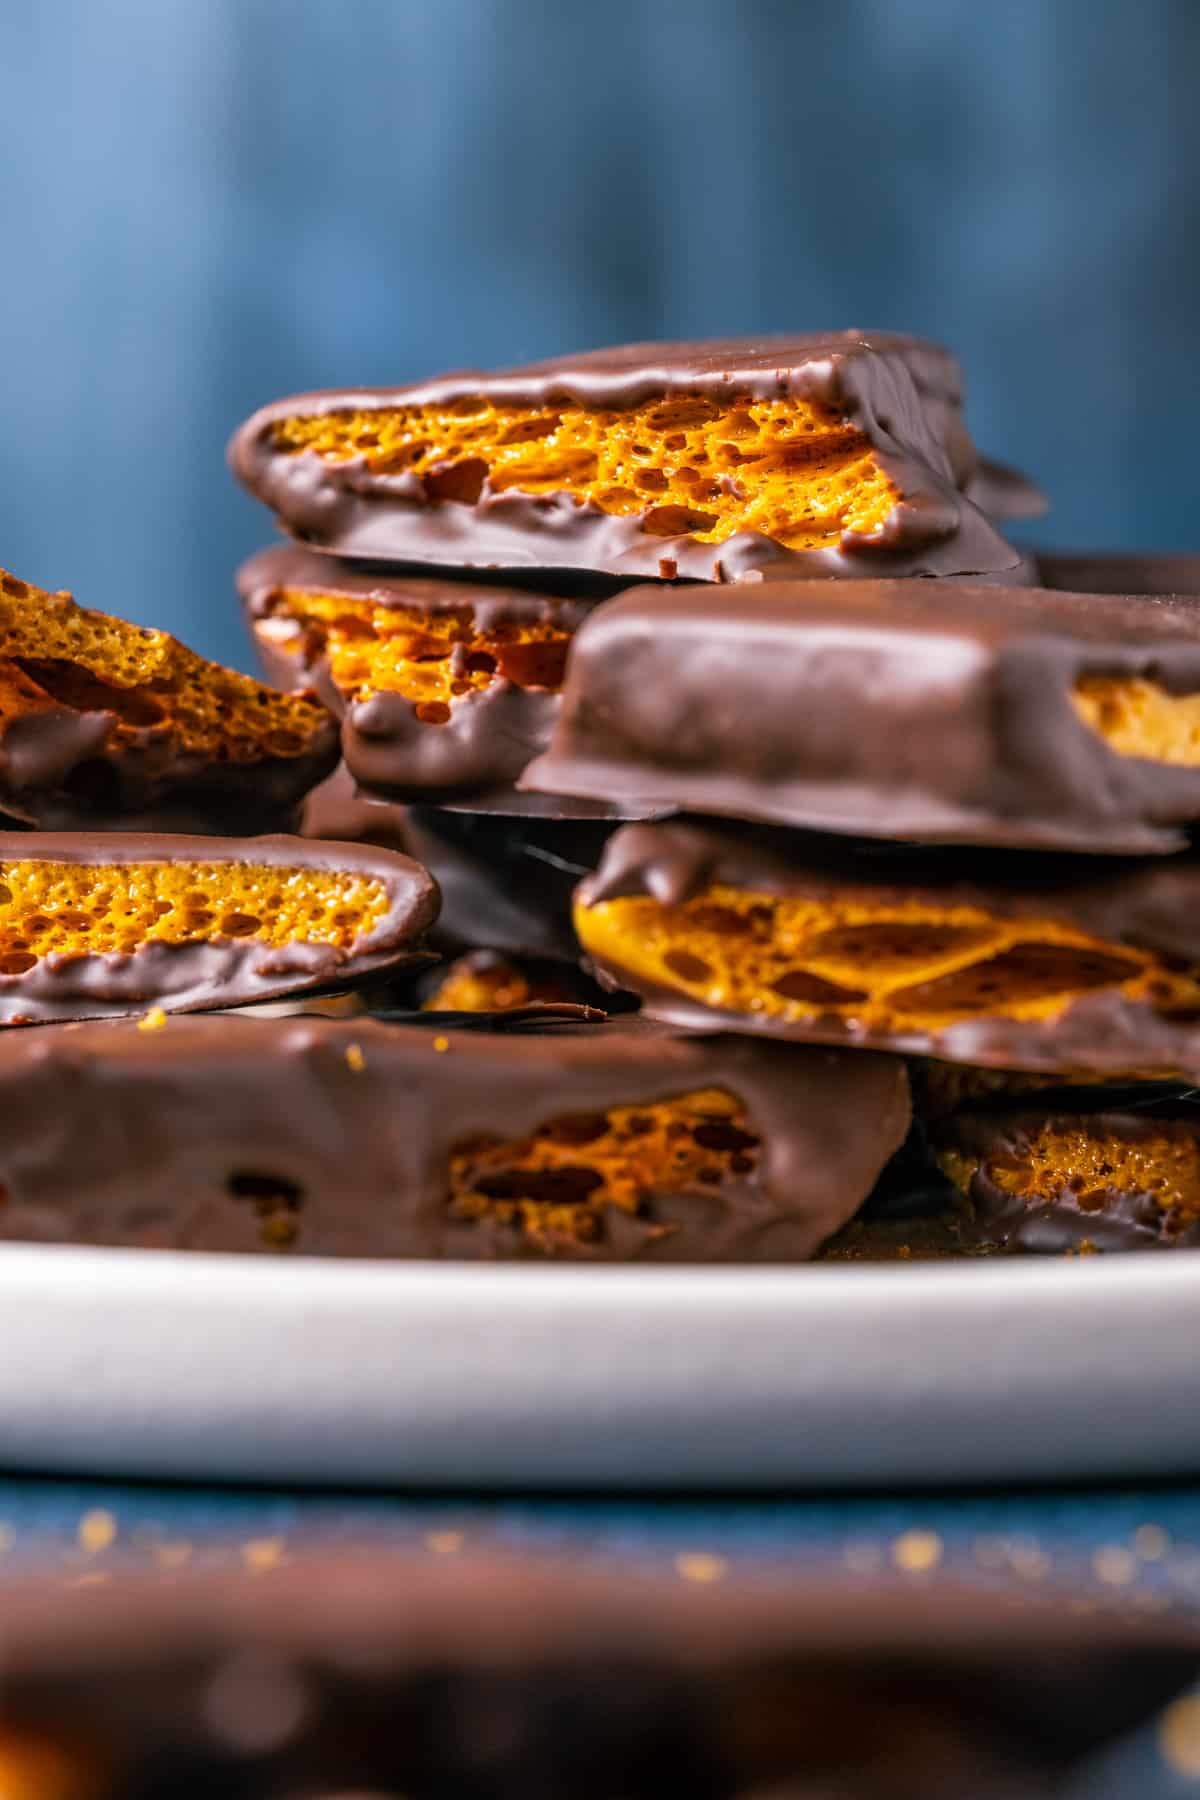
Storing Instructions
Keep them refrigerated or the chocolate can get a bit melty. The honeycomb can also get a bit too chewy if there is any humidity in the air so keeping them in the fridge keeps them perfectly snappy!
It stores really well in the fridge in a covered container. We tried them out after 2 weeks in the fridge and they were still totally great!
Enjoy straight from the fridge any time you want a treat.
More Vegan Candy Recipes
Did you make this recipe? Be sure to leave a comment and rating below!

Vegan Honeycomb
Ingredients
- ⅓ cup Golden Syrup (80ml) or Corn Syrup
- 1 cup White Granulated Sugar (200g)
- ⅓ cup Water (80ml)
- 2 ½ teaspoons Baking Soda
- 12 ounces Vegan Chocolate (340g) or 2 cups Vegan Chocolate Chips
- 1 teaspoon Coconut Oil
Instructions
- Line a baking sheet with parchment paper and set it down next to the stove.
- Place the baking soda in a bowl next to the stove so that it can be thrown in all at once when the time is right.
- Add golden syrup, white granulated sugar and water to a medium sized, heavy bottomed saucepan and turn the heat to medium.
- Stirring all the while, allow the sugar to melt and begin bubbling away.
- Once the mixture begins to boil, attach your candy thermometer and keep stirring vigorously all the while until the mix reaches 300°F (149°C), then immediately move the pot off the heat.
- Throw all the baking soda in immediately and stir it in. Be wary as the mix will double or triple in size, so make sure to stir it in with a long handled spoon. Stir it in completely but don't overmix or your mixture will start to deflate.
- Pour the mix out onto the parchment lined baking sheet and leave it be. Don't try to smooth it out, once it's poured just leave it to take the shape it wants to take.
- Leave it to cool down and set. This will take at least an hour.
- When it's completely set, break it into pieces.
- Add vegan chocolate and coconut oil to a microwave safe bowl and melt it by microwaving it in 30-second intervals in the microwave, bringing it out to stir every 30-seconds until melted.
- Roll the honeycomb pieces in the melted chocolate and then place them back onto the parchment lined baking sheet.
- Place the tray into the fridge for the chocolate to set and then your vegan honeycomb is ready to serve!
Notes
- Candy thermometer. A candy thermometer is essential for making this recipe, as you need to gauge the exact moment when it reaches 300°F (149°C) and you can remove the pot from the stove and whisk in the baking soda.
- Saucepan. It’s important to make it in a heavy bottomed, medium sized saucepan that is quite deep. If it’s not heavy bottomed then it may burn before the sugar mix reaches the correct temp. If the pot is too big then it may also burn before it reaches the correct temp. And then….when you add the baking soda which is the magic ingredient that turns this melted sugar into honeycomb, the whole mix foams up and triples in size. So the saucepan needs to be fairly deep.
- Storing. It stores really well in the fridge in a covered container. We tried them out after 2 weeks in the fridge and they were still totally great!
I would have given this five stars but the most important part of this recipe did not have enough detail for somebody who is making this for the first time.
Once the mixture reaches exactly 300°, you have to dump in the baking soda, and only stir it for about LITERALLY 3-4 seconds before you pour it out onto the baking pan! This part was not clear. It does not tell you how long to stir the baking soda into the mixture. I ended up stirring it too long and the mixture started to deflate and did not turn out as expected. I believe that not only was the mixture over stirred, but the pot was continuing to heat up even though I pulled it off of the burner. So it ended up being too hot, and over stirred.
I would change this recipe and clearly indicate that the window of time to stir in the baking soda is literally less than five seconds before you have to pour the mixture out onto the pan.
Some parts of the mixture did turn out as expected and it was light airy and crunchy and delicious, just like the candy shop. Looking forward to trying this again now that I know the correct way to do it.
You need to stir it in properly or the baking soda won’t be properly dissolved. However, you should not overmix it. While the recipe is easy once you know how to do it, it’s candy making and working with boiling sugar can take a bit of trial and error. And that’s the case no matter how much detail is provided. I provide a LOT of detail in my recipes including heaps of photos.
Made my first honeycomb candy today, and it turned out great thanks to this recipe! The instructions and pictures were super helpful. Although I can probably get the timing even better, it was a lot easier than I thought. Thank you!
So happy to hear it was a success! Thanks for the awesome review Katharina!
Does it stay room temp?
It can if the weather is cool, otherwise the fridge will be better, since the chocolate can get melty.
Hi,
How long will these keep for?
Thanks
At least a week in the fridge.
These kinda worked for me… but not the end result that you had. Mine foamed up so much I had to scoop it out of the saucepan and a lot got stuck in my whisk. Though I think I enjoyed having the random rock shaped pieces over smooth squares. Is it possible I just whisked it too much? Is that possible? Either way this didn’t last the weekend and I may need to visit the dentist soon.
Hi Lauren, it could be possible that you whisked too long, because the whole thing does have to happen pretty fast from the moment the baking soda is added. It could be that it was already setting by the time you were pouring it out which caused odd shapes. But glad it was still tasty! And for your whisk, just soak it in hot water and it will dissolve away. All the best! 🙂
What does it mean if the honeycomb doesn’t harden? It’s been a couple hours but it’s still gooey. Thanks!
Hi Carlee, did you use a candy thermometer? If it didn’t harden I would think it didn’t reach the right temperature and likely won’t harden.
These are AMAZING!! So good yum.
Thanks Molly!
I make this every couple of weeks. A big hit with everyone!
Awesome! Thanks for the great review Kat! 🙂
Hi,
I made this a few years ago and it came out amazing!
Now when I tried to make it, it fluked.
My stove is old and when it gets too hot it turns itself off, and won’t let me turn it back on again until it cools down.
It seems to let me get up to 250f.
If I throw the baking soda in then will it work? Or will it just be a wasted effort and waste of ingredients?
Hi Keren, I think that would be risky. If it doesn’t get to the right heat it may not work at all and may waste your ingredients.
This is delicious, but it was difficult to bite in to…. it was a bit more like cinder toffee than crunchy honeycomb. Is that because i might have left it too long before taking off the heat?
Meera x
Hi Meera, yes I think so, the timing is very important on this one. Glad it was still delicious though! 🙂
Im so excited to find this recipe. My son can’t have dairy so most treats aren’t a option for my little guy. We love this candy!! I had no idea how easy this is to make. Thank you so much!!
That’s wonderful news! Thanks for posting Kelli! 🙂
My heart was thumping the entire time! Its terrifying playing with boiling sugar!
But it came out pretty good considering it’s my first time making it! (I left it on a little too long so it didn’t come out perfect) I can’t wait to make it again!
Hahaha, I know the feeling! And it can be tricky for sure. Glad to hear it came out pretty good for a first try! 🙂
Ugh I just tried making this and I waited a bit too long to take it off the heat and it went over 300 now it’s all crumbly:( pretty sure it won’t set properly it looks nothing like your pics lol. Wondering if I can do anything with this crumbly mess I made.
Oh no! Happens to all of us! I was just trying to make caramel and managed to burn my sugar! As to what to do with it? Well, if it still tastes good….. 🙂