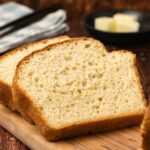
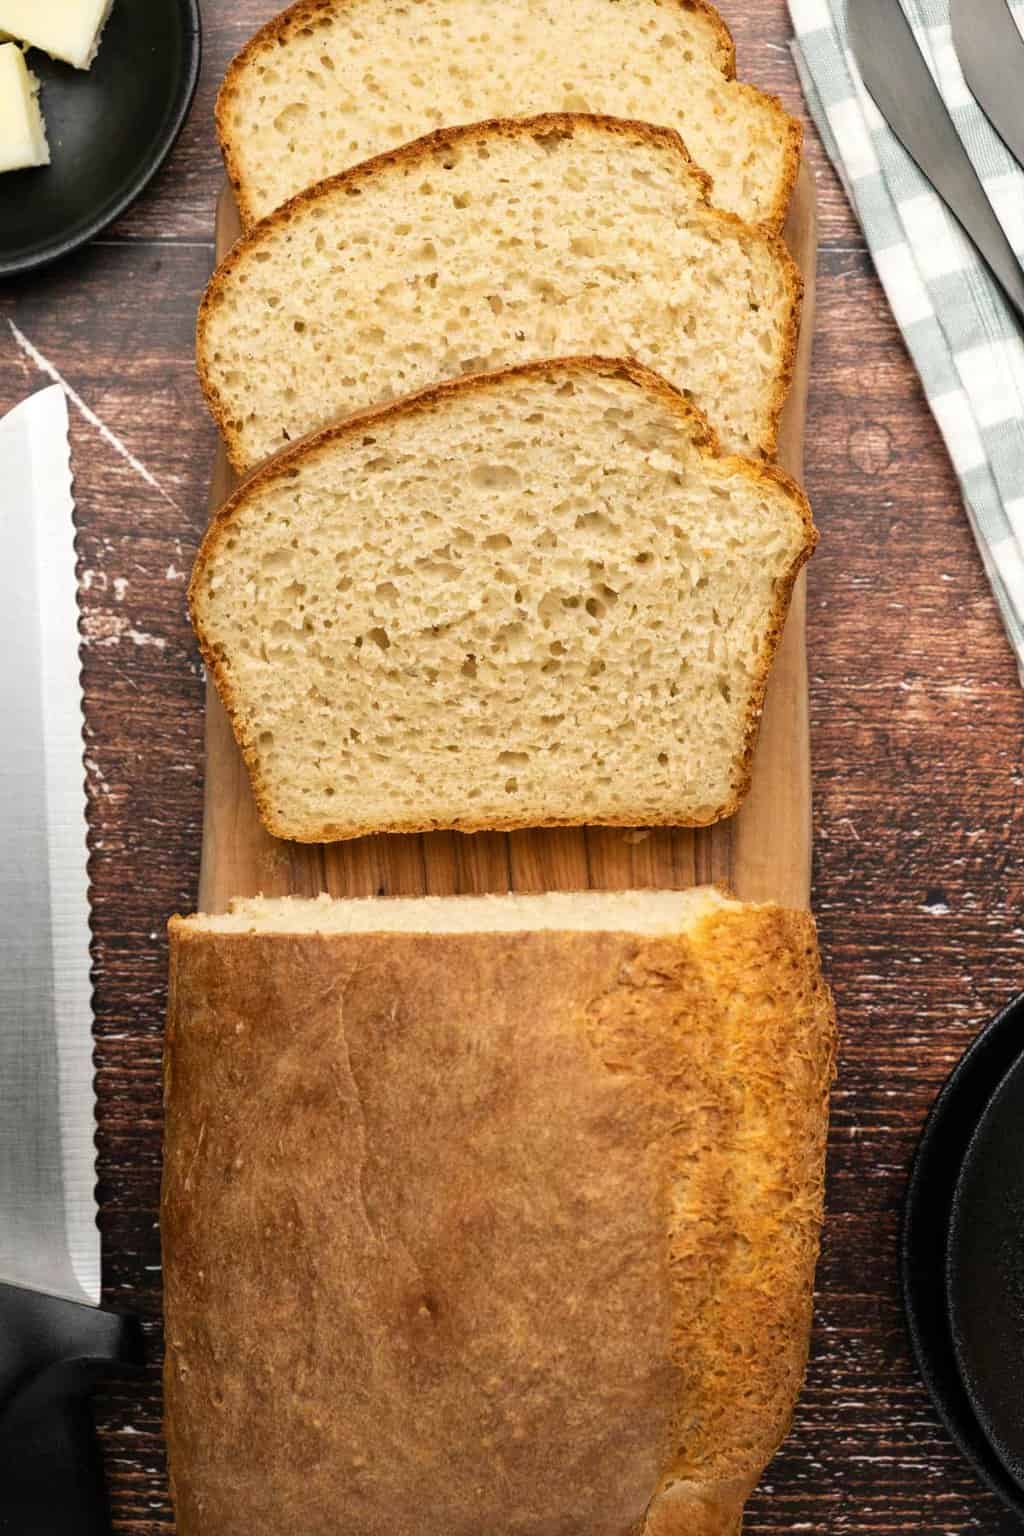
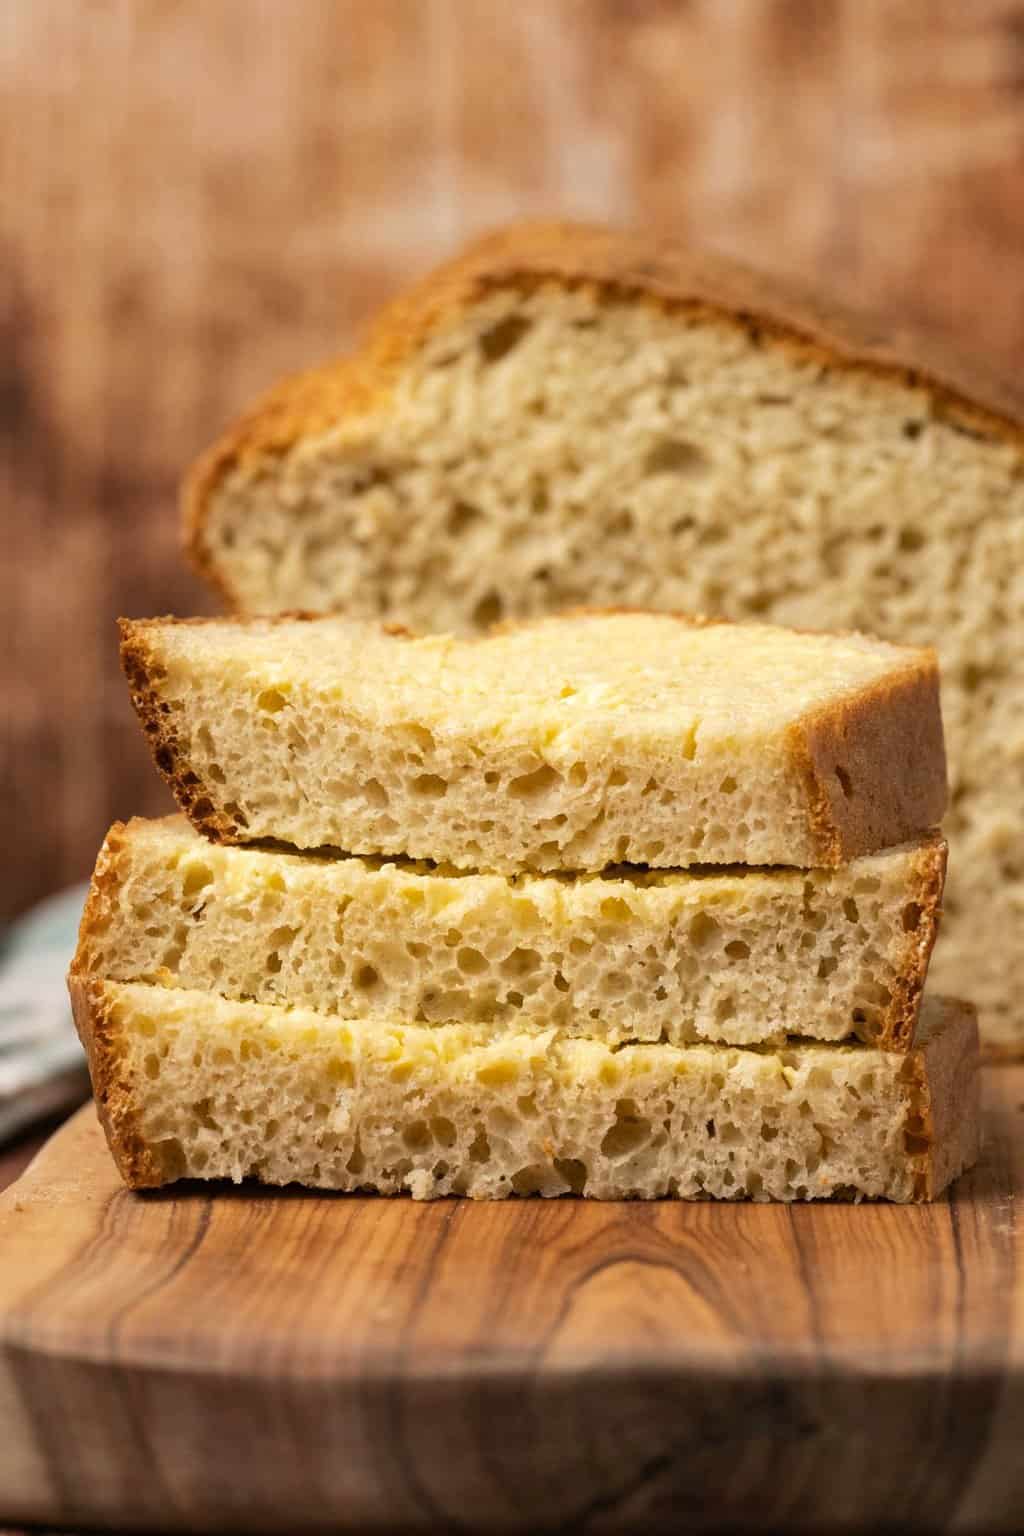
The easiest recipe for homemade vegan white bread on the planet! It’s not only super easy, but it results in a perfectly soft and delicious loaf. No kneading required!
One of our very popular posts on this blog is our whole wheat bread recipe. That recipe does not require any kneading and is so simple that even people who have never baked anything before in their lives end up with a perfect loaf the very first time!
But one of the things I was often asked was: would it work as white bread? And honestly I didn’t know because I hadn’t got around to testing it.
But somehow I didn’t think it would work. I somehow thought that the ‘mojo’ of the recipe was in that whole wheat flour. Because SURELY it can’t be that easy to make white bread too.
But I finally got around to testing this recipe, based on our recipe for whole wheat bread, but using all purpose flour for a white bread version rather than whole wheat flour and to my utter amazement it worked perfectly!
It creates a wonderfully soft and perfectly delicious white bread. It’s also super flexible so if you want to mix up some whole wheat flour in there too for an equally soft and delicious brown bread, you can do that too.
It’s a little less hearty than our totally whole wheat loaf, but it still has that wonderful homemade rustic loaf thing going on that just makes it irresistible.
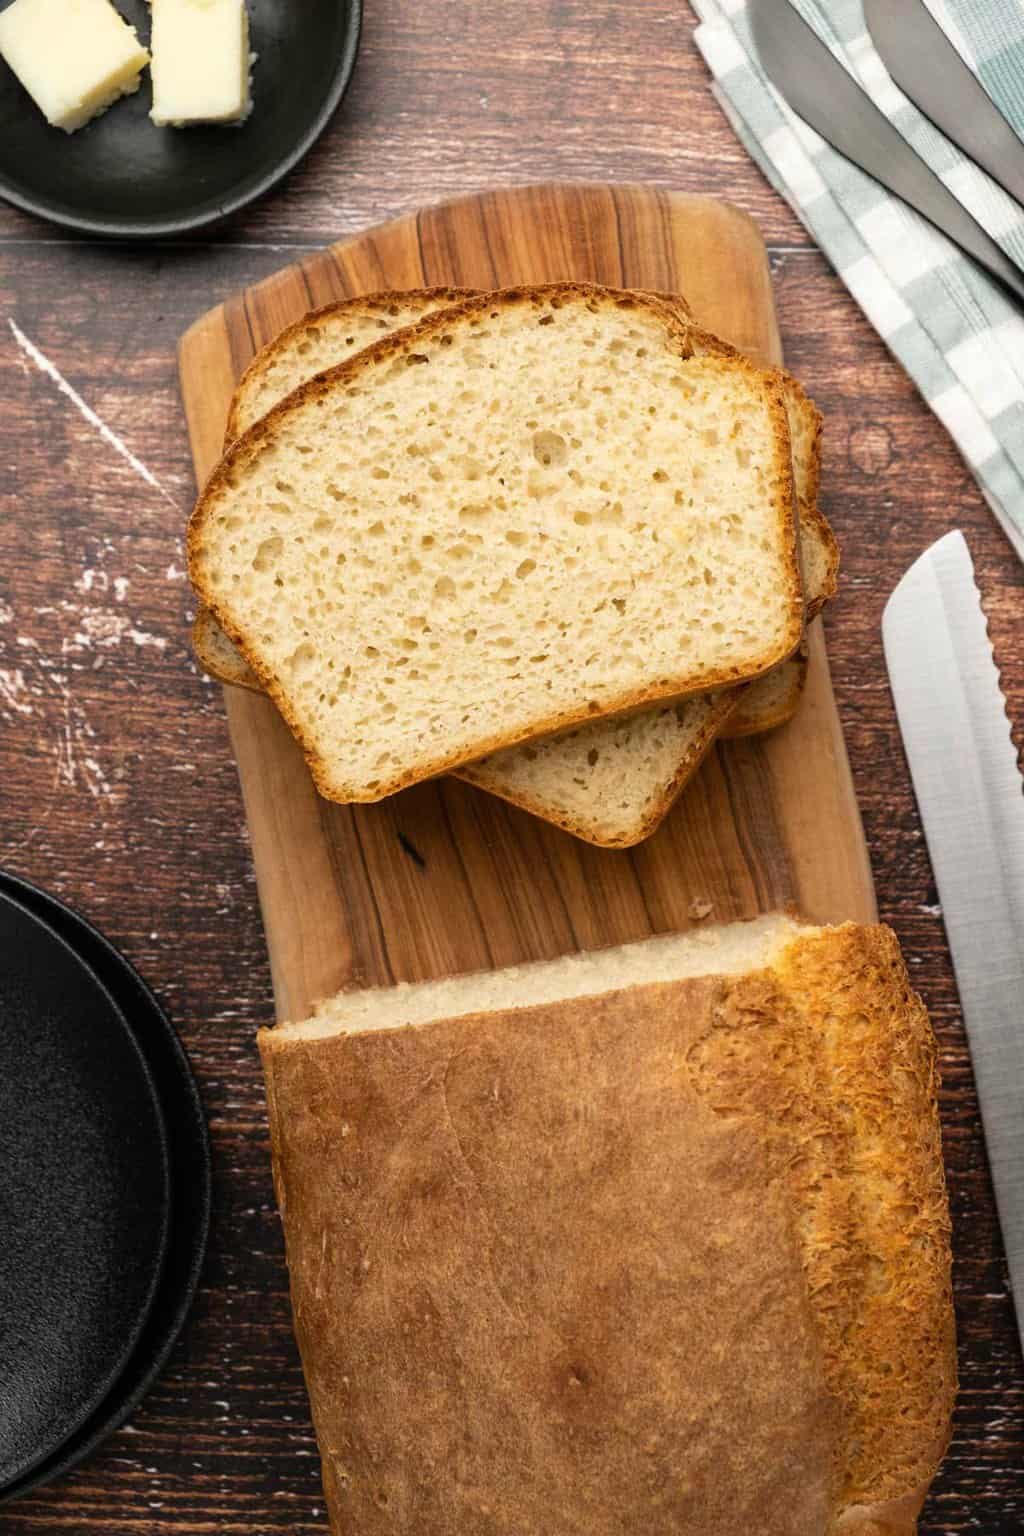
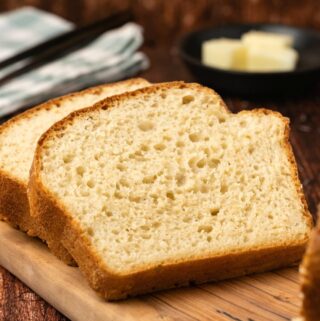
There’s nothing better than a fresh loaf of bread eaten warm straight from the oven. Have it with a homemade vegan lentil soup and go straight to heaven.
Or just eat it with vegan butter and strawberry jam – one of my favorite ways to eat it.
And if you love easy bread recipes then also check out our vegan soda bread and vegan focaccia.

How To Make Homemade White Bread
You will find full instructions and measurements in the recipe card at the bottom of the post. This is a summary of the process to go along with the process photos.
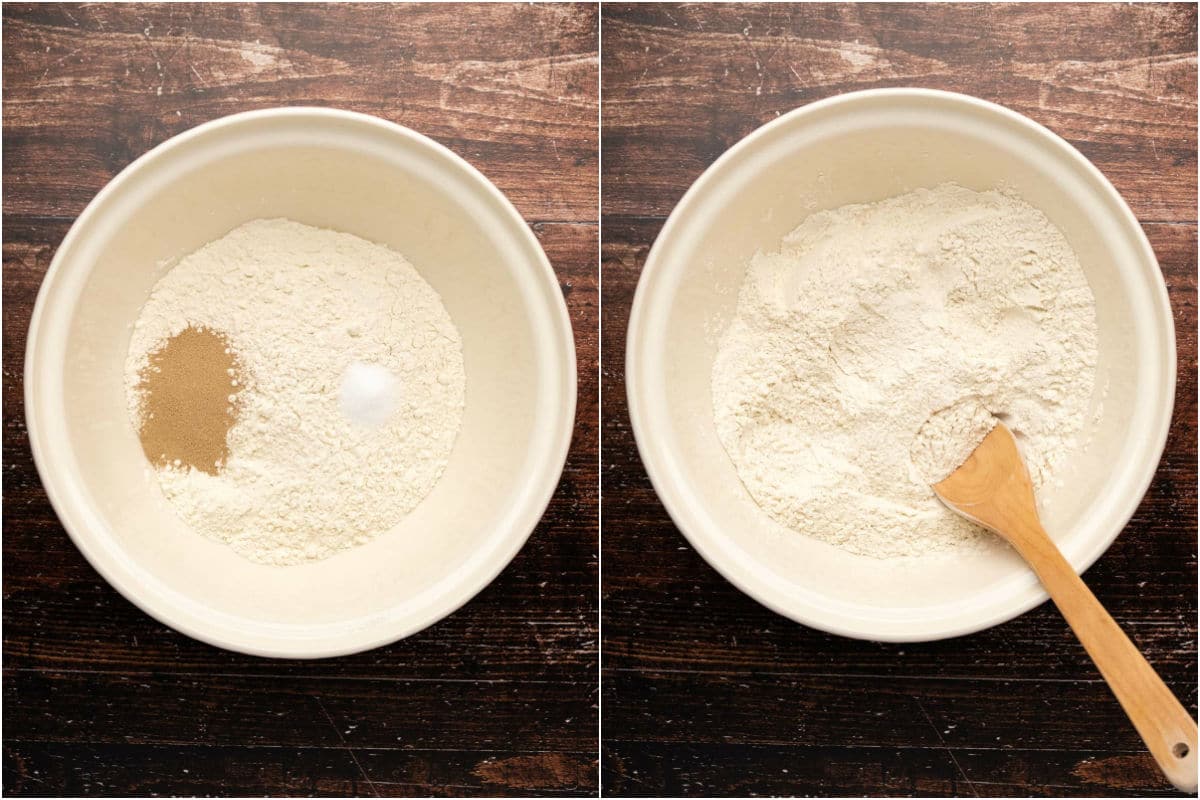
- Add all purpose flour, instant yeast (rapid rise yeast) and salt to your mixing bowl.
- Mix them together.
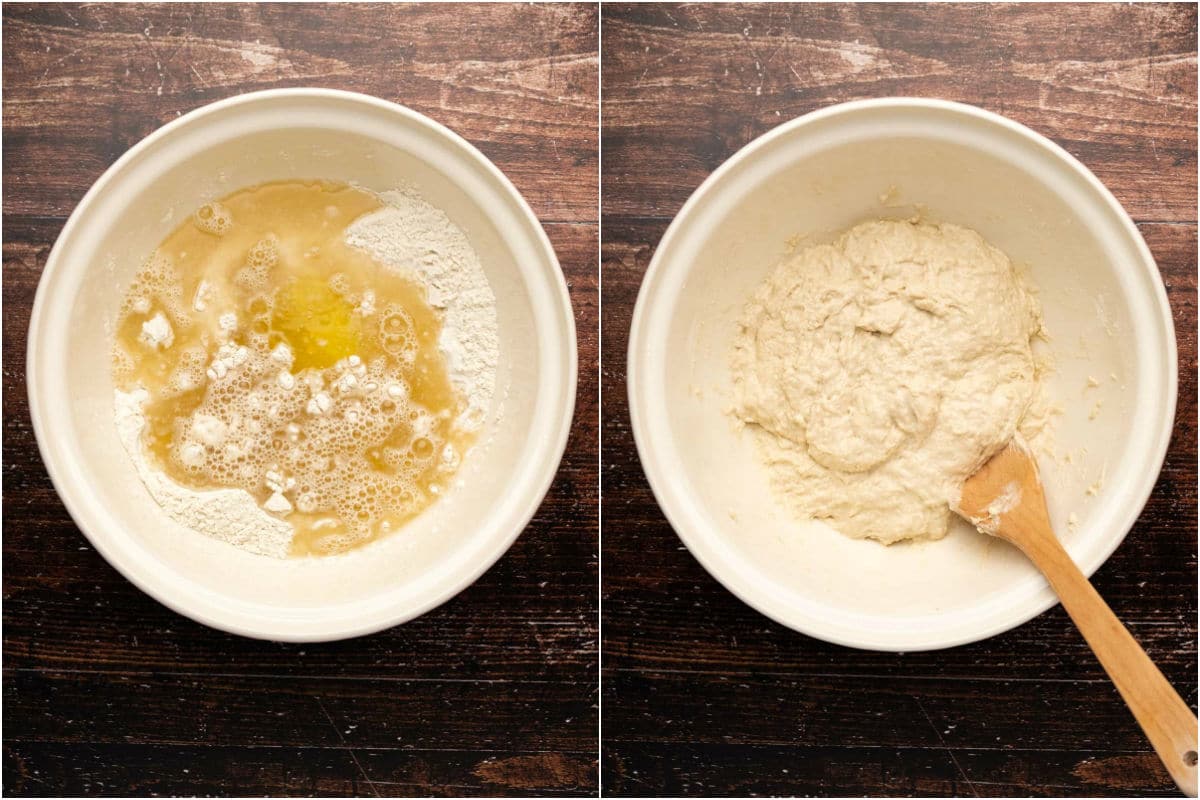
- Now mix two teaspoons of maple syrup with two cups of warm (not hot) water and pour it over the dry ingredients.
- Add olive oil.
- Mix into a dough. Don’t knead it or overmix it. Just mix until mixed.
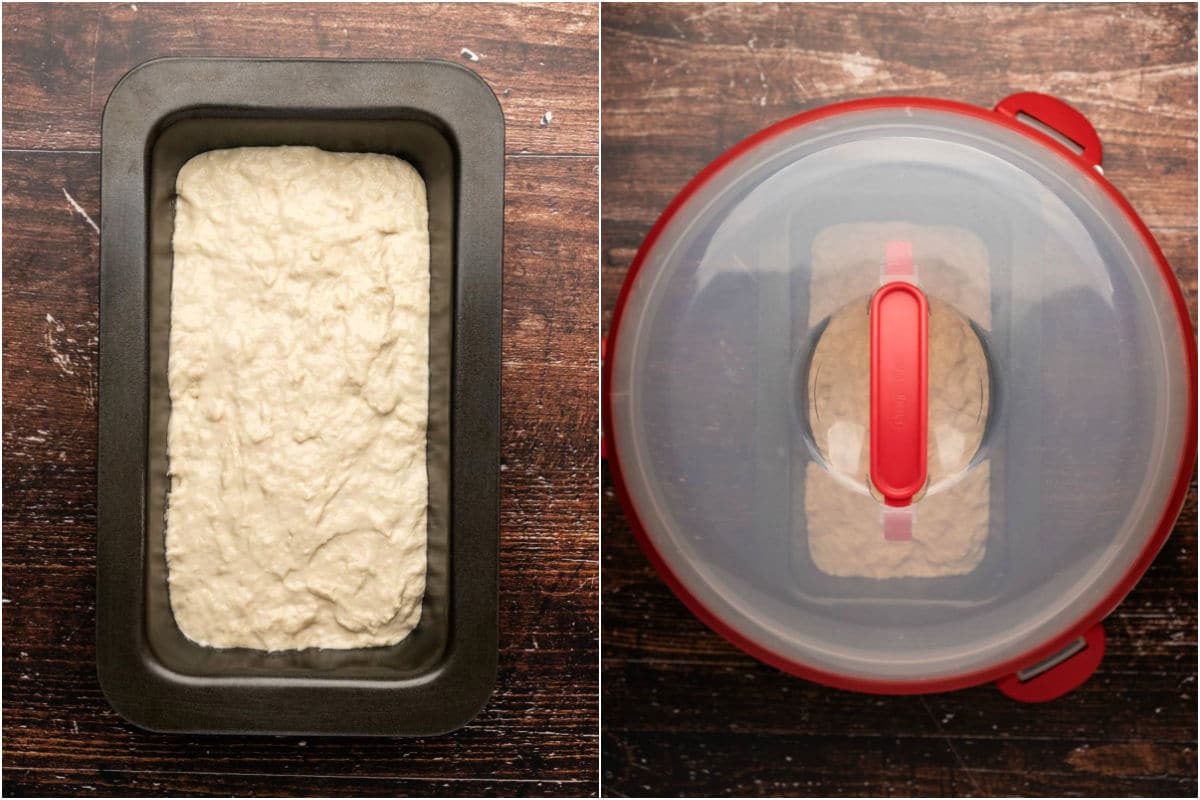
- Transfer to a 9×5 loaf pan (sprayed with non-stick spray and lined with parchment paper on the bottom) and smooth down.
- Cover and leave to rise for 20-30 minutes or until it has risen to the top of your loaf pan or just before the top.
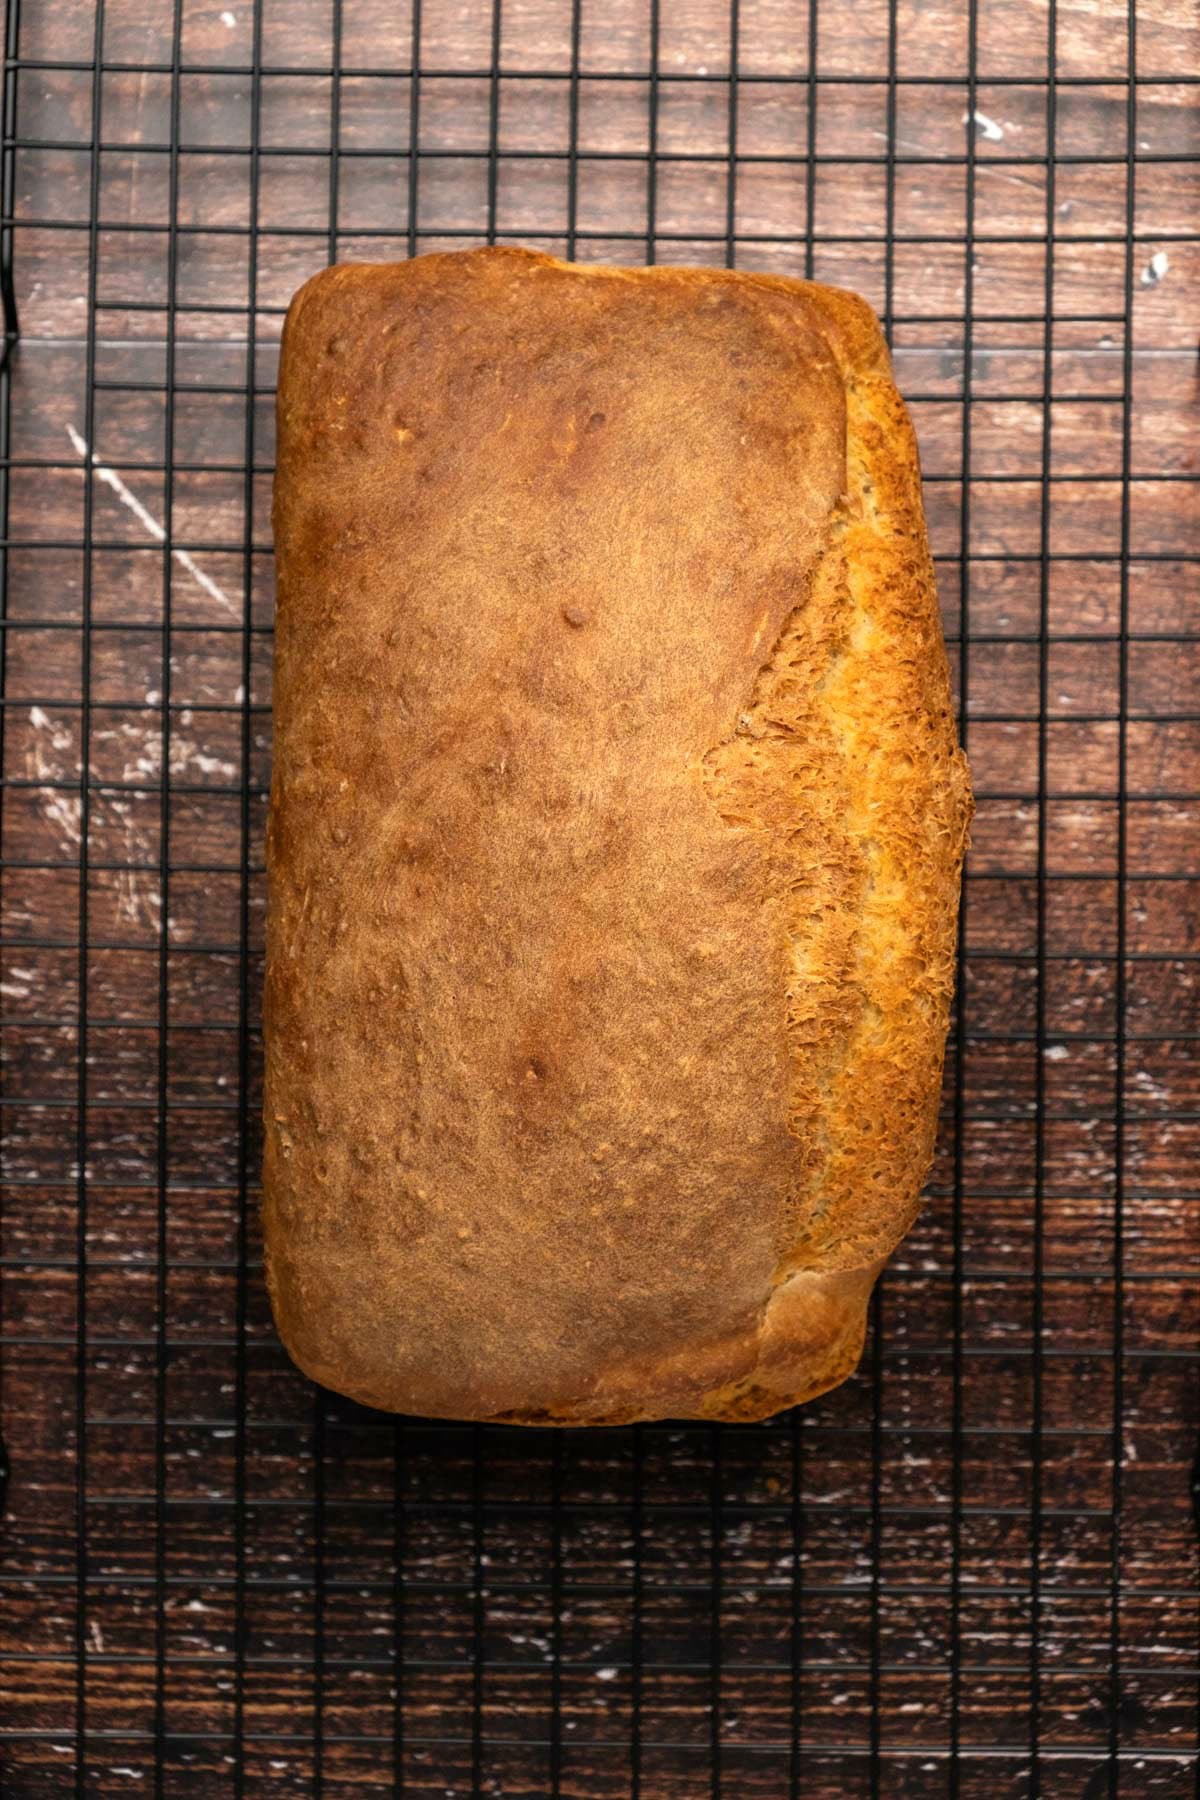
- Bake at 390°F for 40 minutes.
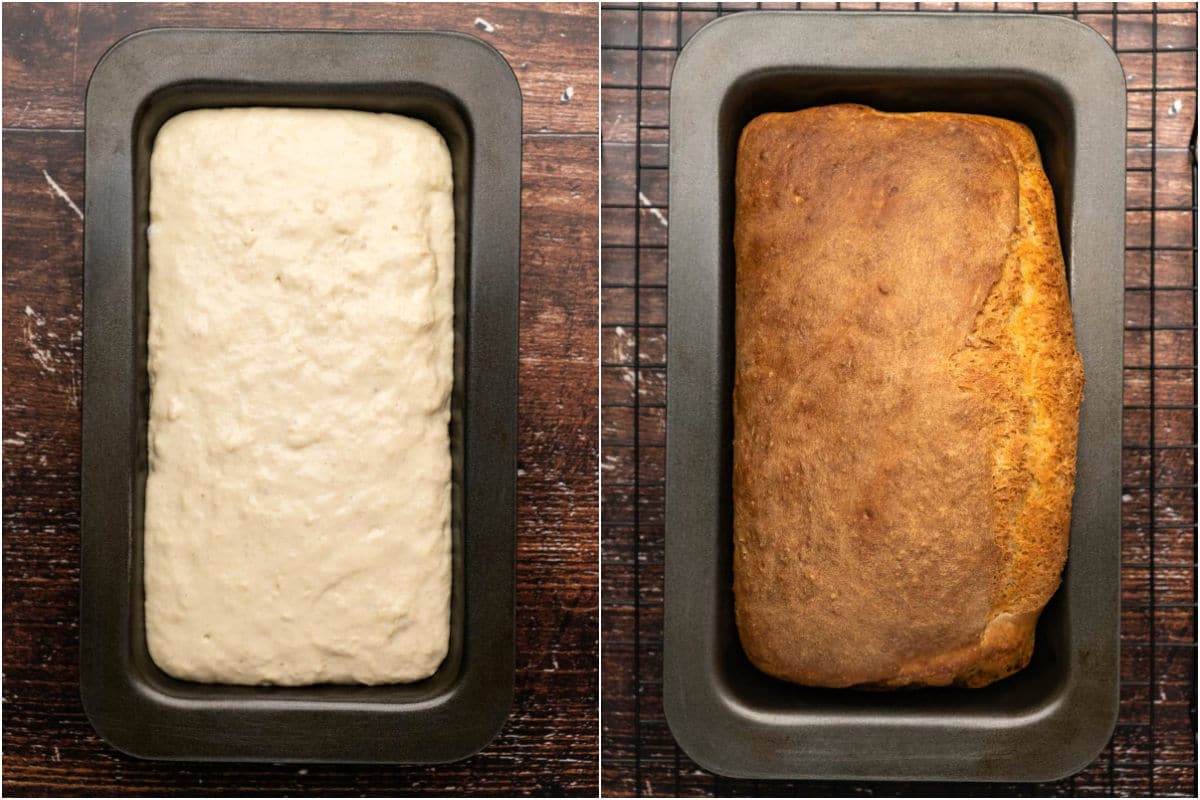
- Remove from the oven and let cool for a few minutes before removing from the loaf pan and placing on a wire cooling rack to cool before slicing and serving.
Ingredient Notes
All Purpose Flour: This recipe uses 4 cups of all purpose flour for a white bread loaf. You can use a mix of all purpose flour and whole wheat flour or brown bread flour to create a soft brown bread. We discuss the variations below.
Instant Yeast: This is also called rapid rise yeast and this is the reason that this bread rises so quickly and is also one of the things that makes it really easy.
If you can’t get hold of instant yeast and need to use active dry yeast instead, you can do so, but the method is slightly different and involves dissolving the active dry yeast in the warm water, which needs to be 105°F. We don’t need to be this precise with our water temp when using instant yeast. This article from Cooks Illustrated discusses how to substitute active dry yeast for instant yeast.
Maple Syrup: This can be replaced with another kind of syrup such as agave nectar or really any sweetener.
Warm Water: This must be warm and NOT hot. Above lukewarm, but warm to the touch and not hot.
Olive Oil: You can likely use any oil here but we used extra virgin olive oil.

Flour Variations
You can make this with 4 cups of all purpose flour as per the recipe. But you can also make variations such as:
- 3 cups all purpose flour, 1 cup whole wheat flour
- 2 cups all purpose flour, 2 cups whole wheat flour
- 1 cup all purpose flour, 3 cups whole wheat flour
You can also use different flours such as brown bread flour, white whole wheat flour, whole wheat pastry flour and likely other flours too, but you would have to make it an experiment.

Recipe Tips
Rising Time:
We have found this to be variable depending on the freshness of your yeast and the weather conditions. Very fresh yeast and warm weather results in a quick rise of about 20 minutes. I had some yeast that had been sitting in my cupboard for a while and that batch plus a colder day resulted in a rise that took closer to 40 minutes. So be flexible and keep an eye on it.
Make Vegan Gluten Free Bread:
We tested this recipe for gluten-free as well, using a gluten-free all purpose flour blend in the same quantity as regular flour (4 cups/500g). And I must say, I had my doubts, but it worked! We had a delicious soft loaf of vegan gluten free bread. A couple of caveats:
- This must be a gluten-free all purpose blend!
- Let the bread cool completely before slicing. We found it to be quite gluey in texture while still warm, which made me think we had a flop on our hands, but once completely cooled, the gluey texture disappeared and we had a lovely soft bread.
- For an even softer loaf, increase the olive oil by a tablespoon or two.
- It’s best on the day of baking. By the second day it’s hard as a rock. If you use extra oil, it lasts a bit longer. But it’s still good to take whatever you don’t finish on the first day and slice and freeze so you can make toast.
- It makes great toast! So enjoy it on the day of baking as bread or toast but from then on, it’s best as toast only.
Storing and Freezing
This is a fresh is best kind of situation and the day of baking is when this bread is at its absolute best. The second day it’s perfectly edible but not as good and it makes good toast. The third day it’s good as toast only and that is the end of the shelf life of this bread.
If you think you’ll take longer than 3 days to finish it, then you can slice it and freeze it and make toast with it straight from the freezer. It makes really good toast so this is a good option.
More Vegan Bread Recipes
Did you make this recipe? Be sure to leave a comment and rating below!
The Easiest White Bread Recipe
Ingredients
- 4 cups All Purpose Flour (500g)
- 1 Packet Instant Yeast 2 ¼ teaspoons
- 1 tsp Salt
- 2 tsp Maple Syrup
- 2 cups Warm Water (480ml)
- 1 Tbsp Olive Oil Extra Virgin
Instructions
- Spray a 9×5 loaf pan with non-stick spray and line the bottom with parchment paper.
- Add the all purpose flour, instant yeast and salt to your mixing bowl and mix them together.
- Add the maple syrup to the warm (not hot) water and mix it in and then pour it over the dry ingredients.
- Add the olive oil.
- Mix into a dough. Don’t knead it or overmix it. Just mix until mixed.
- Transfer to your prepared loaf pan and smooth down.
- Cover the loaf pan and leave the bread to rise for 20-30 minutes or until it has risen to the top of your loaf pan or just before the top.
- Preheat the oven to 390°F (200°C).
- When the bread has risen place into the oven and bake for 40 minutes.
- Remove from the oven and let cool for a few minutes before removing from the loaf pan and placing on a wire cooling rack to cool before slicing and serving.
Notes
- Measure your flour correctly using the spoon and level method (spoon the flour into your measuring cup and level off the top with a knife, don’t pack it in and don’t scoop it) or weigh it on a food scale.
- Instant yeast is also called rapid rise yeast.
- The maple syrup can be replaced with another kind of syrup such as agave nectar or another syrup.
- The water must be warm and NOT hot. Warmer than lukewarm but WARM to the touch and not hot.
- You can likely use any oil such as vegetable oil or canola oil instead of olive oil.
- The rising time can be variable depending on the freshness of your yeast and the weather conditions. Very fresh yeast and warm weather results in a quick rise of about 20 minutes. If your yeast is older and the weather is colder this can be 30 minutes or even up to 40 minutes. Be flexible and keep an eye on it. You just want the bread to rise as high as the top of your loaf pan or close to that.
- Flour Variations: You can make this with 4 cups of all purpose flour as per the recipe or with variations such as: 3 cups all purpose flour, 1 cup whole wheat flour; or 2 cups all purpose flour, 2 cups whole wheat flour; or 1 cup all purpose flour, 3 cups whole wheat flour. You can also use different flours such as brown bread flour, white whole wheat flour, whole wheat pastry flour and likely other flours too, but this would be up to you to experiment with those.
- This bread is BEST on the day of baking. The second day it’s better as toast and the third day it’s good as toast only and that is the final day of shelf life for this bread. It is freezer friendly so if you think you’ll take longer than 3 days to finish it, then slice it and freeze it and make toast straight out of the freezer. It does make very good toast!
- Make It Gluten-Free: We tested this with a gluten-free all purpose flour blend and it worked! So you can make this with a gluten-free baking blend in the same quantity (4 cups/500g) as all purpose flour. See the blog post for further notes about making this gluten-free.
- Prep time includes 20 minutes spent rising.
I made this recipe using the whole wheat version. It was absolutely perfect even though I didn’t read the instructions. I only read the ingredients!!! I also added in about a tablespoon of cinnamon and about 2 tablespoons of sunflower seeds. It is absolutely delicious!! I sliced the loaf into thin slices and wrapped it tightly and I keep it in the freezer and take it to work for lunch and it is delicious. I sent this recipe to my mother and she made it with white flour and again, it came out perfect! Thank you!!!
That’s awesome Rachel! Happy to hear that you and your mom enjoyed the recipe!
Can honey replace maple syrup?
Yes you can! 🙂